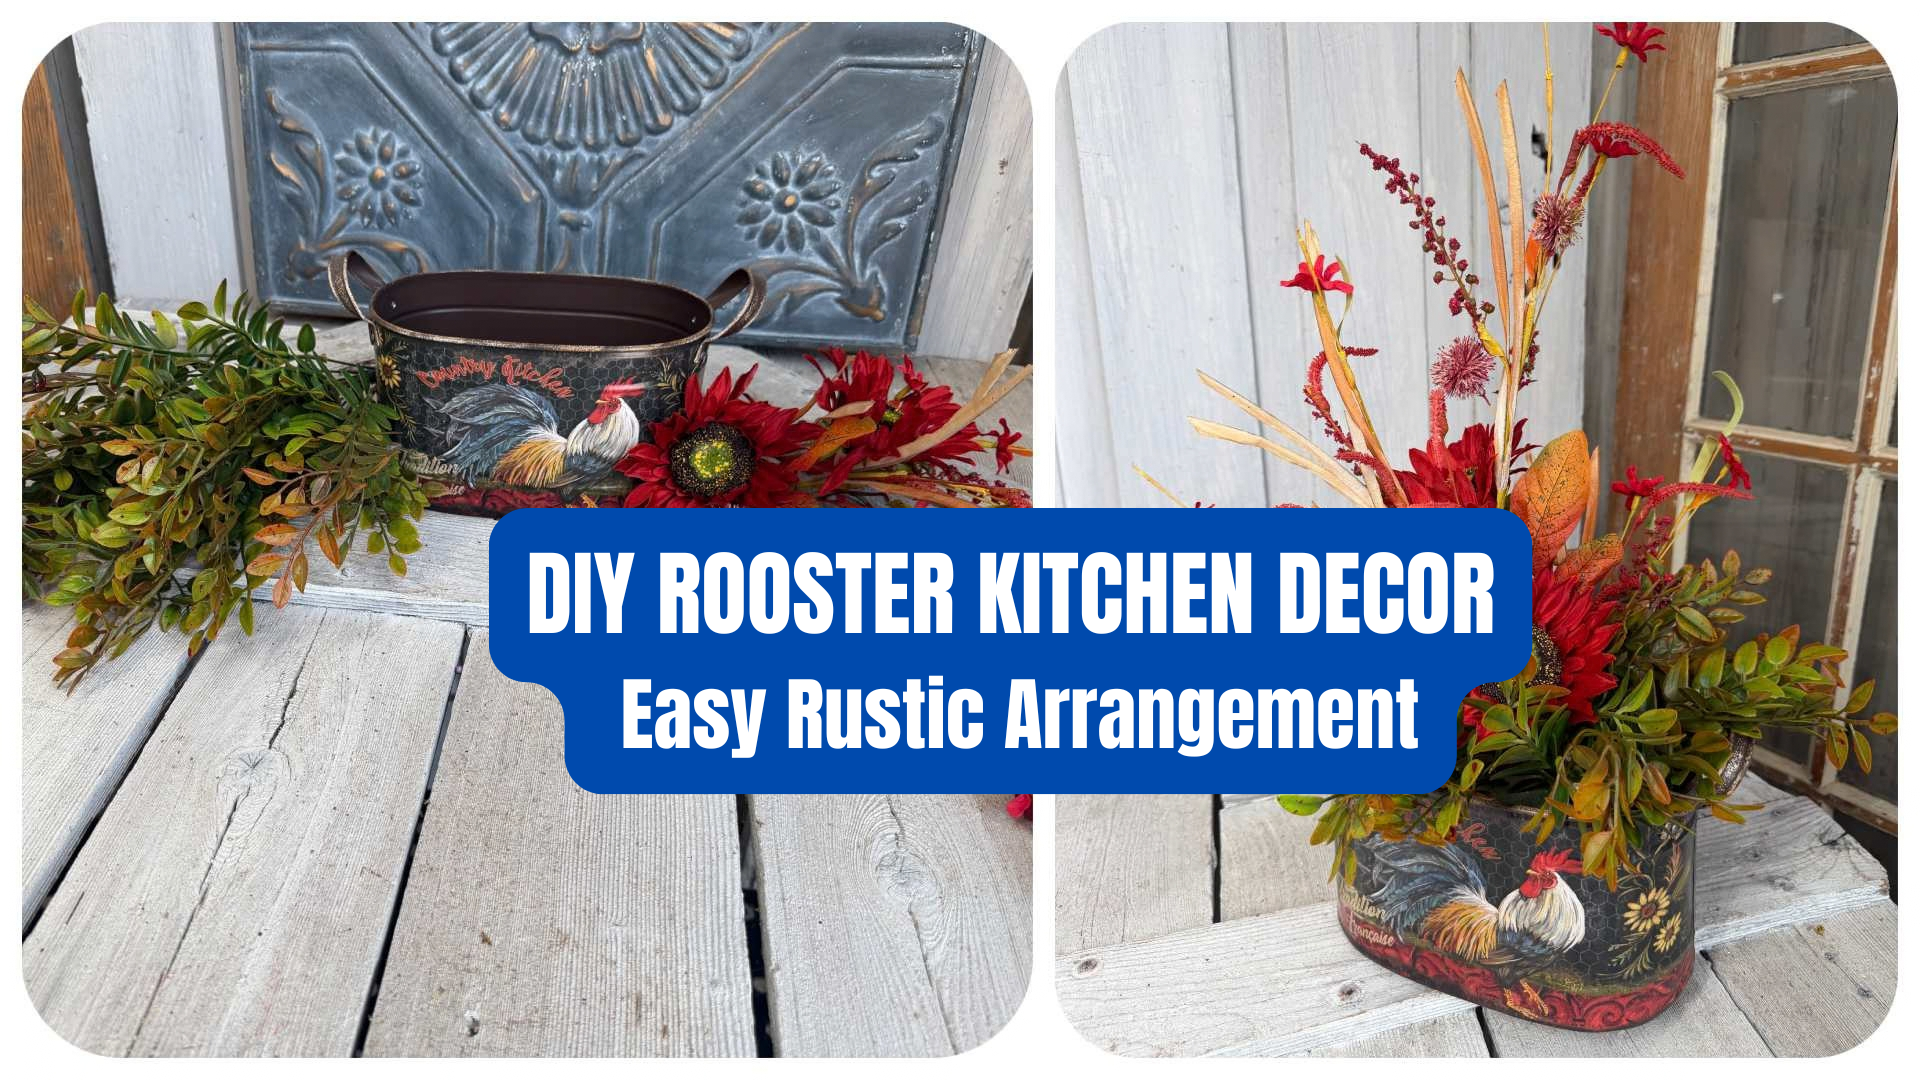
This country kitchen rooster arrangement is a simple way to bring warm, rustic color into your kitchen without creating something that feels overly seasonal.
Kelea designed this piece around the rooster container itself, using barn-red sunflowers and textured greenery to pull the colors from the container into the finished arrangement. The result has a rustic, country-kitchen feel that can work beautifully going into autumn but can also stay out year-round depending on your decor.
See the Country Kitchen Rooster Arrangement Kit:
https://www.keleas.com/product/country-kitchen-rooster-arrangement-kit/
Watch the Country Kitchen Rooster Arrangement Tutorial
This is a particularly approachable project for newer floral designers because the arrangement uses a limited number of materials and a straightforward placement pattern.
Start With a Container That Sets the Style
The rooster container does more than hold the florals.
It establishes the palette and personality of the entire arrangement.
Kelea uses the container’s design as the starting point and chooses the floral colors to coordinate with it rather than treating the vessel as an afterthought.
That’s a good technique whenever you’re creating an arrangement in a decorative container:
Let the container help choose the florals.
Recess the Floral Foam Below the Rim
Kelea adds floral foam inside the container but deliberately keeps it slightly below the top edge.
If the foam sits too high, you create more mechanics that need to be hidden later. By recessing it, the finished arrangement is easier to make look clean.
You can glue the foam permanently into the container or leave it removable if you want to reuse the container later.
Establish the Perimeter First
The first greenery pieces are placed around the outer edge of the arrangement.
Kelea describes this as establishing the perimeter—one of the same design principles she teaches in Design School. The stems move from the center outward, almost like a starburst.
Even in a small arrangement, establishing that outer shape gives you a framework before adding the focal florals.
Use Greenery to Add Dimension
The greenery was chosen specifically because it can be shaped.
It can be compressed into a chunkier filler or opened wider to create more movement and dimension. Kelea also points out the speckled coloring, which adds visual depth instead of reading as one flat green.
Before placing it, shape and spread the wired stems so the greenery does more work for you.
Keep a Simple Arrangement Simple
One of the most useful lessons in this project is knowing when not to keep adding.
Kelea says this piece isn’t intended to be a showstopper. It’s meant to be a handmade accent that complements the rest of the room.
That distinction matters.
Not every centerpiece needs:
- multiple focal flowers
- oversized ribbon
- dozens of filler stems
- dramatic height
Sometimes the right goal is a clean, finished accent piece that fits comfortably into everyday decor.
“Shake Hands” With the Greenery
Kelea uses her familiar “shake hands” technique here too.
That simply means taking advantage of the wired stems—spreading, shaping and repositioning them instead of leaving them compressed exactly as they came.
That one step helps a modest number of materials look fuller and more intentional.
Use the Sunflower Spray in Sections
The red sunflower spray is already constructed in useful clusters, so Kelea doesn’t completely dismantle it.
Instead, she separates it into sections and uses those natural groupings in the arrangement.
That saves time and preserves the movement already built into the spray.
This is a good rule when working with floral stems:
If a spray is already wired and grouped well, don’t create extra work by rebuilding it from scratch.
Create Height Variation in the Center
The focal flowers sit in the center, but they aren’t all placed at exactly the same height.
Kelea specifically likes having one sunflower lower and one higher, with the smaller textured pieces extending above them.
That creates a more natural arrangement than forming one perfectly level ring of flowers.
Let the Arrangement Look Good From Every Side
This isn’t designed as a flat-backed mantel arrangement.
Kelea notes that the piece should look cute all the way around, so the placement radiates from the center instead of favoring only one front-facing direction.
That makes it a good option for:
- a kitchen island
- dining table
- breakfast nook
- open shelf
- countertop
Fill the Center Last
After the focal sunflower pieces are in, Kelea returns with the remaining greenery and fills the small gaps between the floral stems.
That keeps the arrangement from getting overly full too early and gives her control over where filler is actually needed.
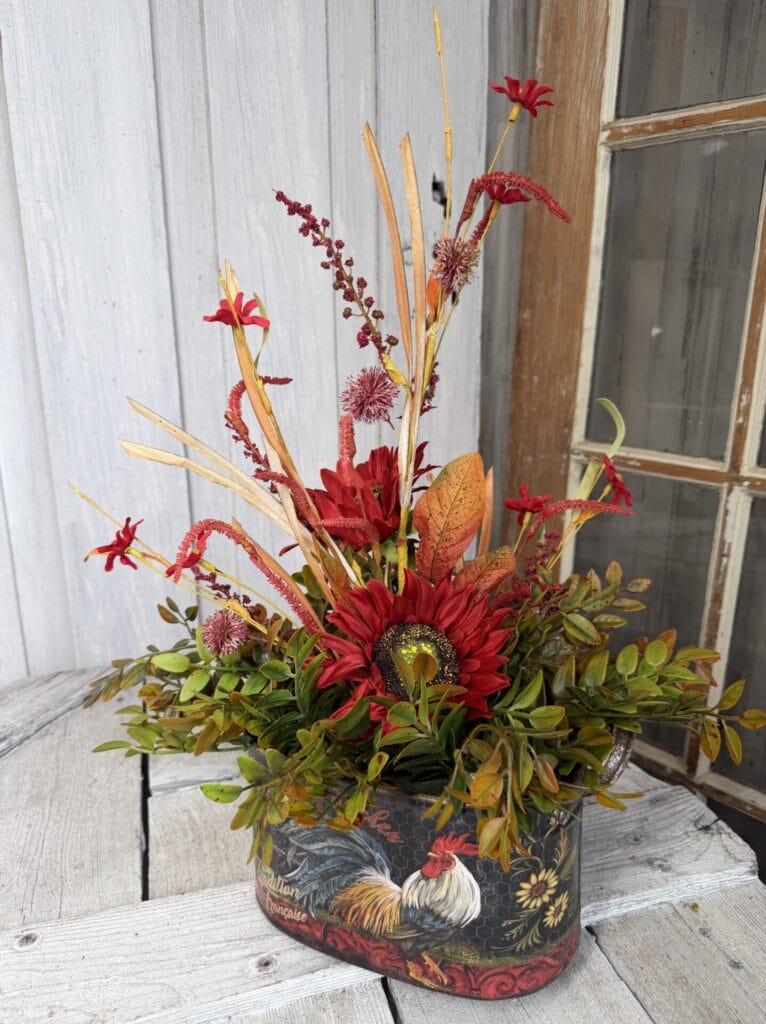
Why This Country Kitchen Rooster Arrangement Works
This project is successful because it stays focused.
The container establishes the theme.
The barn-red sunflowers repeat the color from the rooster design.
The textured greenery softens the arrangement and adds dimension.
The compact size keeps it useful in an actual kitchen.
And the all-around construction lets it work in more than one location.
The result feels decorative without demanding the entire room’s attention.
Looking for more seasonal inspiration? Explore these easy DIY autumn floral arrangements for more ways to bring warm color and texture into your home.
Beginner Floral Design Lesson: Start With Less
If you’re newer to floral design, this is exactly the type of project that can help build confidence.
You’re practicing:
- choosing a palette from the container
- setting the perimeter
- creating all-around balance
- using height variation
- shaping wired greenery
- filling gaps strategically
- knowing when the arrangement is finished
Once you’re comfortable with this simple design, you can use the same placement and layering principles in larger projects like our Wildflower Willow Basket Arrangement.
Learn the Why Behind Floral Design
Kelea talks about setting the perimeter, creating dimension and shaping every wired stem because floral design becomes much easier when you understand why each placement works.
Inside Kelea’s Design School, she teaches those design principles so you can apply them to materials and containers you already own.
Country Kitchen Rooster Arrangement FAQ
Is this a good beginner floral arrangement?
Yes. Kelea specifically describes it as beginner-friendly because it doesn’t require many supplies and the placement is straightforward.
Can this stay out all year?
Yes. Although the barn-red palette works well going into autumn, Kelea says the arrangement can work year-round depending on your home decor.
Do I have to glue the floral foam into the container?
No. Kelea glues hers in, but she explains that you can leave it removable if you want to reuse the container later.
Why is the floral foam placed below the rim?
Keeping it recessed means there is less visible foam to conceal once the arrangement is finished.
Should the arrangement have a defined front?
Not really. This project is intended to look attractive all the way around, which makes it useful on a table or kitchen island.
What gives the design its country-kitchen look?
The rooster container establishes the theme, while the barn-red sunflower spray and textured greenery repeat and support the colors already present in the container.
Want another project to make next? Browse our centerpiece tutorials for more floral arrangement ideas and design inspiration.
Make Your Own Country Kitchen Rooster Arrangement
A beautiful arrangement doesn’t always need dozens of materials.
Sometimes a decorative container, one strong focal floral and well-shaped greenery are enough.
Start with the perimeter.
Keep the foam low.
Let the flowers vary in height.
Shape every piece.
Then stop when the design feels balanced.
See the Country Kitchen Rooster Arrangement Kit:
https://www.keleas.com/product/country-kitchen-rooster-arrangement-kit/