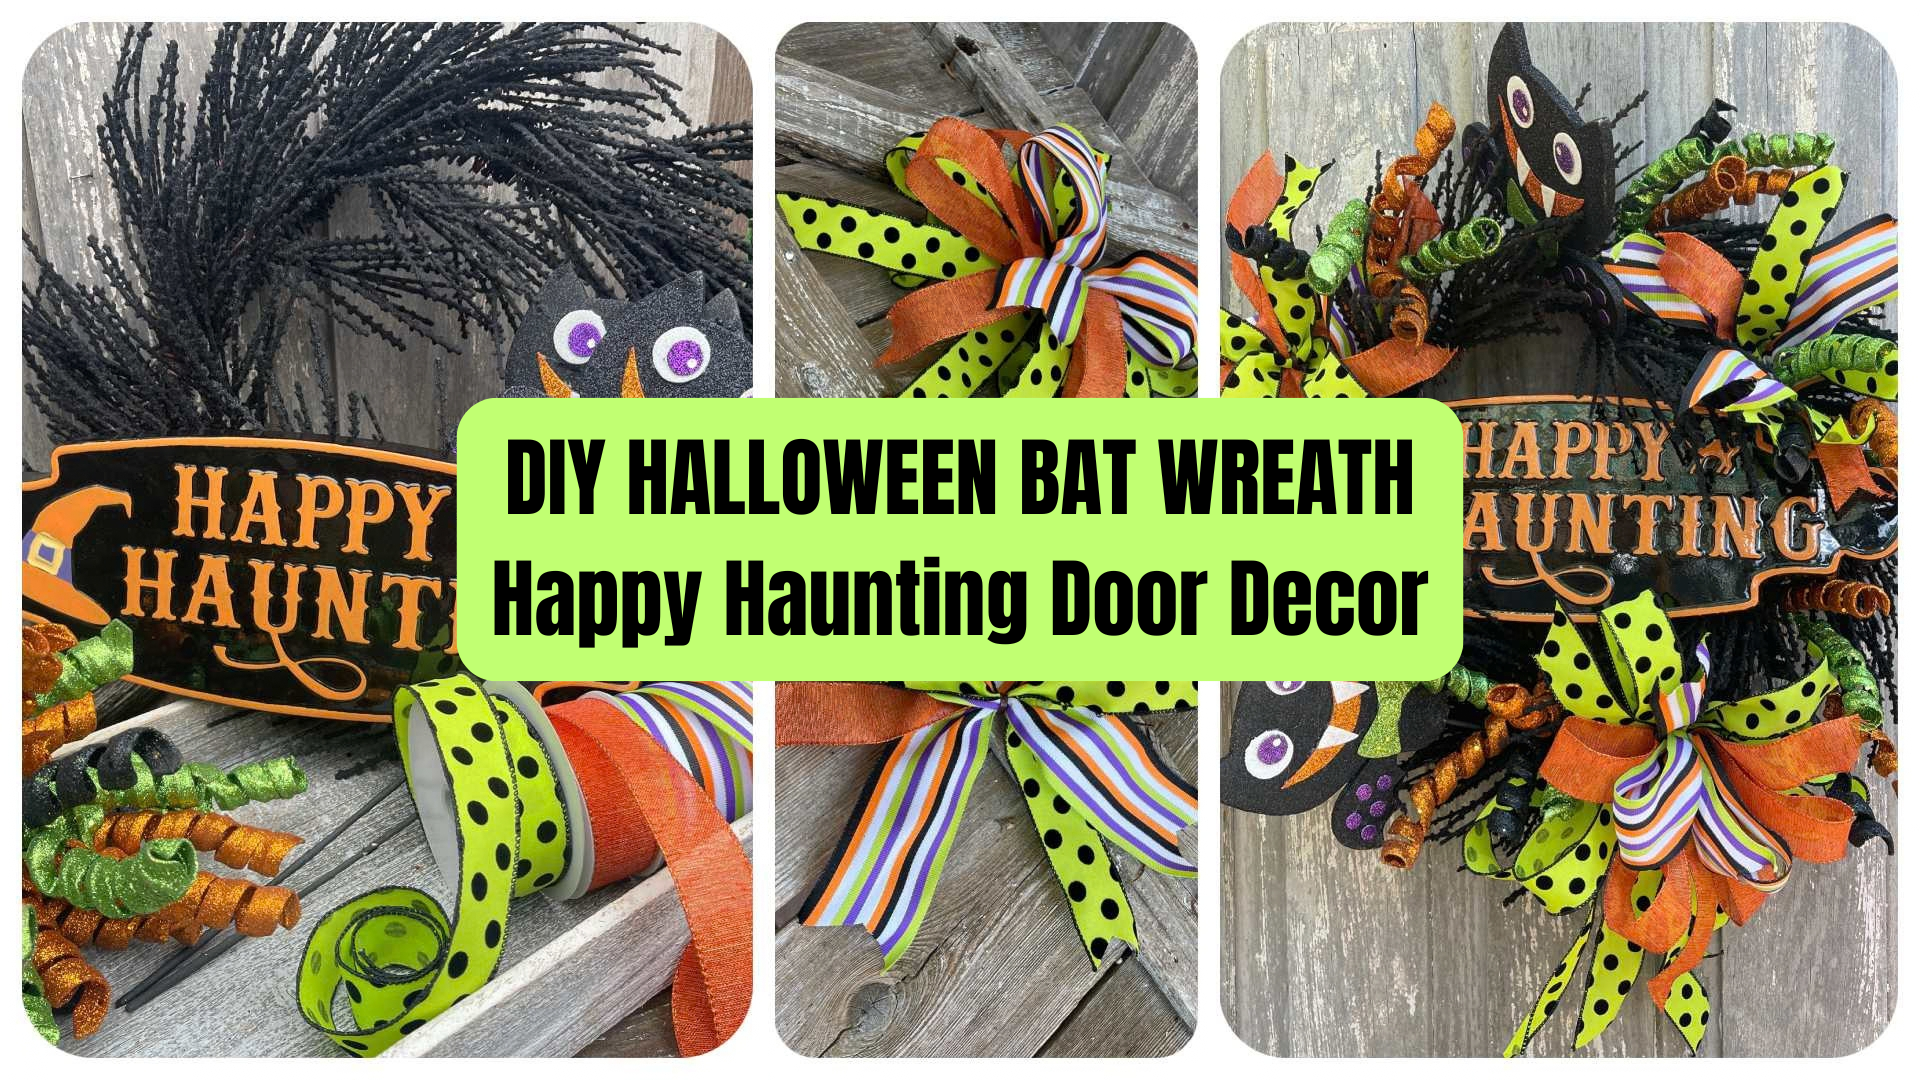
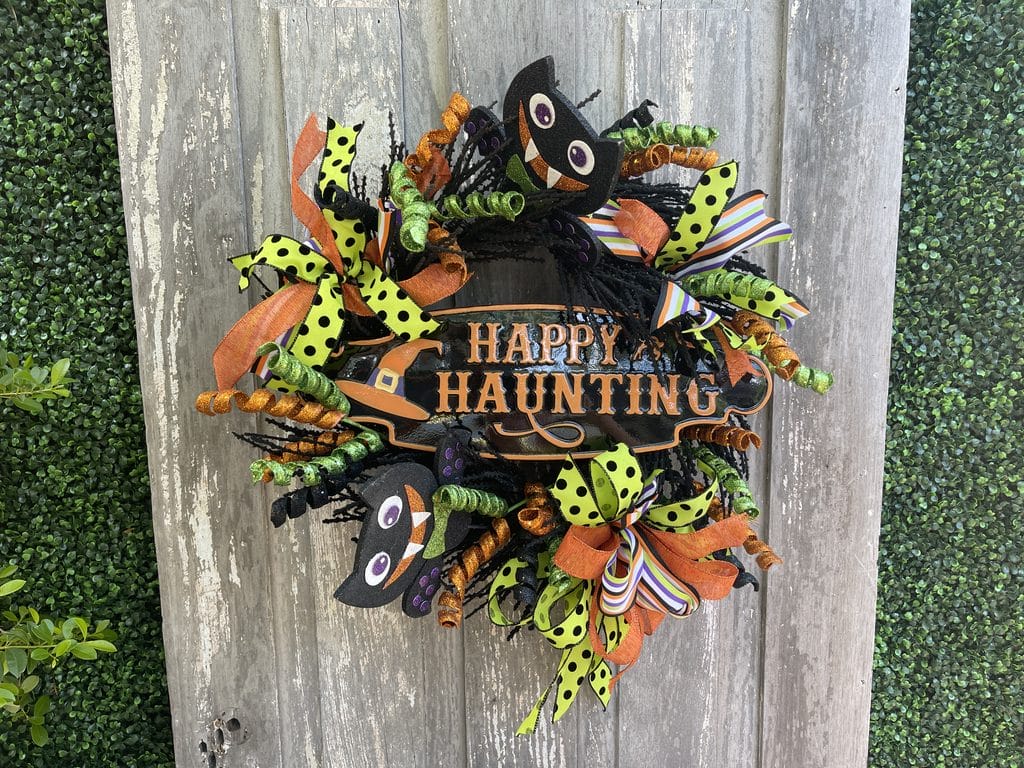
This Halloween bat wreath is a playful way to decorate your front door with bright color, movement and just the right amount of Halloween fun.
Instead of going dark and scary, Kelea combines a black flocked wreath base with a Happy Haunting sign, colorful ribbon, glitter curls and whimsical bats. The orange, green and black palette gives the design plenty of contrast while still keeping it fun and approachable.
See the Batty Happy Haunting Wreath Kit Supply List:
https://www.keleas.com/product/batty-happy-haunting-wreath-kit-supply-list/
Watch the Full Halloween Bat Wreath Tutorial
Start With a Strong Wreath Base
The black flocked base gives this design texture before anything else is added.
Kelea starts by “shaking hands” with the wreath—opening and separating the wired greenery so the base looks fuller and is easier to work with.
That step matters because a compressed base makes every later placement harder.
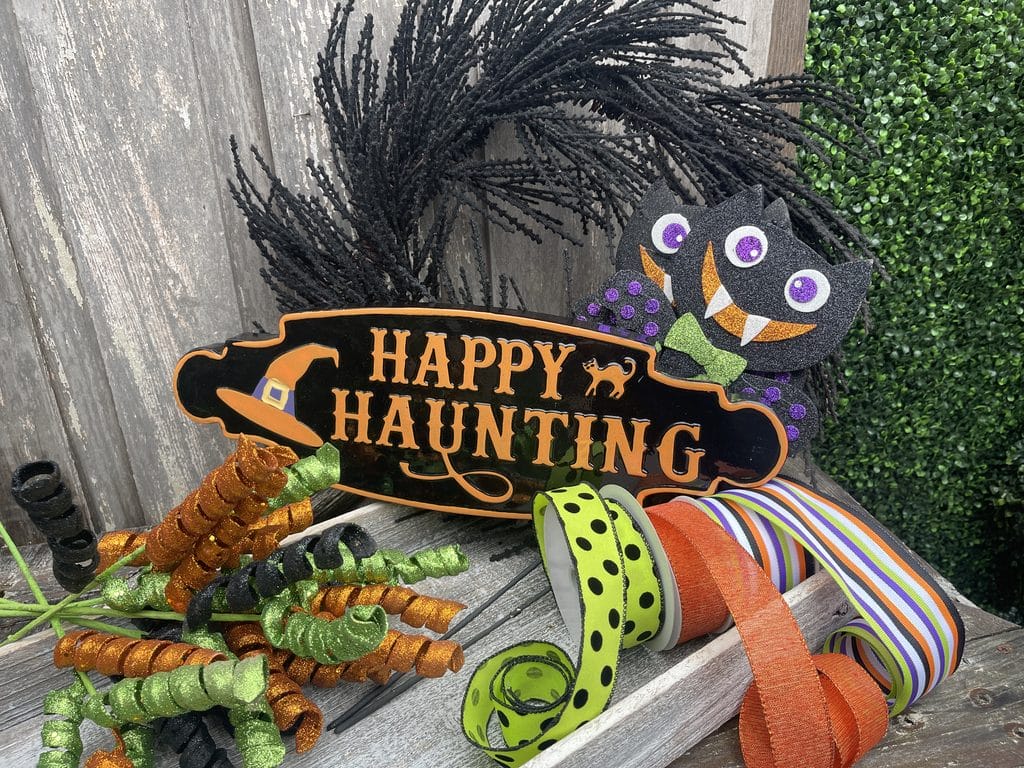
Add the Happy Haunting Sign First
The sign establishes the center and helps determine how much room remains for bows, bats and curly picks.
Kelea attaches one side first, then adjusts and levels the other side before tightening both. She also uses the actual wire frame rather than relying only on outer greenery so the sign stays secure.
Why Hanging the Wreath While You Build Helps
Kelea prefers positioning the sign while the wreath is hanging on a stand instead of lying flat.
That makes it easier to see how the sign will actually sit once the wreath is on a door.
That is especially helpful with signs and other heavier focal pieces.
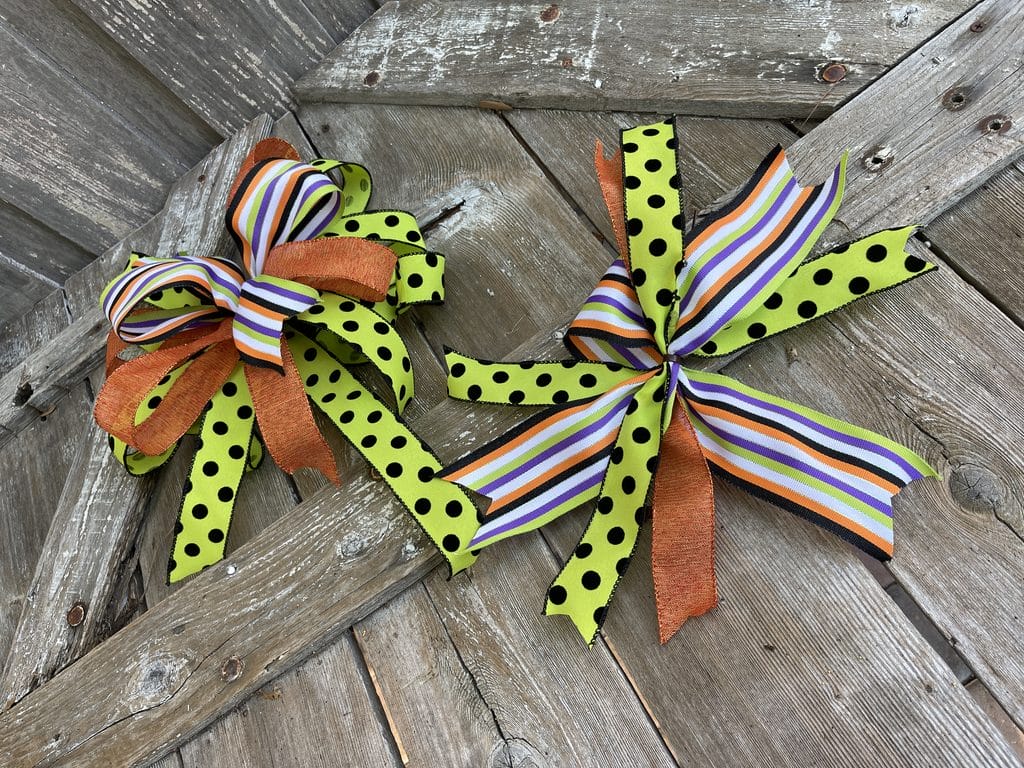
Add the Bow Early to Establish Space
Kelea normally prefers to add bows later, but she explains that when you’re newer to wreath making, adding the bow earlier can help you understand how much space it will occupy.
The main bow sits in the lower-right area, with ribbon tails placed opposite it to distribute color around the wreath.
This creates balance without making the wreath look overly symmetrical.
Create Direction With the Bats
The bats are not simply placed randomly.
Kelea chooses a direction and keeps the bats flowing around the wreath so they look as though they are moving through the design.
She keeps the stems long until she knows exactly where each bat will sit, which allows her to bend and angle them before trimming or weaving the stems into the base.
Use Strong Mechanics for Focal Pieces
For the bats, Kelea prefers wiring or cable ties through the wreath frame instead of relying only on glue.
She explains that wiring holds up better over time and gives the design a more professional, durable construction.
That matters even more for wreaths that may be handled, stored or sold.
Add Glitter Curls Between the Major Elements
The curly picks become the movement pieces that connect everything together.
Kelea divides them across both sides of the wreath and places them between the bats, bow and sign rather than bunching them into one area.
One curl comes directly out of the bow, another sits behind a bat, and the others fill the remaining spaces.
That helps the design feel connected instead of looking like separate decorations attached to a wreath.
Use Depth Instead of One Flat Layer
One of the strongest teaching points in this design is depth.
Kelea intentionally adjusts how deep the bow and curly picks sit in the base so some elements come forward while others recede.
That “in and out” placement keeps the wreath from feeling flat.
Hide Your Mechanics
Dark cable ties disappear nicely against the black base, which lets the mechanics stay secure without drawing attention.
Kelea specifically recommends darker cable ties because they blend into the wreath and are much easier to conceal.
You can also weave stems back into the base rather than trimming everything immediately.
Shape the Curls After Everything Is Secure
Once the curls are attached, that’s when Kelea pulls, bends and reshapes them.
Because the stems are wired, you can adjust the movement after the mechanics are already locked in place.
That gives you more control over the final silhouette.
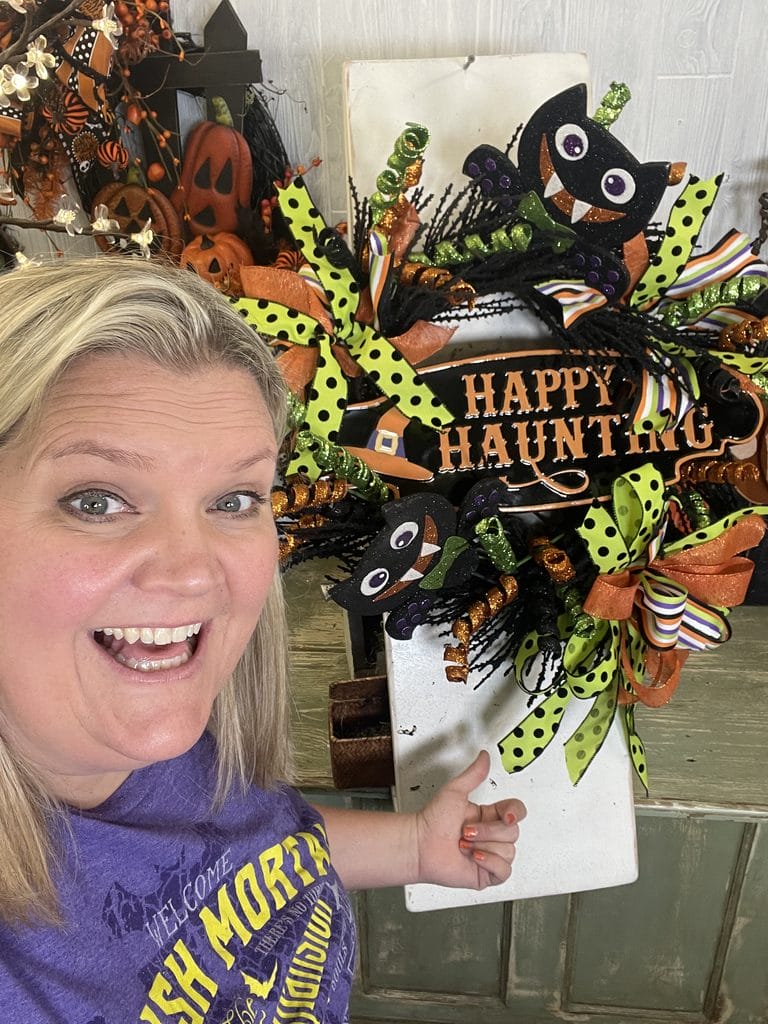
Why This Halloween Bat Wreath Works
This design is successful because it balances several strong visual elements without letting any one of them dominate.
The Happy Haunting sign creates the center.
The bats establish movement.
The ribbon distributes color.
The glitter curls add energy and dimension.
The black flocked base gives everything contrast.
Together, those elements create a wreath that feels playful, colorful and finished rather than overly busy.
Learn the Why Behind Wreath Design
If you’re learning wreath making, one of the most useful parts of this project is seeing why Kelea places each element where she does.
Why put the bow early?
Why place one bat higher and another opposite it?
Why use the frame for attachment?
Why stagger the curls?
Why push some pieces deeper into the wreath?
Those are the kinds of design decisions Kelea teaches inside Kelea’s Design School so you can apply the same principles to your own materials.
Halloween Bat Wreath FAQ
Can I use glue instead of cable ties?
You can use glue in some areas, but Kelea prefers cable ties or wire for major focal pieces because they hold more securely over time.
Why should I add the bow before the other elements?
For beginners, placing the bow earlier helps show how much space it will occupy, making later placement easier.
How do I make the bats look like they are moving?
Choose one direction and keep their angles flowing around the wreath instead of pointing them randomly.
How many glitter curls are used?
Kelea works with six curly picks, roughly dividing them across both sides of the wreath.
How do I keep the mechanics from showing?
Use dark cable ties against the black wreath base, work close to the frame, and weave or hide stems behind other elements.
Make Your Own Halloween Bat Wreath
This Halloween bat wreath shows how a few strong design choices can make whimsical decor feel polished.
Start with the sign.
Plan the bow.
Choose a direction.
Layer the bats.
Add curls for movement.
Then adjust depth until the entire wreath feels connected.
See the Batty Happy Haunting Wreath Kit Supply List:
https://www.keleas.com/product/batty-happy-haunting-wreath-kit-supply-list/