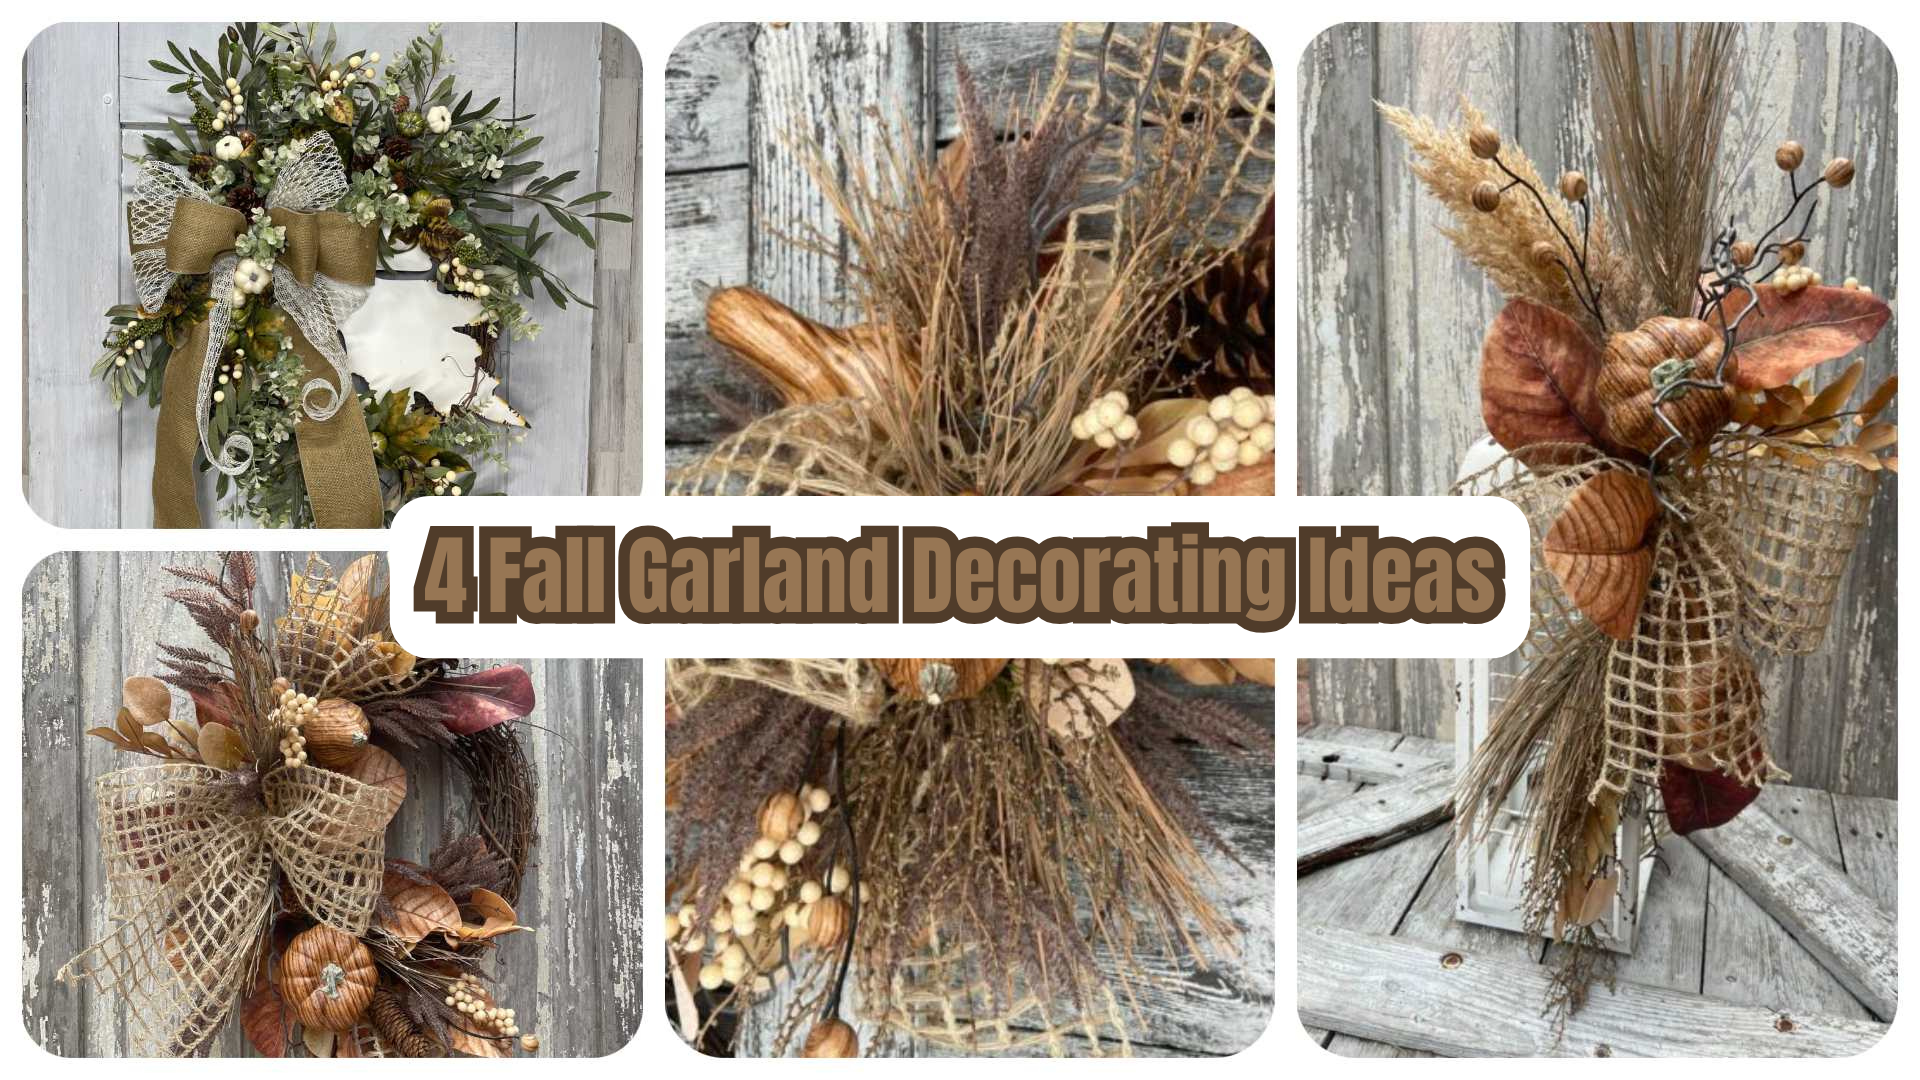
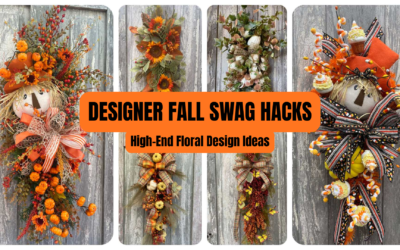
These fall garland decorating ideas show how much you can create when you stop seeing a garland as one finished decoration and start seeing the individual floral elements inside it.
In this compilation, Kelea uses warm neutral autumn colors, pumpkins, gourds, leaves, pinecones, berries, greenery, and natural ribbon to create four coordinated fall floral designs. The collection includes wreath ideas, a smaller arrangement and a lantern swag, while teaching techniques you can use with garlands and floral materials you already own.
One of the biggest lessons is simple: a beautiful garland can become a ready-made collection of coordinating pieces, not just one long strand of decor.
➡️ See the Designer Autumn Florals from a Garland Compilation Supply List:
https://www.keleas.com/product/designer-autumn-florals-from-a-garland-compilation-supply-list/
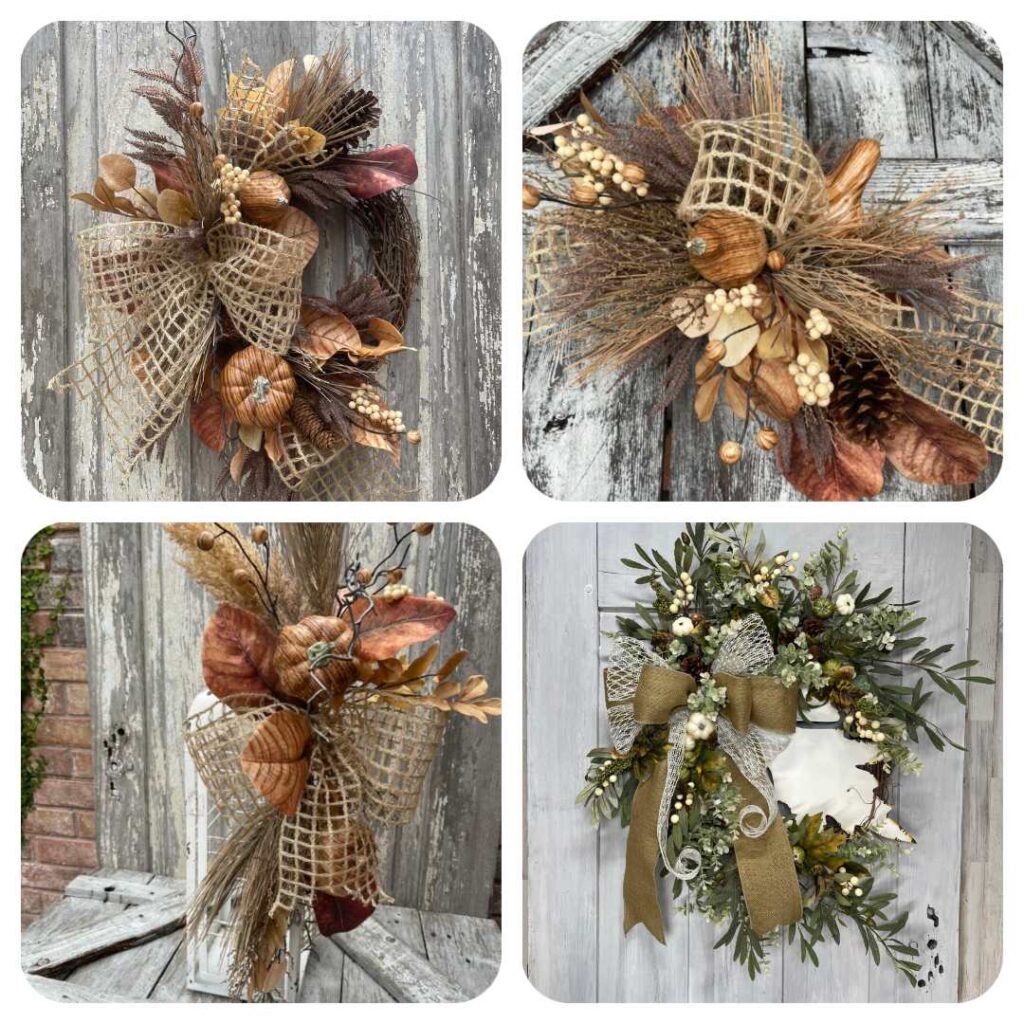
See how coordinated autumn garland pieces can become multiple fall floral designs.
Watch All 4 Autumn Floral Projects
If you want to see the complete collection come together, watch Kelea work through the full compilation.
The full video includes four fall decor tutorials and shows how Kelea adapts similar colors and textures to very different bases.
Why Use a Garland for Fall Floral Designs?
Garlands can be especially useful because much of the coordinating work has already been done.
Pumpkins, foliage, pinecones, berries and complementary colors are already grouped together. Instead of shopping for every individual component, you can cut apart sections of the garland and treat them like floral picks.
Kelea explains that although a premium garland may initially seem expensive, it can become much more cost-effective when you use it across several designs.
The tradeoff is time.
Breaking a garland apart can require more labor than using individual ready-to-go stems, which is especially important to consider if you sell your finished work.
For personal decorating, though, it opens up a lot of possibilities.
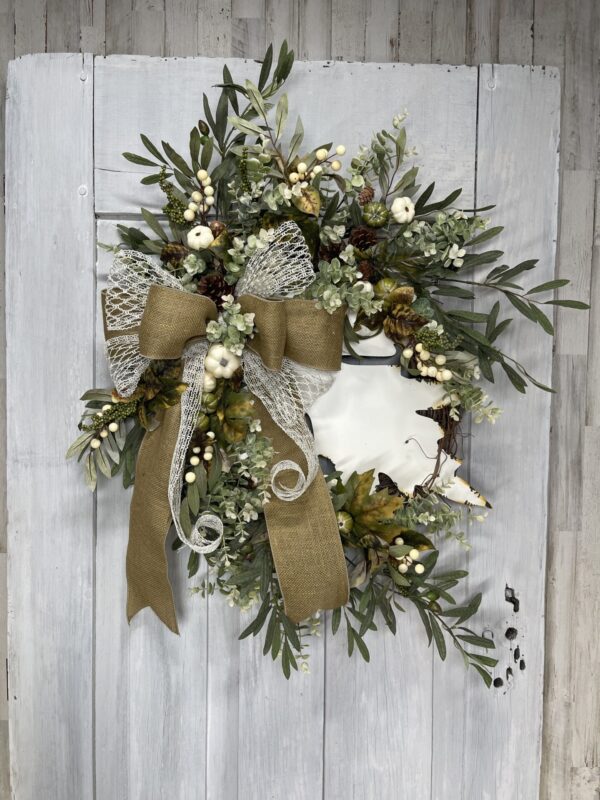
Project 1: Neutral Autumn Maple Leaf Wreath
The first design introduces the warm, neutral cottage-inspired palette that carries through the collection.
Kelea starts with a large decorative maple leaf in the background and builds the florals around it using pumpkins, foliage, eucalyptus, olive leaves and neutral jute ribbon.
This design is a great example of how to use a decorative attachment without letting it become a flat background.
Secure Large Attachments in More Than One Place
The maple leaf is attached securely at the top, but Kelea also thinks about what will happen at the bottom once the wreath is hanging on a door.
Instead of allowing the leaf to flap forward, she works part of it through the grapevine so the attachment stays controlled.
That’s an important design habit:
Think about how the finished piece will behave after it leaves your worktable.
Establish the Perimeter Before Filling the Wreath
Kelea begins with the longer olive branches to establish the outer shape of the wreath.
She already knows where the bow will sit, so she treats that area as the transition point and lets the greenery move outward in both directions from it.
This gives the design direction before pumpkins and fillers begin taking up space.
What Is a Transition Point?
A transition point is the area where the direction of your floral design changes.
It may be marked by a bow, larger flower or another prominent feature.
Once you know where that point will be, it becomes easier to decide which stems should travel upward, downward or outward.
Break the Plane of the Background
When the pumpkin garland sections are added, Kelea intentionally lets some of the materials overlap the edges of the large maple leaf.
She calls this breaking the plane.
If every stem stayed perfectly inside the outline of the leaf, the design would feel confined.
Allowing greenery, pumpkins and foliage to cross those edges visually connects the background attachment to the florals layered over it.
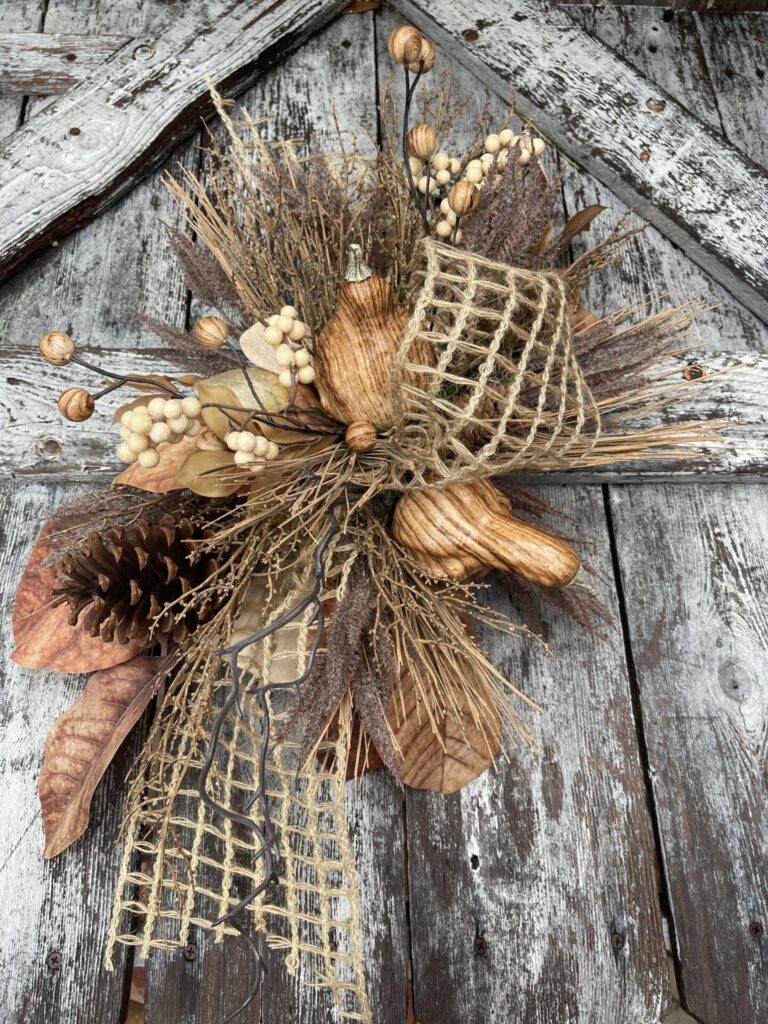
Project 2: Small Fall Floral Arrangement from a Garland
For the next project, Kelea begins cutting apart a large pumpkin garland and using the individual pieces to build a completely different design.
A small wood board becomes the base, with floral foam attached in the center. The piece can sit flat on a table or hang using the hanger already built into the board.
That flexibility makes the project useful for a coffee table, entryway, shelf or wall.
Start With Your Largest Garland Pieces
Once the garland is separated, Kelea uses the largest leaves toward the back first.
Then she works forward with pinecones, berries, pumpkins, gourds and smaller details.
This creates an easy hierarchy:
Large shapes establish the silhouette.
Medium elements establish the focal area.
Smaller materials add detail.
Scale the Garland Pieces to the Base
One of the most useful ideas in this project is that Kelea doesn’t treat every garland section the same way.
Because the wood base is small, she breaks the garland into smaller sections so the materials won’t overpower it.
That’s something you can use far beyond this project.
The size of your base should determine the scale of your floral materials.
A beautiful pick may need to be divided into several pieces on a small arrangement but left almost intact on a larger wreath.
Use.
Add Extra Texture Without Losing the Original Palette
Kelea adds a little wheat and twig texture to the arrangement, but she doesn’t overwhelm the materials that came from the garland.
The goal is to support the collection, not replace it.
This is especially helpful when a garland already contains a strong mix of autumn colors and textures.
Use extra stems to solve a design problem—such as adding height, movement or finer texture—rather than simply adding more supplies.
Let Ribbon Move the Eye
Instead of using a large traditional bow on the small arrangement, Kelea introduces sections of wide ribbon through the design.
The ribbon tails visually carry your eye through the arrangement and continue the direction of the florals.
This is an important floral-design principle.
Ribbon doesn’t have to sit on top of a design as a separate decoration.
It can become part of the movement.
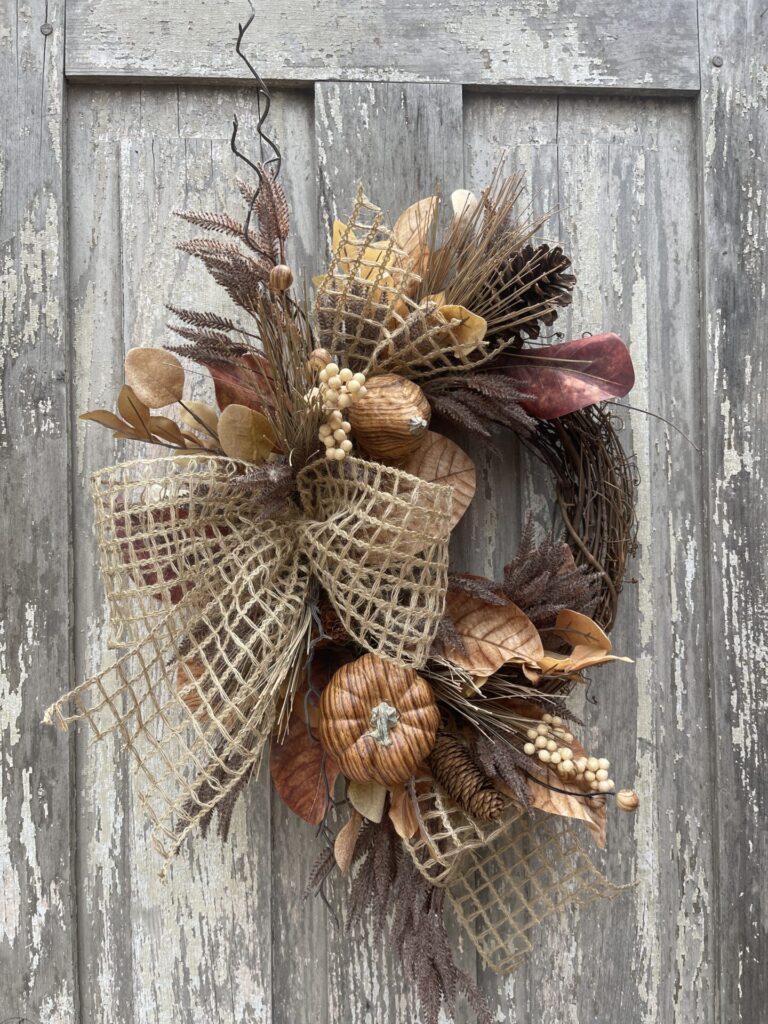
Project 3: Fall Floral Wreath from the Same Garland
The next project gives the remaining garland pieces more room on a wreath base.
Instead of wrapping the garland around the wreath, Kelea continues cutting it apart and uses the individual elements exactly where she wants them.
That gives her control over where pumpkins, gourds, leaves and berries appear instead of letting the original garland spacing dictate the design.
Kelea describes this as the second project created during the garland challenge.
Use Larger Elements in the Background
Large leaves again become background pieces.
Then pumpkins and gourds are layered forward, with additional brown wheat-style texture used to extend the design and create movement.
This layering prevents everything from sitting on the same visual level.
Use Zigzag Placement Instead of Perfect Spacing
Another placement technique Kelea uses throughout these designs is a zigzag pattern.
Instead of placing every greenery stem in one neat line, she moves in and out of the design, alternating foreground and background placement.
That creates depth while still maintaining the overall shape.
It also keeps a wreath from feeling overly patterned.
Leave Room for the Bow
Kelea also reminds designers to think about the bow before filling every opening.
She intentionally saves the transition area because once that space becomes crowded, getting a strong attachment around the grapevine becomes much harder.
Even when the bow goes in later:
Plan its space early.
Project 4: Fall Lantern Swag
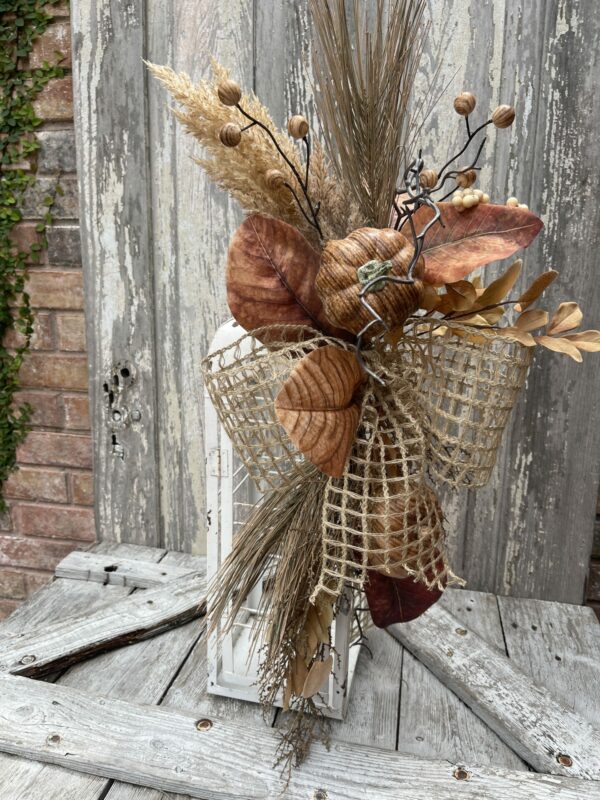
The final project uses the last portion of the garland to create a smaller lantern swag.
Kelea separates the remaining garland into clusters, reshapes them and essentially turns those pieces into individual floral sprays.
Because the swag is being designed for a lantern, she pays close attention to its finished length before securing the sections together.
The proportions have to work with the lantern—not simply look good lying on the table.
Let the Display Determine the Length
The ribbon is deliberately left longer on one side so it can travel down the lantern.
Kelea explains that the exact length should depend on the lantern or object where you’re planning to use the swag.
This is another example of designing for the final location rather than treating every swag the same.
Build the Swag Before Committing to Every Cut
Kelea begins arranging longer pieces together, checking them against the lantern and manipulating their shape before trimming everything down.
That gives her room to adjust.
Once the basic structure looks right, the stems can be secured together with cable ties.
A Lantern Swag Can Be More Versatile Than You Think
Although this piece is designed for a lantern, Kelea points out that it doesn’t have to stay there.
It can be tied higher or lower depending on the lantern, used as a hanging swag, laid flat or even incorporated beneath an existing light fixture.
That’s worth remembering when you make smaller seasonal florals.
A versatile attachment gives you more decorating options than something designed for only one specific spot.
Watch the Quick Transformation
This is a good place in the blog to give readers a fast visual recap before we move into the larger design lessons.
Shake Hands With Every Garland Piece
One of Kelea’s recurring techniques is to “shake hands” with your materials.
Once a garland section is cut apart, don’t assume it is ready to use.
Open the leaves.
Bend the branches.
Separate the clusters.
Turn focal elements forward.
Change the direction.
Kelea reshapes the garland pieces into individual sprays before using them in the finished designs.
The difference can be dramatic.
A compressed garland section can suddenly look like a completely different floral pick once you’ve given it shape.
Why These Fall Garland Decorating Ideas Work Together
All four designs share similar colors and textures, but they don’t look like copies of each other.
That’s because Kelea changes the base, scale and placement for each one.
The maple-leaf wreath uses a strong decorative background.
The small arrangement brings the elements into a compact composition.
The wreath allows the florals to stretch farther around the perimeter.
The lantern swag becomes narrower and directional.
The materials coordinate, but the designs don’t have to match exactly.
Make One Collection Work Harder
This compilation is also a smart lesson in buying floral materials.
Instead of asking:
“What can I make with this garland?”
Try asking:
“How many useful floral elements are actually inside this garland?”
A beautiful garland may contain leaves, berries, pumpkins, pinecones, twig texture and other components that could cost much more if purchased individually.
Kelea ultimately demonstrates that the primary garland can be divided across multiple projects while using only a limited number of additional coordinating stems.
That’s where the value really starts to show.
Learn the Why Behind Floral Design
These four projects aren’t only about recreating four finished pieces.
They’re also examples of design principles you can use again:
Establish the perimeter before filling the center. Use a transition point to change direction. Break the plane of your base. Stagger materials between foreground and background. Scale stems to the size of the project. Use ribbon to continue movement. Leave room for focal pieces before the design gets crowded.
Those are the decisions that help you take materials you already own and create something completely different with them.
Kelea teaches more of the why, when and where behind floral placement inside Kelea’s Design School.
Fall Garland Decorating Ideas FAQ
Can I cut apart a decorative fall garland?
Yes. Kelea cuts sections from the garland and reshapes them into individual floral pieces throughout these projects. The exact construction of your garland will determine the easiest places to separate it.
How many projects can you make from one garland?
In this compilation, the garland challenge produces three different projects from the main garland—a small arrangement, wreath and lantern swag—while the full compilation includes a fourth coordinated neutral autumn wreath tutorial.
Is using a garland cheaper than buying individual picks?
It can be. A premium garland may have a higher upfront price, but it can provide many coordinating elements for multiple projects. Kelea also notes that breaking it apart requires additional labor, so sellers should consider both material cost and construction time.
Do I need to use every piece of the garland exactly as it comes?
No. In fact, much of the creativity comes from cutting sections apart and changing their scale, direction and shape.
Why should larger leaves go in the back?
Larger materials establish the silhouette and give the smaller pumpkins, berries and textural elements somewhere to layer in front.
Can a lantern swag be used somewhere else?
Yes. Kelea explains that the finished swag can also hang independently, lie flat or potentially be used around another decorative fixture.
Where can I find the supply lists?
The complete Designer Autumn Florals from a Garland Compilation Supply List is here:
The current product page includes separate supply-list options for the floral arrangement, wreath and lantern swag, along with the coordinating Maple Leaf and Pumpkins Neutral Autumn Wreath.
Turn One Garland Into Something Completely New
The biggest takeaway from these fall garland decorating ideas is that supplies don’t have to be used exactly as they were sold.
A garland can become leaves for a wreath.
A pumpkin cluster can become a focal point.
A pinecone can become a small finishing detail.
A section of foliage can become its own floral pick.
And when the colors and textures are already coordinated, you have a strong starting point for creating several autumn designs that feel related without looking identical.
➡️ See Compilation 1583 and the supply lists:
https://www.keleas.com/product/designer-autumn-florals-from-a-garland-compilation-supply-list/