Let’s whip up Sunflower and Blueberry swag! Swags are a great way to make a change from a usual wreath. I was inspired today while walking around Bloom Central when I came across a beautiful bunch of yellow Sunflowers. They were so bright and cheery and reminded me that warmer days are coming!
Are you as ready as I am for warmer days? These sunflowers were really reminding me that the warmth of the summer days is nearing. Let me show you how well the yellow from the Sunflower is going to pair with the blue in the Blueberry bushes. This design will be perfect for the upcoming Spring and Summer seasons. When you see this beautiful swag put all together with the various greenery and a beautiful bow, it will be sure to please!
Sunflower and Blueberry Swag
We are using a grapevine base today specifically created for swags. It has a sturdy pre-made shape with a circular top and a grapevine bottom that can be spread out to add more volume to your design.
I love the touches of Spanish moss it also has throughout the grapevine base that go so well with our natural floral designs. We are going to start by building a good base of greenery throughout the top and bottom of the base. This will allow the various greenery to make up most of the background, but also be brought to the forefront as well.
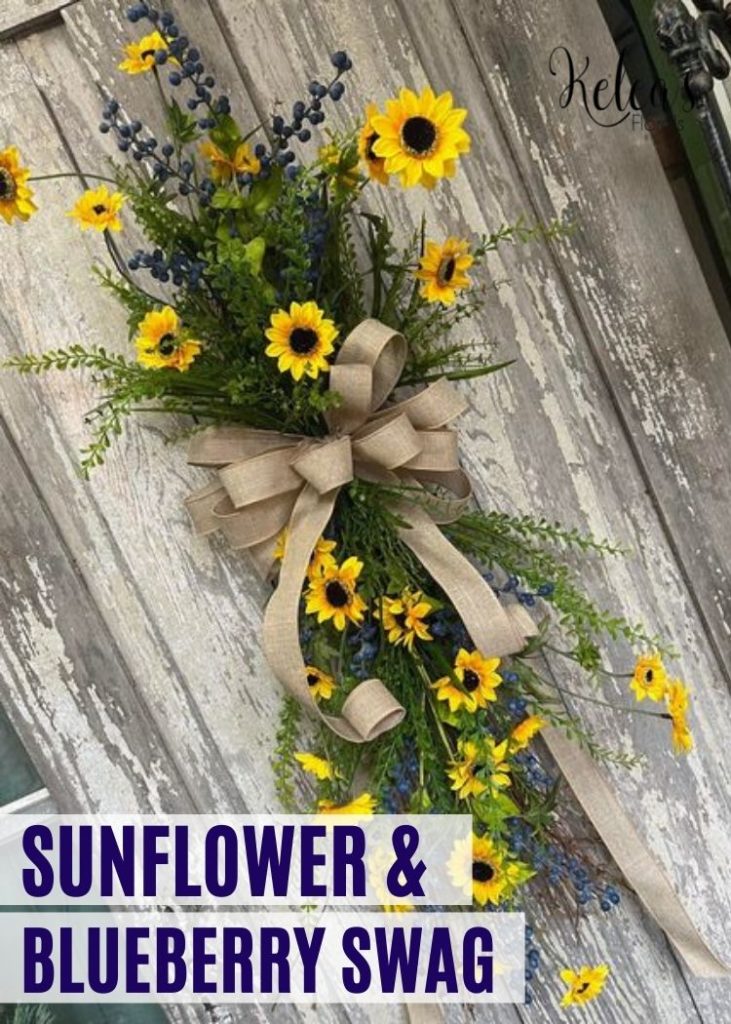
The Blueberries and yellow Sunflowers are a stunning combination in this piece. I’m using a Sunflower bunch that has such natural-looking and lengthy stems. A little tip when it comes to making this swag. You will want to keep your Sunflower stems as long as you can to add lots of depth and dimension with varying lengths.
As always, don’t forget to “shake hands” with each bush and stem to create depth and have each flower and berry facing towards you. It makes all the difference in the world to create that natural pop! An easy but full Burlap bow right in the center will tie everything together and finish off this full yet whimsy design.
Ingredients
Moss Twig Swag Base
Green Mini Leaf Bush
Blue Berry & Leaves Stem
1.5″ Burlap Ribbon on a 50 Yard Roll
Hot Glue Sticks
Directions
- Grab your grapevine swag base and spread the bottom. Take your longer green mini leaf bush and clip it into separate stems. Hold a few off to the side for later.
- Use the super long stems towards the bottom of your base. Start adding stems into the top of the base where the bottom starts to spread using hot glue on the ends. Add on both sides to fill out the bottom.
- Use the shorter mini leaf stems on the top, making sure to secure the stem into the grapevine base. Add throughout the top to fill in nicely.
- Take your wire cutters and cut the yellow Sunflower bush into separate pieces as long as you can. Add a Sunflower bunch in the center on the bottom going downward. Bend and adjust your Sunflowers to keep the flowers looking at you.
- Add more Sunflowers on the top and continue to mirror what you are doing on the bottom. Try to stagger the placement to keep it from being too “matchy-matchy”!
- Let’s add some more greenery with the plastic button grass mix bush. Separate into smaller stems and spread the leaves. Add the grass mix into the center of the base on each side, and on the top of the base.
- Keep adding some more button grass mix greenery throughout the bottom of the swag base to fill out your design. Cover any exposed glue with leaves from a bush or Spanish moss.
- Shake hands with your Blueberry bushes and fluff each stem making them face forward. Add one Blueberry bush up the center so it’s shooting out of the top. Hot glue another Blueberry bush in the center coming downwards. The last Blueberry bush you’ll want in the bottom center making sure to not go past the Sunflowers.
- It’s time for the bow! Measure out tails that are slightly longer than your swag with your 1½” Burlap ribbon and add into your Bowmaker. Make three 6” loops on each side and trim your tails at opposite angles.
- Keep with the Burlap ribbon and make a tiny tail to add into the center dowels. Make two 5” loops on each side and cut short enough to not have any more tails. Finish off the bow with an 18” tail of Burlap with two 4” loops on each side. Cut the last tail at an opposite angle.
- Run a cable tie around the center and pull off. Fluff the loops and insert a second cable tie through the back before cinching tight. Cut a 12” piece of Burlap ribbon and fold over itself widthwise. Use this to tie around the center of the bow and trim the excess in the back.
- Use the cable tie to add your bow to the center of the swag. Curl the tails around your fingers and pull the longer tails to the back of the greenery, making sure they are the same length.
- Grab the mini leaf stems and mixed grass you set aside earlier and add right around the base of the bow.
Tips and Tricks To Designing A Swag
Keep in mind when creating swags that it’s important to pay attention to the lengths of the floral pieces and ribbons you use. We don’t want things to look too “matchy-matchy” or like a goal post. Remember to do the following:
- Stagger the placement of floral stems- this helps your design look more natural and organic.
- Make sure when making the bow that the tails were slightly longer than the swag to have better flow and movement.
- Pay attention to the little things and it will make a huge difference in the overall look of your swag
Want to learn more?
Join the free Facebook group Keleas Bloomarino Buds Wreath Making Community


