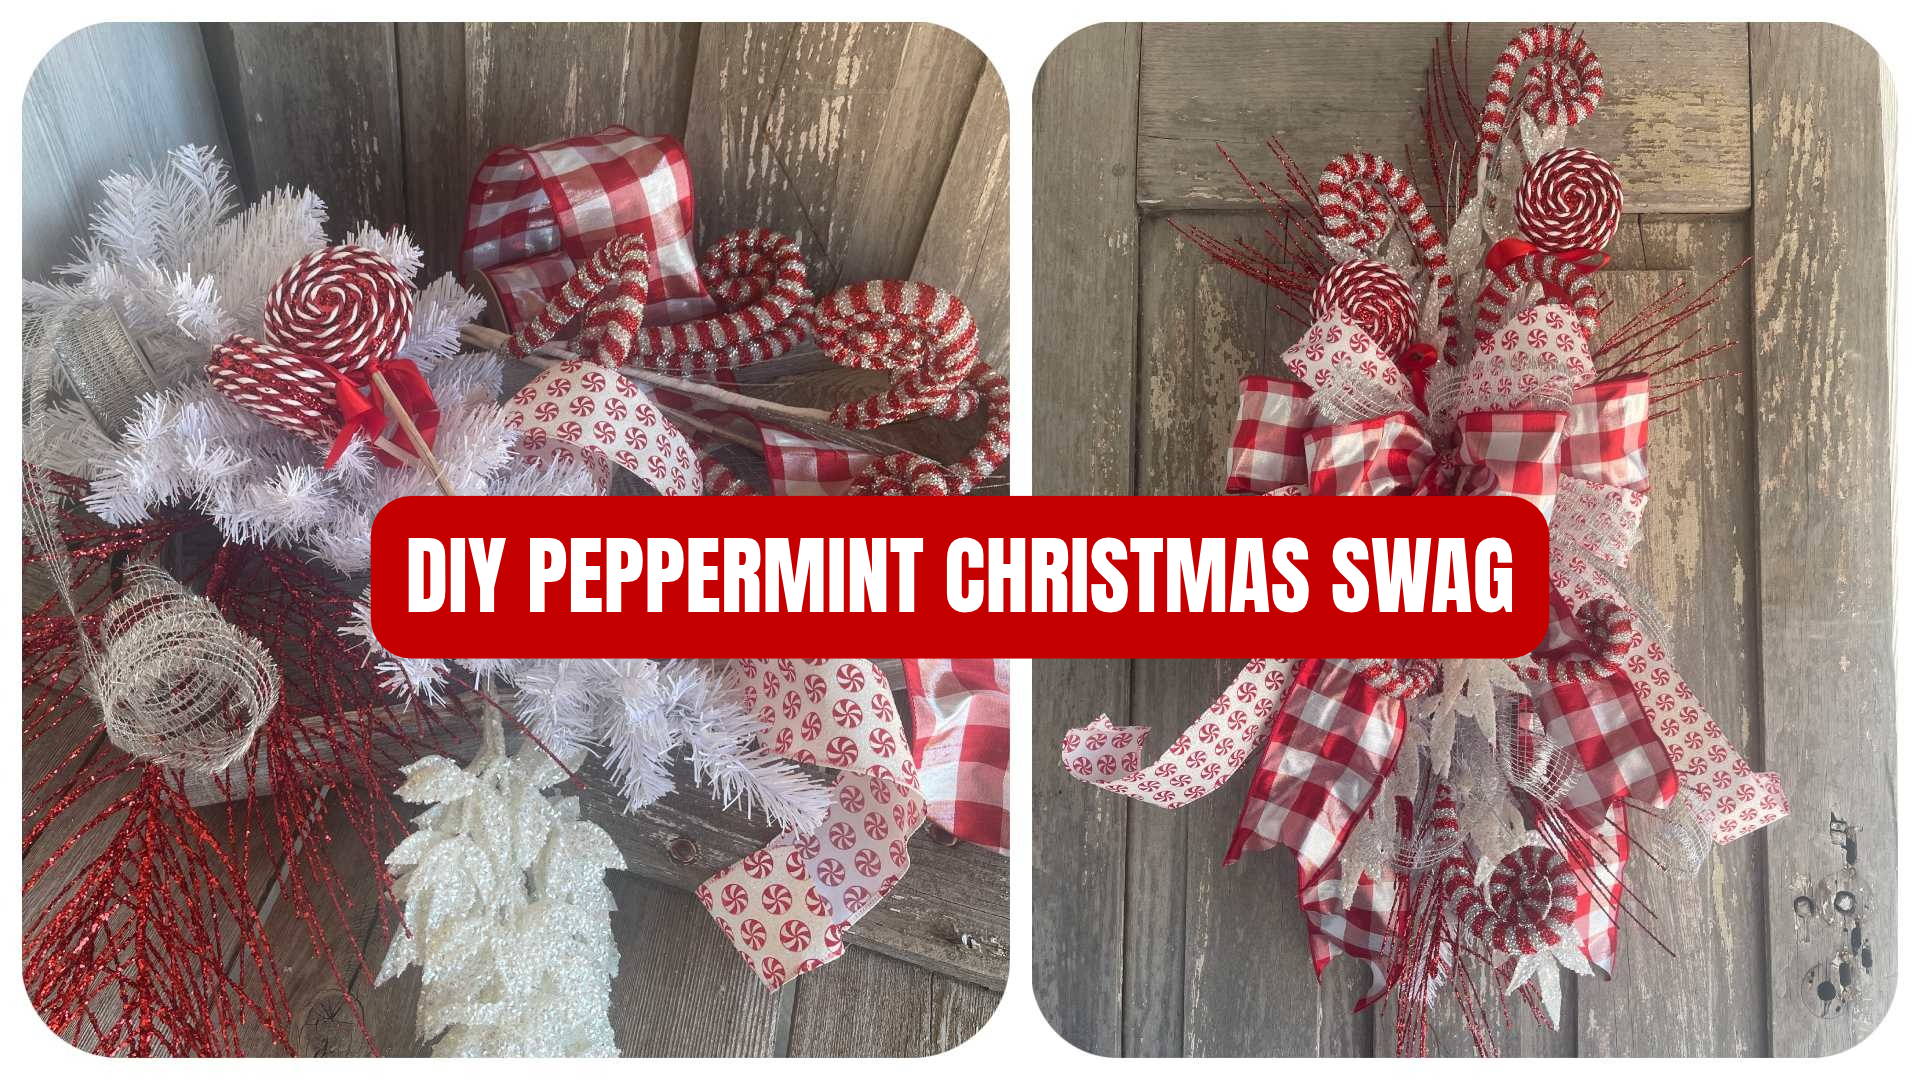
Want to create a Christmas door decoration that’s playful, sparkling and surprisingly simple to make? This peppermint Christmas door swag combines silver candy canes, red glitter twigs, shimmering white leaves and peppermint accents with an oversized holiday bow.
Kelea starts with a ready-made pine swag base, making this a great project if you’ve never created a Christmas swag before. You’ll learn how to shape your base, extend the design with decorative stems and arrange your ribbon for a full, dimensional finish.
Explore Silver Peppermint Swag Kit #1249 and Its Supply List
Start With a Ready-Made Swag Base
One of the reasons this project is beginner-friendly is that the pine swag foundation is already assembled.
Before adding decorations, Kelea shapes the branches to prepare the base.
She calls this process shaking hands with your florals.
The goal is to create a relatively flat back so the swag hangs comfortably against the door, while bringing some greenery forward to add dimension.
This step also helps you see where the decorative materials will fit.
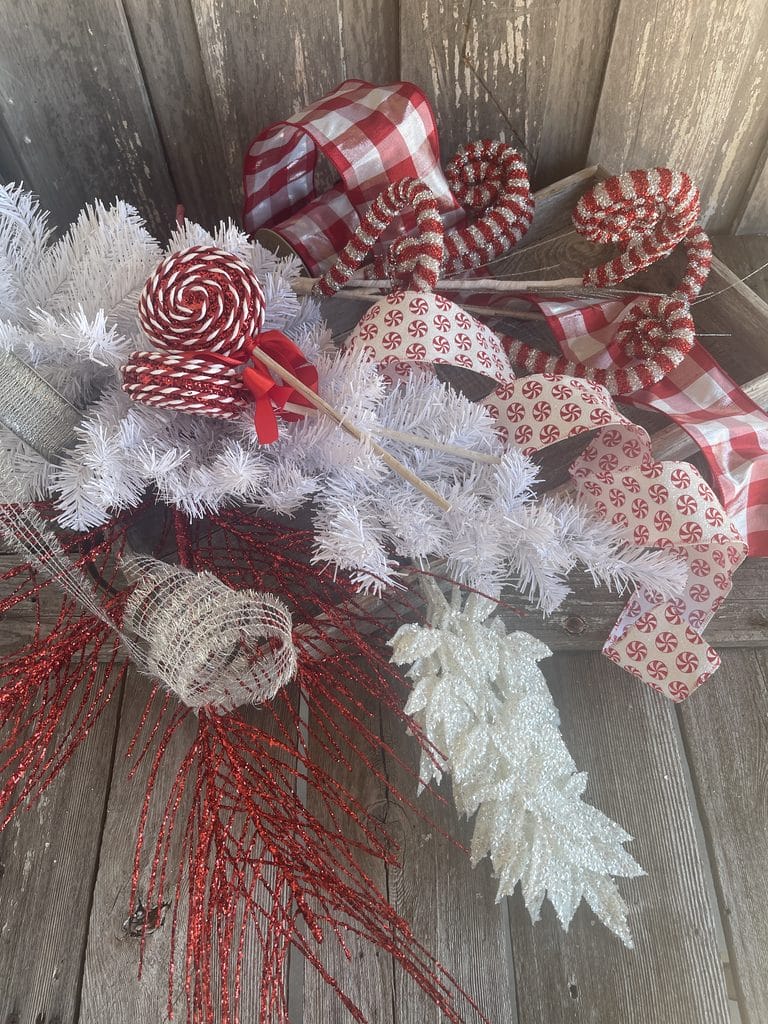
Build the Shape With Red Glitter Twigs
Kelea begins the decorating process with red glitter twigs.
These establish the overall length and shape of the swag.
She positions one group toward the top and another toward the bottom, leaving a central area for the bow.
Instead of keeping the twigs flat against the pine, she allows them to extend outward at different angles.
Secure the Stems With Glue and Wire
After trimming the stems, Kelea adds hot glue and inserts them into the swag base.
She then twists the wired branches around the inserted stems to help secure them.
The combination of glue and wire provides additional stability while preserving the design’s movement.
Designer tip: You don’t need to cover every inch of the pine. Allowing some of the original greenery to remain visible helps the finished swag feel connected and balanced.
Add Sparkling Silver Candy Canes
Next, Kelea introduces the silver candy cane decorations.
She places them near the red twigs, repeating their direction but allowing the silver curls to sit slightly lower.
This creates a layered effect and helps the colors flow through the design.
One candy cane extends upward, while another travels downward toward the lower portion of the swag.
Create Movement With Curved Stems
Rather than making every decorative stem point in the same direction, Kelea shapes the curls to complement the existing lines.
The result is a design that feels playful and energetic without looking disorganized.
This is also a great example of how you can use the natural shape of a decorative pick to establish movement.
Attach the Oversized Peppermint Christmas Bow
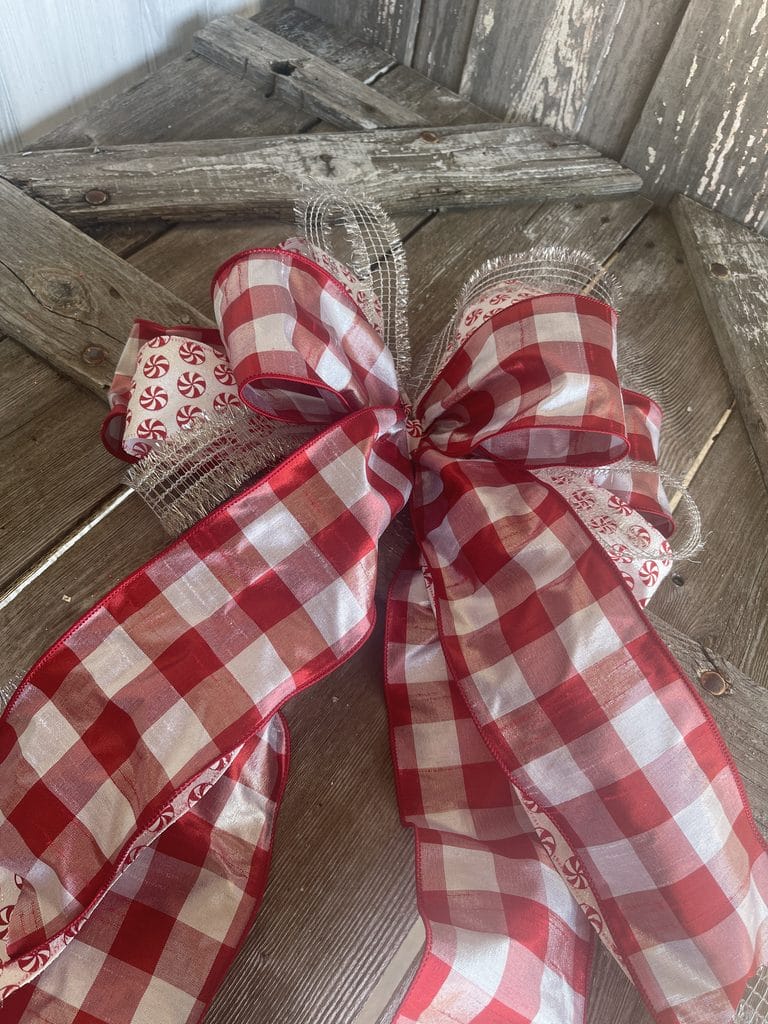
The bow is the centerpiece of this project.
Kelea uses a dramatic layered bow featuring wide holiday ribbon and long decorative tails.
She attaches it near the center of the swag using the cable tie already secured to the back of the bow.
Shape the Ribbon for Depth
Once the bow is attached, Kelea adjusts the loops and tails so they sit at different depths.
Some tails travel downward, while others extend outward.
She also brings the silver candy cane curls forward between the ribbon tails.
This creates a more dimensional appearance and keeps the decorative elements visible.
Designer tip: Don’t leave your ribbon flat. Shaping the loops and tails after attaching the bow helps the entire arrangement look fuller.
Add Glittery White Leaves Around the Bow
With the bow secured, Kelea begins placing the sparkling white leaves.
These help connect the silver candy canes with the white details already present in the pine swag.
She starts near the top of the bow and then adds another section beneath it.
Additional leaves extend toward the upper right and continue down the design.
Use a Zigzag Placement Pattern
One of the easiest techniques to follow in this tutorial is Kelea’s zigzag method.
She alternates the direction of the white leaf stems as she moves down the swag.
One section extends toward the right, and the next shifts toward the left.
This helps distribute the sparkle evenly while preventing the leaves from collecting in one area.
Designer tip: Zigzag placement is especially useful when you have a limited number of decorative picks and want to spread them throughout a larger arrangement.
Finish With Peppermint Lollipop Decorations
The final accents are two decorative peppermint lollipops.
Kelea initially considers placing one above and one below the bow.
However, after examining the arrangement, she decides the lower section already has plenty of interest from the ribbon and glittery leaves.
Instead, she positions both peppermint accents in the upper section at slightly different heights.
This is an important lesson: your original plan doesn’t have to determine the finished design.
Experiment Before Gluing
Kelea encourages you to test different placements before attaching the decorations permanently.
Try one position, step back and look at the overall arrangement.
Then move the accent and compare.
This simple habit helps you develop your own design style instead of feeling that every project must be an exact copy.
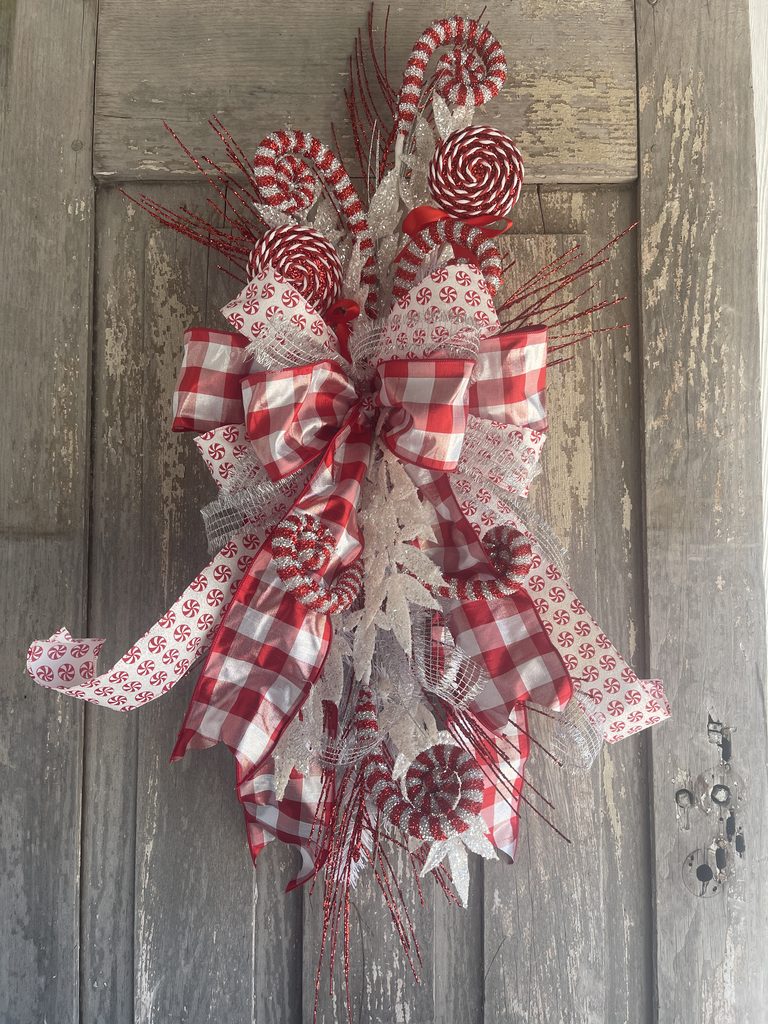
What Makes This Christmas Swag Look Professionally Designed?
Several details work together to give this peppermint swag its finished appearance.
Depth and dimension
The red twigs, silver curls, white leaves and ribbon sit at different levels.
This creates visual depth rather than a flat arrangement.
Repeated colors
Red, silver and white appear throughout the swag.
Repeating these colors helps connect the different decorative elements.
A strong focal point
The oversized bow establishes the center of the design.
The surrounding materials support it without hiding its shape.
Movement
The upward and downward stems create a flowing silhouette.
The ribbon tails and candy cane curls add another layer of movement.
Secure construction
Kelea uses hot glue, wired branches and a cable tie to attach the decorations.
This keeps the design stable while allowing the materials to be shaped.
Frequently Asked Questions About Peppermint Christmas Swags
Is this Christmas door swag beginner-friendly?
Yes. The tutorial starts with a ready-made pine swag base, so you can concentrate on arranging the decorations instead of building the foundation from scratch.
Do I need to make the bow before starting the swag?
Kelea uses a bow prepared separately. Having the bow ready makes it easier to plan where the decorative stems should meet.
How do I make a Christmas swag look fuller?
Shape the pine branches, extend decorative stems outward, arrange ribbon tails at different depths and alternate the placement of your accents.
Can I change where the peppermint decorations go?
Absolutely. Kelea demonstrates testing different positions before deciding where to attach the final accents.
Can I make this design without covering the entire pine base?
Yes. Kelea intentionally allows some of the original pine greenery to remain visible.
Create Your Own Silver Peppermint Christmas Swag
This project shows how a ready-made swag can become a beautiful Christmas decoration with a few carefully chosen accents.
The silver candy canes, sparkling white leaves and red glitter twigs create the playful peppermint theme, while the oversized bow gives the arrangement its signature look.
And as Kelea reminds us, the goal isn’t simply to copy a design. It’s to learn the techniques, experiment with placement and develop your own creative style.
Explore Silver Peppermint Swag Kit #1249
Want to learn more about floral design, ribbon placement and creating dimensional arrangements? Visit Kelea’s Design School to explore tutorials and membership options.
Would you hang this silver peppermint swag on your front door or use it as part of your indoor Christmas decorating?