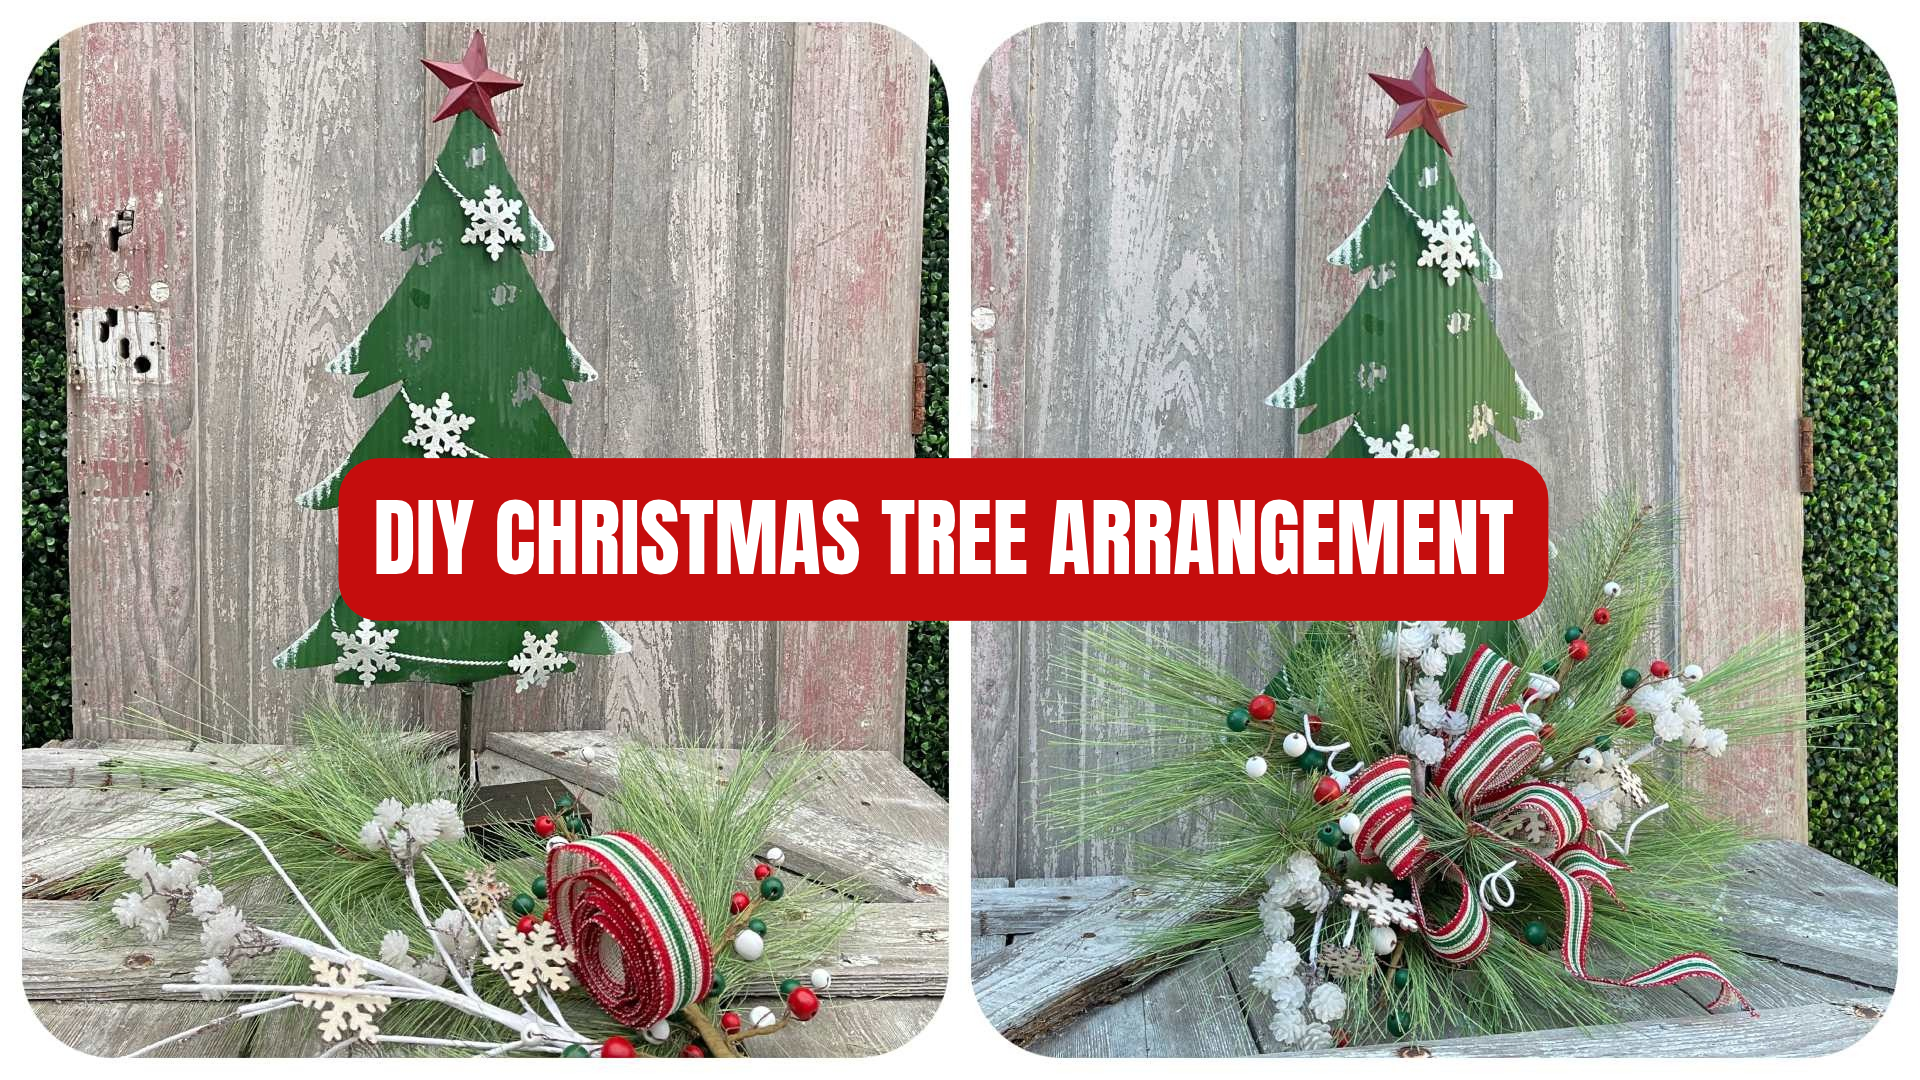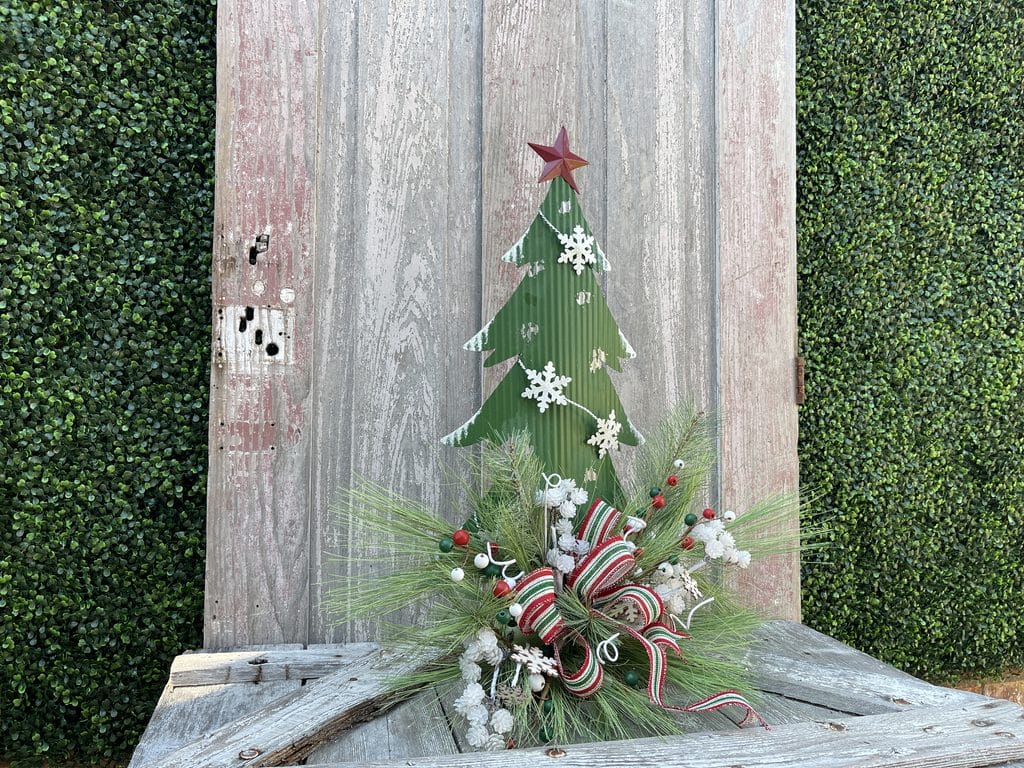
Looking for a Christmas decoration that’s a little different from the usual wreath or centerpiece? This DIY Christmas tree arrangement combines a rustic metal Christmas tree with wispy pine, glittery snowflakes, wooden berries and a handmade burlap ribbon bow.
Kelea shows how to build a floral arrangement around the base of a decorative Christmas tree while keeping the tree itself as the focal point. You’ll also learn how to establish the shape of an arrangement, divide larger floral picks into smaller sections and layer greenery around a bow.
It’s a charming project for a mantel, entryway table or Christmas display.
Explore the Snowflake Christmas Tree Arrangement Kit and Supply List
Watch Kelea Make the Snowflake Christmas Tree Arrangement
See how Kelea prepares the metal tree, adds floral foam and builds the arrangement with greenery, ribbon, berries and snowflakes.
Prepare the Metal Christmas Tree Base
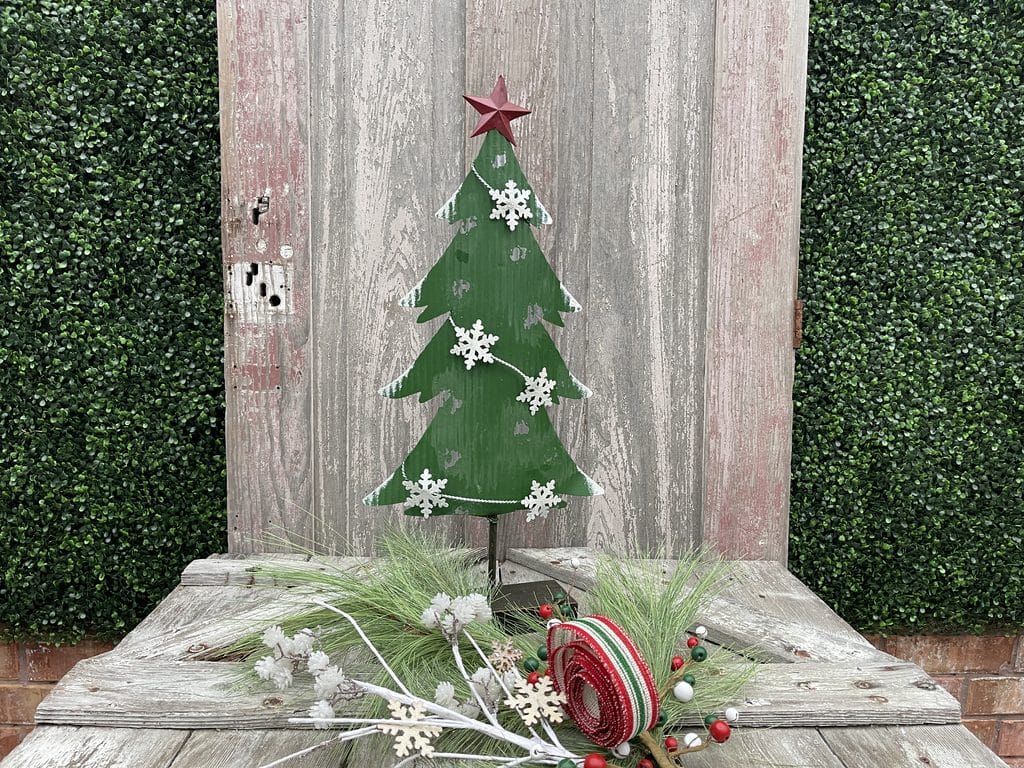
Before adding greenery, Kelea prepares the decorative metal Christmas tree.
The tree has a wing nut underneath that holds its pieces together. For a finished arrangement intended to remain assembled, Kelea adds a little Gorilla Glue to make the connection more permanent.
However, she also explains that you can leave the tree detachable if you prefer to take it apart for seasonal storage.
Attach Floral Foam for the Arrangement
Next, Kelea adds two small blocks of dense floral foam to the bottom of the metal tree.
She uses the firm foam intended for decorative floral arrangements, not the water-absorbing foam used for fresh flowers.
Before attaching the foam, she recommends cleaning the metal surface with alcohol.
Then she uses Gorilla Glue along with hot glue to secure the foam.
The foam pieces are large enough to support the floral stems but small enough to remain hidden beneath the finished arrangement.
Designer tip: Prepare the base carefully before adding decorations. A secure foundation makes the rest of the project easier to assemble.
Establish the Shape With Wispy Pine Greenery
Once the foam is attached, Kelea begins creating the arrangement’s perimeter.
She uses long-needle pine because its wispy texture complements the rustic Christmas tree.
Divide Large Pine Picks Into Smaller Sections
Rather than using an entire pine bush in one spot, Kelea cuts it into smaller pieces.
First, she measures how far she wants each section to extend.
Then she trims the stems, leaving enough length to insert them securely into the foam.
She places one longer pine section toward the left and another toward the right.
These two pieces establish the arrangement’s width.
Work From the Center Outward
Kelea continues filling the arrangement with smaller pine sections, working outward from the center.
She pays attention to the transition point, where the stems change direction.
Because she plans to display this Christmas tree against a wall, she concentrates the floral materials toward the front instead of building a full arrangement around the back.
Designer tip: Think about where your finished piece will be displayed before arranging the greenery. A design against a wall may not need the same depth in the back as one viewed from every side.
Make a Simple Burlap Christmas Bow by Hand
Next, Kelea makes a bow using rustic ribbon that coordinates with the Christmas tree.
The ribbon includes red, green and white, bringing together the colors of the star and snowflake decorations.
Its burlap texture also complements the tree’s rustic finish.
Build the Bow Without Special Equipment
Kelea creates the bow freehand.
She begins with a ribbon tail of approximately 14 inches, then makes loops of roughly five inches.
As she builds the bow, she twists the ribbon at the center to keep the patterned side facing outward.
She creates three loops on each side, including smaller loops near the middle.
Then she secures the center with a cable tie and fluffs the loops.
You can also use a bow maker if that’s your preference, but Kelea demonstrates that this design doesn’t require one.
Attach the Bow Before Adding the Decorative Picks
Kelea places the bow near the center of the arrangement using a floral pin and glue.
She intentionally adds it before the snowflakes and berries.
Why?
Because placing the bow first helps her see exactly where the remaining materials should go.
Finally, she cuts the ribbon tails into neat V-shaped ends and shapes them to extend outward.
Add Rustic Snowflakes and White Pinecones
With the bow in place, Kelea begins adding the decorative snowflake pick.
This pick contains several different elements, including glittery snowflakes, white pinecones and small branches.
Rather than inserting the entire pick, she separates it into smaller sections.
Spread Decorative Elements Throughout the Arrangement
Kelea places a white pinecone section on one side and another on the opposite side.
She keeps the placement balanced without making both sides identical.
Then she positions the glittery snowflakes near the bow.
Some snowflake pieces extend slightly forward, overlapping the ribbon loops.
This is a technique Kelea calls breaking the plane.
Instead of keeping every decorative element behind the bow, she allows some materials to move into the foreground.
The result is a more dimensional arrangement.
Bring the Star Colors Into the Arrangement With Berries
The decorative Christmas tree includes red accents in its star.
To connect the base arrangement with the tree above it, Kelea adds a rustic berry pick containing warm red tones.
The berries also have a wooden texture that complements the metal tree and burlap ribbon.
Use Longer Stems First
Kelea cuts the berry pick into two longer sections.
She positions these toward the outer edges of the arrangement, allowing them to branch into the pine.
Next, she divides the remaining berry stems into shorter pieces.
These smaller sections fill openings closer to the center.
As she works, she lets the berries overlap the greenery instead of pushing every stem deep into the background.
Designer tip: Repeating colors from your base or container in the surrounding florals helps the entire arrangement look connected.
Layer Greenery Around the Bow
After adding the snowflakes and berries, Kelea returns to the remaining pine.
She cuts the leftover greenery into smaller sections and places them around the bow.
Some pine pieces extend forward between the ribbon loops.
Others soften the edges where the bow meets the surrounding floral materials.
This creates a smooth transition between the ribbon and greenery.
Why Layering Matters
When every material sits at the same depth, an arrangement can look flat.
By bringing selected stems forward, Kelea creates a more natural-looking design with depth and movement.
She also points out that thoughtful placement can make a project look full without requiring excessive supplies.
Finish With Curled White Twigs
The final decorative pieces are small white twigs.
Kelea places them where the arrangement needs a little more contrast.
Some remain straight, while others are gently curled.
She demonstrates curling the wired twigs around a finger or glue stick to create soft movement.
The white accents repeat the snowflake color and help connect the different parts of the arrangement.
Finally, she checks the overall shape and makes small adjustments to the greenery.
What Makes This Christmas Tree Arrangement Work?
Several design choices give this project its distinctive appearance.
A strong focal point
The decorative metal Christmas tree remains the star of the design. The floral arrangement supports it rather than competing with it.
Coordinated colors
Red, green and white appear in the tree, ribbon, berries and snowflake accents.
Complementary textures
Rustic metal, burlap ribbon, wooden berries and wispy pine work together to create a consistent style.
Balanced movement
Longer pine stems establish the perimeter, while smaller branches and berries add depth.
Layered decorations
Snowflakes, greenery and berries extend around and slightly in front of the bow, creating a more dimensional arrangement.
Frequently Asked Questions
Can beginners make this DIY Christmas tree arrangement?
Yes. Kelea demonstrates a straightforward process using floral foam, divided greenery picks and a simple freehand bow.
What type of floral foam should I use?
Use firm foam designed for decorative floral arrangements rather than the softer, water-absorbing foam intended for fresh flowers.
Can I take the metal Christmas tree apart for storage?
Yes, if you leave the wing nut connection removable. Kelea permanently secures hers because she is preparing a finished piece, but she explains that a detachable tree may be easier to store.
Do I need a bow maker?
No. Kelea makes this bow by hand, although you can use a bow maker if you prefer.
How can I make a Christmas arrangement look fuller without buying extra greenery?
Divide larger picks into smaller sections, shape the wired branches and use the remaining pieces to fill openings around the bow.
What does breaking the plane mean in floral design?
It means allowing some materials to extend forward or overlap another element, rather than keeping everything at the same depth.
Create Your Own Snowflake Christmas Tree Arrangement
This project shows how a simple decorative Christmas tree can become a charming holiday arrangement with thoughtful floral placement.
Start by securing the base, then establish the perimeter with wispy pine. Add the bow before distributing snowflakes, berries and white pinecones.
Finally, bring smaller greenery pieces forward and finish with curled white twigs.
You’ll have a Christmas decoration that combines rustic textures, coordinated colors and Kelea’s practical floral design techniques.
Explore Kit #1042 — Snowflake Christmas Tree Arrangement
For more floral design tutorials and techniques, visit Kelea’s Design School.
Would you display this Christmas tree arrangement on a mantel, entryway table or as part of a larger holiday display?