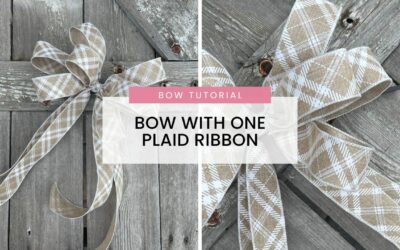
Learn how to tie blast off bows for all your Easter decor! Make four super cute bows with different combinations of Easter ribbons that you can use this Easter season. These Easter Ribbon Bows have three layers of loops so you can mix and match the wired ribbon to create the perfect Easter or Spring bow.
How To Make An Easter Bow
Let me show you how to mix a regular tail bow with a funky bow. These types are bows are perfect to use for any spring or Easter decor! Each bow is a 2-1-1 recipe. That just means how many loops of each layer of ribbon you will be using. Thought this time we are going to mix things up. We’re going to add an extra set of tails for fun. Then end with a bow tie style ribbon on top. Remember that whatever ribbon you pick for the bottom layer is what will dominate the bow. Making it the main focal point. Doesn’t that just sound AMAZING?!

I love using an EZ Bowmaker. It really helps when I’m making bows to act as an extra set of hands. It cuts down on making sure you are handling all of that fun ribbon correctly. This helps keep the right side of the ribbon out so you can see the beautiful pattern nice and bright. It also helps tremendously to keep the loops and tails from slipping out when you are layering different ribbons.
Let’s get started and make the perfect Easter bows using a variety of super cute easter ribbon!
Ingredients
1.5″ fuchsia Color Bunnies Ribbon on 10 Yard Roll
1.5″ White Small and Large Dots on Pink Ribbon on 10 Yard Roll
1.5″ Lime Orange Coral Ombre Striped Ribbon on a 10 Yard Roll
1.5″ Ivory Canvas Green Vertical Vary Stripes Ribbon on a 10 Yard Roll
1.5″ Dark Natural Canvas Pink Roses Ribbon on a 10 Yard Roll
1.5″ Fuchsia & White Gingham Ribbon on 50 Yard Roll
EZ Bow Maker
Cable Ties
Scissors

Directions for Bunny and Pink Polka Dot Bow
- Make a 16” tail with 1 ½” Bunny ribbon and two 6” loops on each side, pinching and twisting in the center. Trim your tails at opposite angles. Add the pink polka dot ribbon make an 8” tail, and have it going up. Make 5 1/2” loops on each side. Trim the second tail downward at an opposite angle.
- Finish it off by adding an additional 8” tails of pink polka dot going the opposite, one up and one down for a crisscross effect. Add one more layer of bunny ribbon with a bow tie. Make a loop wide enough for each side to be 5”, overlapping a bit in the back. Gather the center and add into the center dowels.
- Place your cable tie underneath and press with your finger as you lift off the Bowmaker. Add a second cable tie through the back before cinching closed.
- Cut a 12” strip of polka dot and fold over widthwise. Tie around the center and cut the excess in the back.
Directions for Carrot and Stripes Bow
- Start with a 16” tail of the striped ribbon and twist in the center. Make two 6” loops on both sides, fluffing as you go. Trim the tails at opposite angles.
- Add an 8” tail going up with the carrot ribbon and make a 5” loop on each side. Trim another 8” tail down downward. Make 8” crisscross tails cut at opposite angles.
- Create a bow tie with enough ribbon for 5” loops and scrunch into the center. Place your cable tie underneath and press together as you lift the bow up. Spread and fluff each loop. Add a second cable tie pull and cinch tight.
- Cut a 12” length of carrot ribbon to fold over and tie around the center to cover the cable ties.
Directions for Sunflowers and Stripes Bow
- Start with the sunflower ribbon with a 16” tail. Make two 6” loops on both sides. Trim the tails at opposite angles.
- Add the green striped ribbon with an 8” tail going up. Make one 5 ½” loop on each side and twist in the center. Add another crisscross of 8” tails trimming at opposite angles.
- Use the sunflower ribbon to make a bowtie with 5” loops. Gather the center and slide into the Bowmaker. Run your cable tie along the side and lift off. Fluff and spread each loop and add another cable tie through the back before cinching tight.
- Cut a 12” strip of striped ribbon and fold over widthwise so the green stripe will be around the middle. Tie around the center and cut the excess in the back.
Directions Pink Roses and Pink Check Bow
- Make a 16” tail with the pink rose ribbon. Make two 6” loops on each side and trim the second tail at an opposite angle.
- Add the pink check ribbon with an 8” tail going up. Make a 5 ½” loop on each side and another tail coming down. Add an extra set of crisscross tails that are 8” long trimmed at an angle.
- Make your bowtie with the rose ribbon with enough ribbon for 6” loops. Gather the center and add to your bow. Run your cable tie along the side and lift off. Fluff and spread each loop and add another cable tie through the back before cinching tight.
- Cut a 12” strip of pink check ribbon and fold over widthwise. Tie around the center and cut the excess in the back.
How To Use An EZ Bow Maker
Using an EZ Bow maker just helps you hold your ribbon better when making a bow. A little tip I have is to make sure that you twist the ribbon each time you add it into the center. That simple step keeps all your loops facing the right way.
Want to learn more?
Join the free Facebook group Keleas Bloomarino Buds Wreath Making Community


