Create Elegant Spring Table Decor with this DIY decor kit.
If you love decorating your home with beautiful seasonal florals and charming Easter decor, this Cherry Blossom Bunny centerpiece is a stunning project to try. Inspired by an enchanted spring garden, this arrangement combines soft cherry blossoms, lush greenery, rustic twigs, and a sweet bunny focal point.
If you enjoy learning designs like this, you can also explore tutorials and seasonal projects inside Kelea’s Design School, where you can watch step-by-step demonstrations and see new floral designs throughout the year.
Gathering Your Supplies
Before starting this Easter centerpiece, gather the materials used to create the layered, dimensional look.
Main elements include:
- Large neutral bunny base
- Cherry blossom bush
- Long cherry blossom sprays
- Cream-green fishtail fern bush
- Artificial twig branches
- Lime green frosted berry stems
- Floral foam blocks
- Burlap ribbon
- Gorilla Glue
- Hot glue
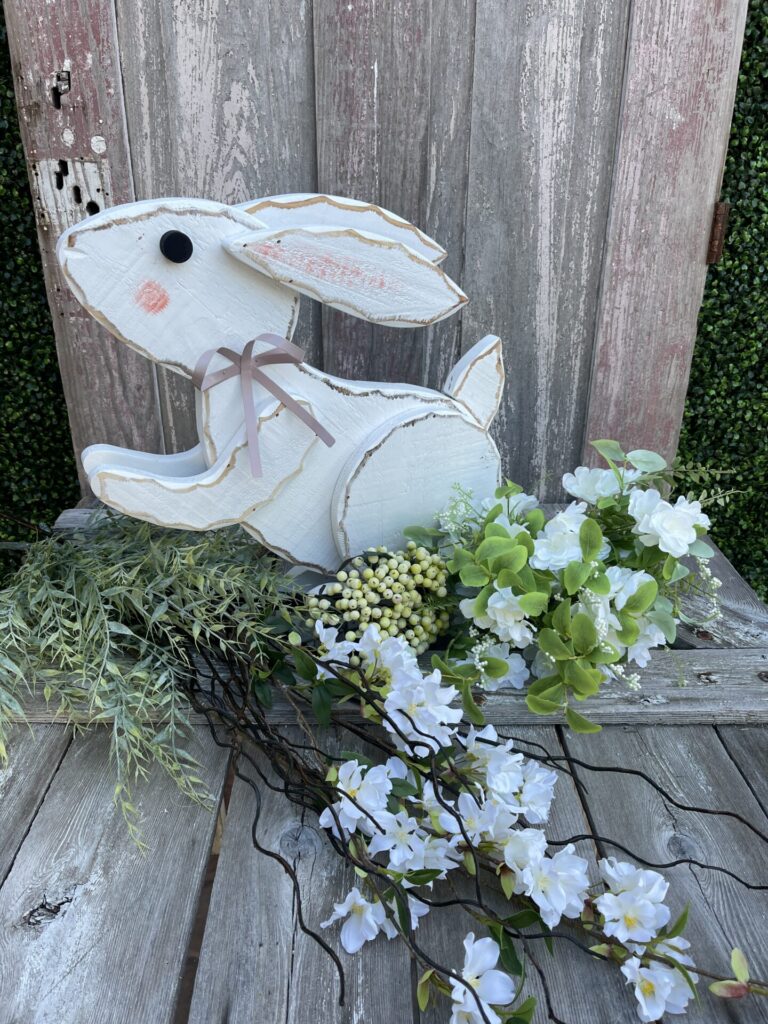
These materials combine to create the lush garden effect that makes this arrangement feel full and professional.
Preparing the Foundation
Before adding florals, the mechanics must be secure.
Start by finishing the bottom of the foam block with burlap ribbon, which prevents scratching surfaces and gives the design a clean finish.
Next, use the double-glue method, combining Gorilla Glue for long-term strength and hot glue for an instant bond.
Position the foam blocks so the design can be seen from all sides:
- One foam block near the bunny’s feet
- A smaller foam block on the back “hip”
This setup allows the arrangement to become a full 360-degree centerpiece.
Building the Spring Meadow
Once the base is secure, you can begin layering greenery and florals to create the garden effect.
Step 1: Set the Perimeter
Start with the fishtail fern. Place one stem on each side of the front foam block to frame the bunny and establish the foundation of the design. This greenery creates the foreground and visual base of the arrangement.
Step 2: Add Height and Depth
Insert long cherry blossom sprays behind the bunny and between the ears.
This technique creates layered dimension so the bunny appears to be emerging from a lush spring meadow.
Untitled document – Google Docs
Step 3: The KDS Cluster Method
Break down the cherry blossom bush into smaller picks and group them together near the base of the bunny.
Keep these blooms low to the table to fill gaps and soften the transition between the bunny and the foam blocks.
This clustering technique helps achieve a full, professional floral look.
Step 4: Add High-Drama Twigs
Twigs create structure and movement within the arrangement.
Cut your twigs long and short:
Long twigs
Place them high and arching above the bunny to form a natural canopy.
Short twigs
Add these closer to the base to introduce rustic texture.
Step 5: Pops of Color
Insert lime green berry stems to brighten the design and highlight the greenery.
A helpful placement approach:
- Cluster five berries in the front
- Place one toward the back
These bright accents pull out the fresh greens in the fern leaves.
The Professional Finishing Touches
The final steps help the arrangement look polished and complete.
Hide the Back Mechanics
Use small scraps of cherry blossoms and Spanish moss to cover visible foam and mechanics on the back of the arrangement.
Add a Decorative Bow
The original metal bow can remain, or you can swap it for a custom ribbon bow to personalize the centerpiece.
A designer bow can add extra color, texture, and seasonal flair.
Pro Tip for Maximum Impact
Always “shake hands” with your stems by adjusting wired petals and leaves so they face the viewer.
This small step makes a huge difference in how full and professional the arrangement appears.
A Beautiful Easter Centerpiece for Your Home
This Cherry Blossom Bunny centerpiece combines:
- soft florals
- lush greenery
- natural twigs
- bright seasonal accents
The result is an elegant spring table centerpiece that feels fresh, cheerful, and full of garden charm.
It works beautifully for:
- Easter tablescapes
- entry tables
- dining room centerpieces
- spring home decor
Want to Learn More Designs Like This?
If you enjoy creating seasonal floral designs like this one, you can learn more techniques inside Kelea’s Design School
Inside the school you’ll find:
- seasonal wreath tutorials
- floral arrangement designs
- bow making techniques
- decorating ideas for every season
Learn how to create designs like this one by joining
Kelea’s Design School!
Each month, we have 4 detailed tutorials, including supply lists, tips and tricks, and access to a community of fabulous designers who love to share and help each other.

It’s a wonderful place to grow your skills and discover new ways to decorate your home with beautiful floral designs.