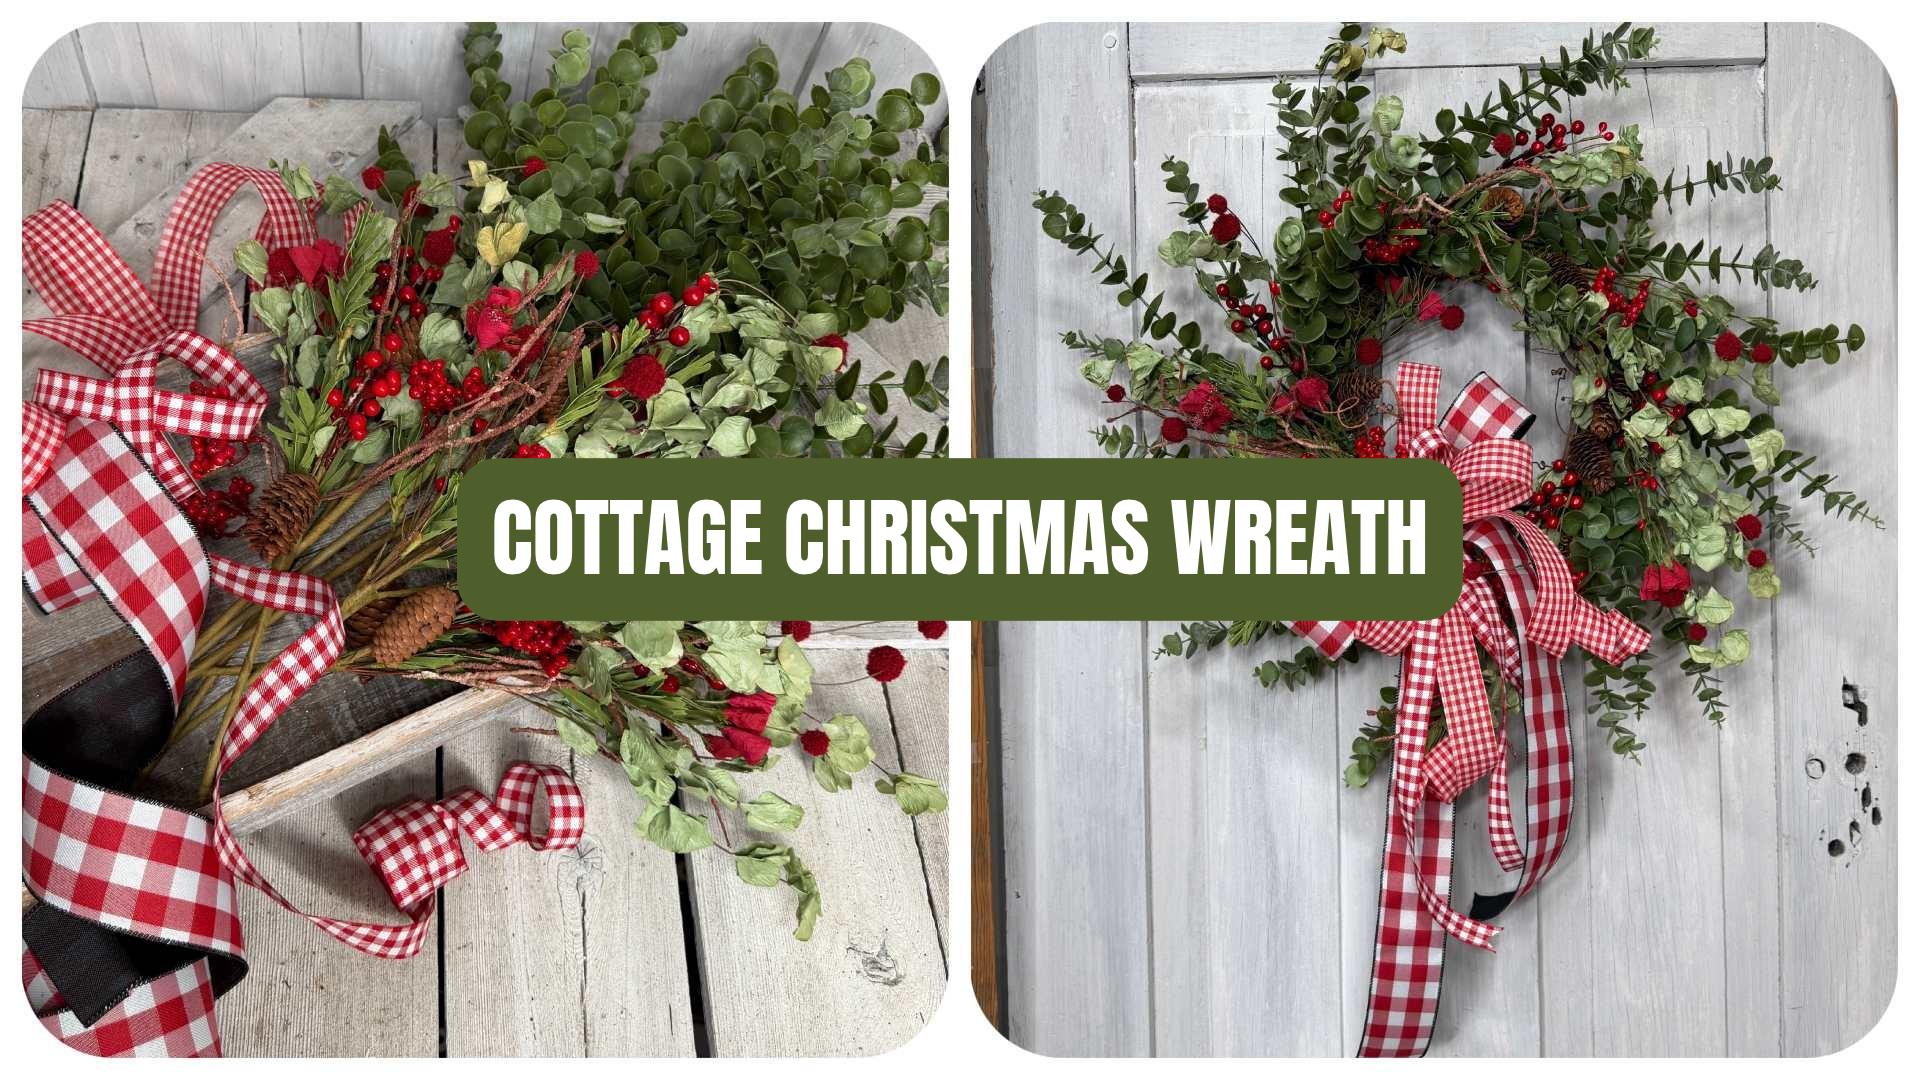
There’s something special about Christmas at the cottage. The natural greenery, beautiful red berries, rustic pinecones, and familiar holiday colors bring back memories of Christmases spent with family.
If you love that timeless country Christmas look, this DIY cottage Christmas wreath is a wonderful project to make your own.
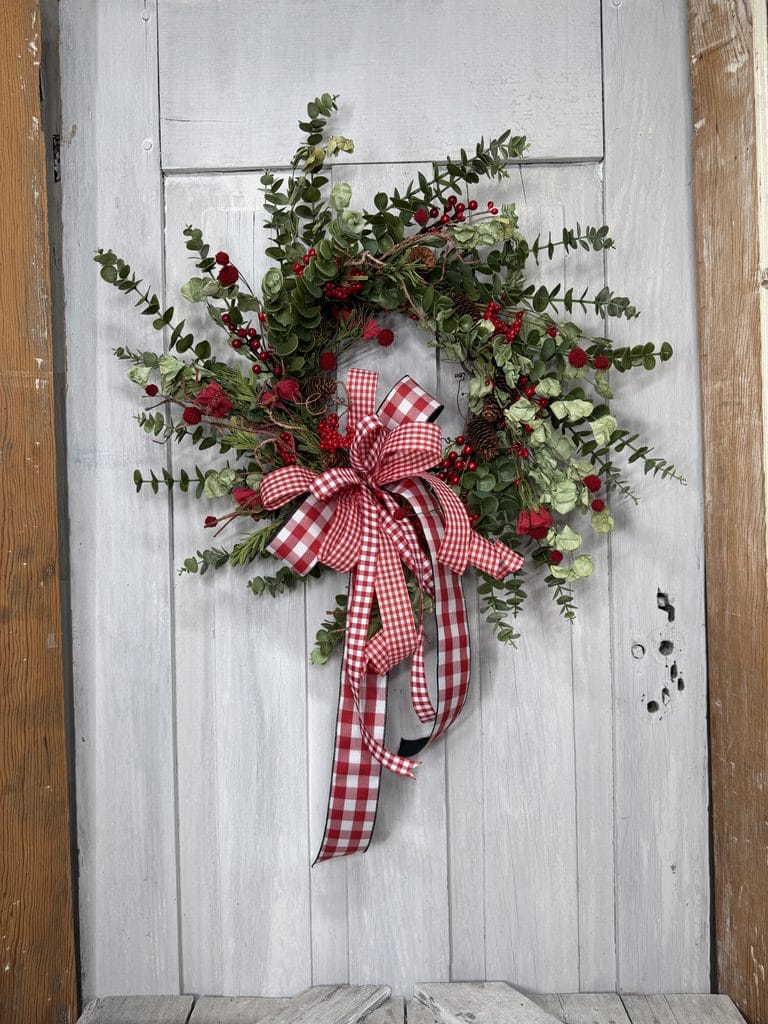
Kelea combines olive-green eucalyptus with dried-look berries, natural twigs, pinecones, and a coordinating ribbon bow. The finished wreath has beautiful movement and a relaxed, collected appearance that works with traditional Christmas decorating.
And you don’t have to be an experienced wreath maker to follow along!
🎄 Shop the Christmas at the Cottage Wreath Kit
Watch Kelea Make the Christmas at the Cottage Wreath
Supplies for Your Cottage Christmas Wreath
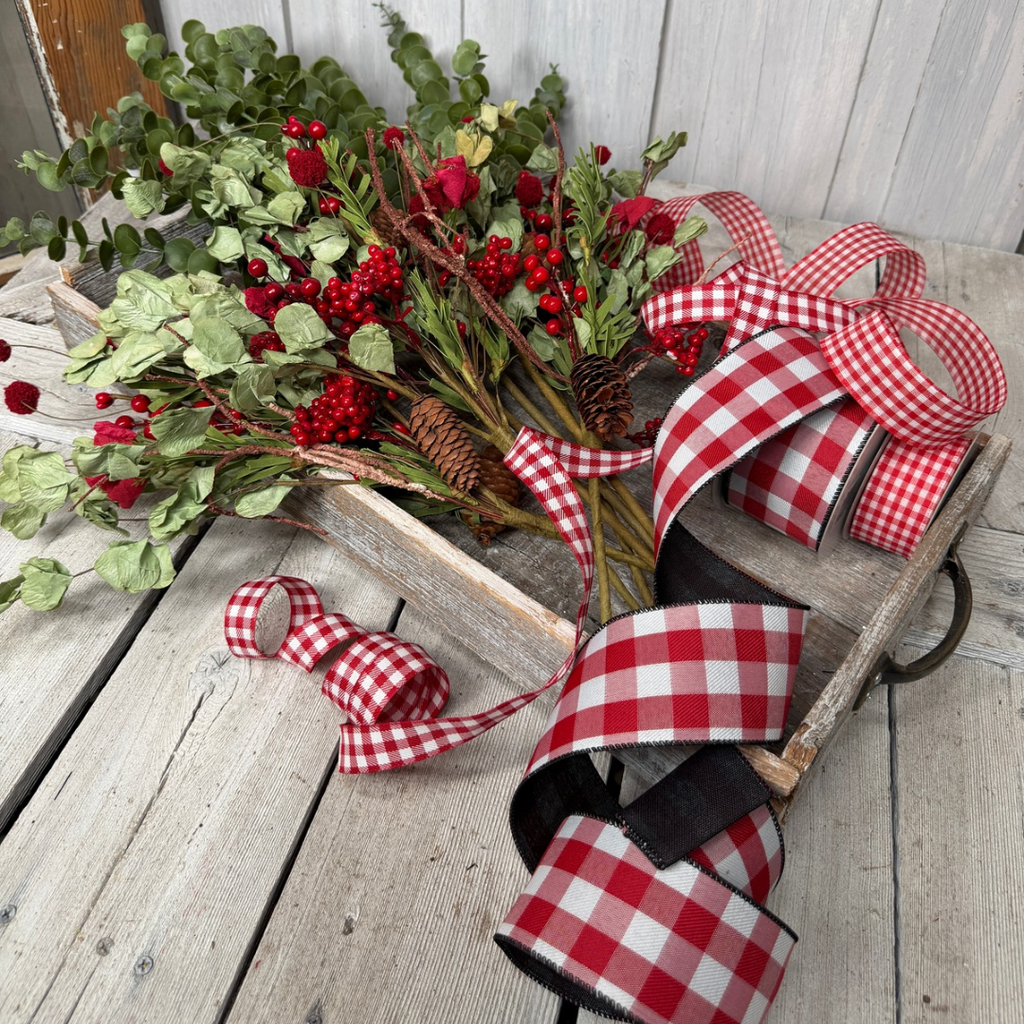
For this project, Kelea uses:
- A 14-inch grapevine wreath base, purchased separately
- Olive-green eucalyptus from the kit
- Christmas berry sprays with dried-look leaves
- Decorative twigs and pinecones
- A coordinating Christmas ribbon bow
- Floral glue and wire cutters
- Spanish moss for covering glue and securing stems
Important: The Christmas at the Cottage Wreath Kit does not include the grapevine wreath base. You’ll need to supply your own 14-inch base.
You can find the kit here: Christmas at the Cottage Wreath Kit page.
Step 1: Prepare the Eucalyptus Before Building Your Wreath
Kelea begins by preparing the eucalyptus stems.
This olive-green eucalyptus is especially versatile because it works beautifully throughout the year, not just at Christmas.
Its muted coloring coordinates with the red berries, dried leaves, and rustic pinecones in this design.
Divide the greenery into smaller sections
Kelea cuts each eucalyptus stem into two sections.
One section contains approximately four branches, while the other contains two.
She leaves roughly two inches of stem so each section can be inserted securely into the grapevine wreath.
Preparing all the greenery before beginning makes the assembly process faster and helps distribute the materials evenly.
Kelea’s tip: Save the sturdy wired stem pieces you cut away. They can be useful for attaching decorative elements to future floral projects.
Step 2: Establish the Wreath’s Perimeter
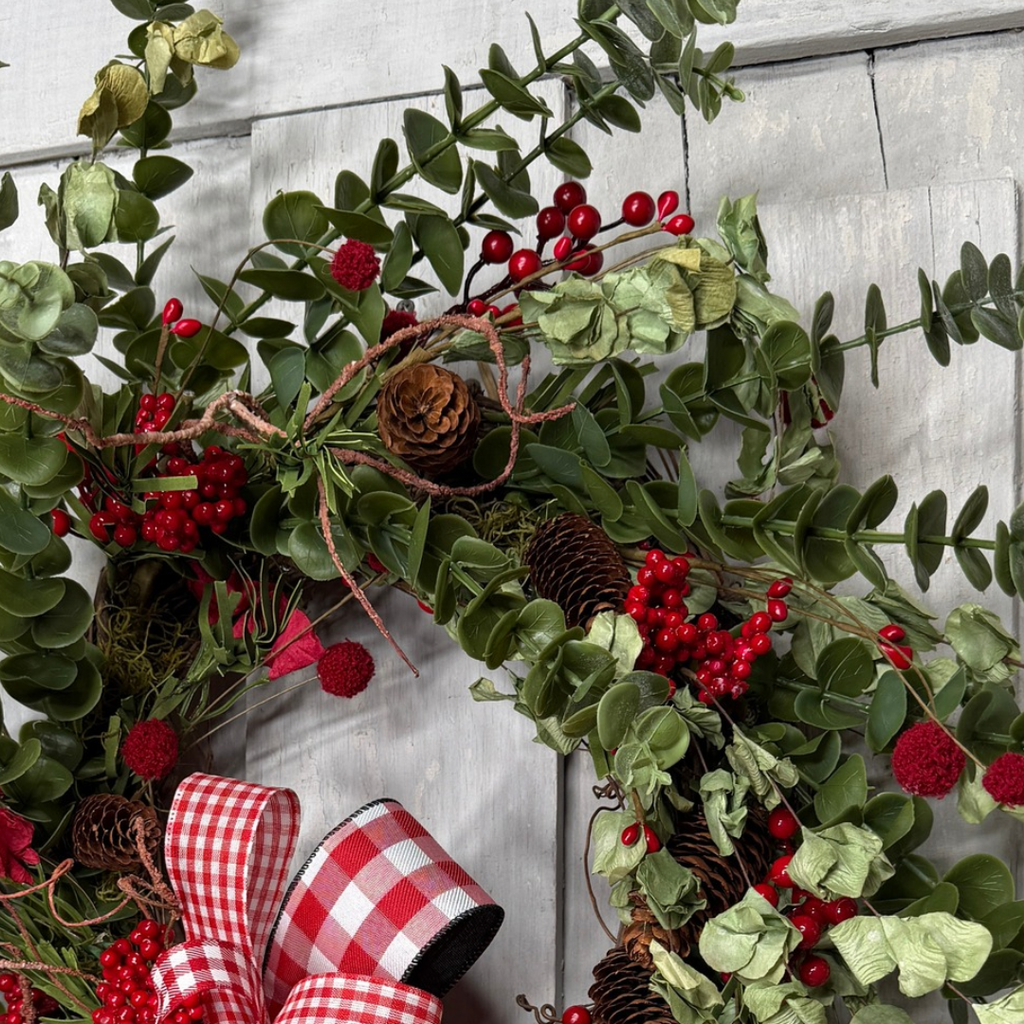
Once the eucalyptus is prepared, Kelea begins building the wreath’s outer shape.
She starts with a simple placement method: top, bottom, left, and right.
This creates four evenly spaced starting points around the wreath.
Fill the spaces between the greenery
Next, she adds eucalyptus between the original placements.
She continues working around the wreath until the greenery establishes a consistent outer perimeter.
This technique creates a balanced foundation without making the design appear overly structured.
Secure each piece
Kelea applies floral glue to the stems before pressing them into the grapevine.
She adds small amounts of chartreuse Spanish moss where needed.
The moss conceals exposed glue and helps support the stems within the grapevine.
Design lesson: Building the perimeter first establishes the wreath’s overall shape before adding the decorative materials.
Step 3: Identify Your Bow Zone
Before adding the Christmas berry sprays, Kelea studies the wreath to determine where the bow should go.
She looks for an area with a little less greenery or an opening that would benefit from a focal point.
This becomes what Kelea calls the bow zone.
Leave room for the ribbon
Once you’ve chosen your bow position, avoid filling that area with too many decorative stems.
Kelea even suggests using a clothespin to mark the spot if you’re worried about forgetting where it belongs.
But remember, the position isn’t permanent.
As the wreath develops, you can move the bow zone if another area looks better.
Kelea’s tip: Let the design guide your decisions. You don’t have to commit to every placement before you begin.
Step 4: Prepare the Christmas Berry and Pinecone Sprays
Now it’s time to introduce the materials that give this wreath its nostalgic Christmas personality.
Kelea uses sprays featuring red berries, dried-look foliage, pinecones, and natural twigs.
Instead of inserting the entire bush into the wreath, she separates it into smaller sections.
Prepare your stems in advance
She cuts the individual clusters apart and cleans up the stem ends.
If a berry or pinecone comes loose during preparation, she simply reattaches it or saves it for the finishing details.
This keeps the materials organized and ready to use.
Mix the textures
Some sections contain pinecones, while others feature berries or twigs.
Kelea alternates these different materials as she works around the wreath.
This creates variety without making every section identical.
Design lesson: Preparing materials before assembly gives you more control over placement, texture, and the finished shape.
Step 5: Layer the Christmas Sprays Around the Outside
With the eucalyptus perimeter complete, Kelea begins adding the berry-and-pinecone sections.
She works around the outer portion of the wreath, inserting the decorative sprays between the greenery.
Keep the materials visible
Kelea positions some stems slightly behind the eucalyptus while allowing the berries, twigs, and pinecones to remain visible.
She also pays attention to the direction of each spray so the materials flow naturally around the wreath.
Protect your bow zone
As she works, Kelea leaves the designated bow area relatively open.
This ensures there will be enough space for the ribbon without having to remove large amounts of greenery later.
Kelea’s tip: Insert your stems into the grapevine rather than pushing them all the way through the back. A neatly constructed back is part of a well-finished wreath.
Step 6: Add Shorter Sprays to the Inside of the Wreath
Once the outer perimeter is decorated, Kelea turns her attention to the inside.
She cuts the remaining berry-and-pinecone sections shorter so they fit within the wreath’s center opening.
Create depth with shorter stems
These smaller sections fill the inner portion without competing with the longer materials around the outside.
Kelea continues alternating the decorative elements and adjusting the placement as needed.
At this stage, she also decides to move her original bow zone to a slightly different location.
That’s an important reminder that floral design is a creative process.
You can make adjustments as you work!
Step 7: Attach the Christmas Ribbon Bow
With the greenery and decorative sprays in place, Kelea attaches the ribbon bow.
She positions it toward the right-hand side of the wreath, allowing the ribbon tails to flow downward.
Secure the bow to the grapevine
The bow is attached using a cable tie.
Kelea threads the tie through several layers of grapevine near the front of the wreath, tightens it, and trims the excess.
Then she shapes the ribbon loops and adjusts the tails.
Some tails can sit in front of the greenery, while others can be tucked slightly behind it.
This makes the bow look like part of the floral arrangement rather than a separate decoration.
Design lesson: Your ribbon should work with the greenery and follow the movement of the wreath.
Step 8: Add the Finishing Details Around the Bow
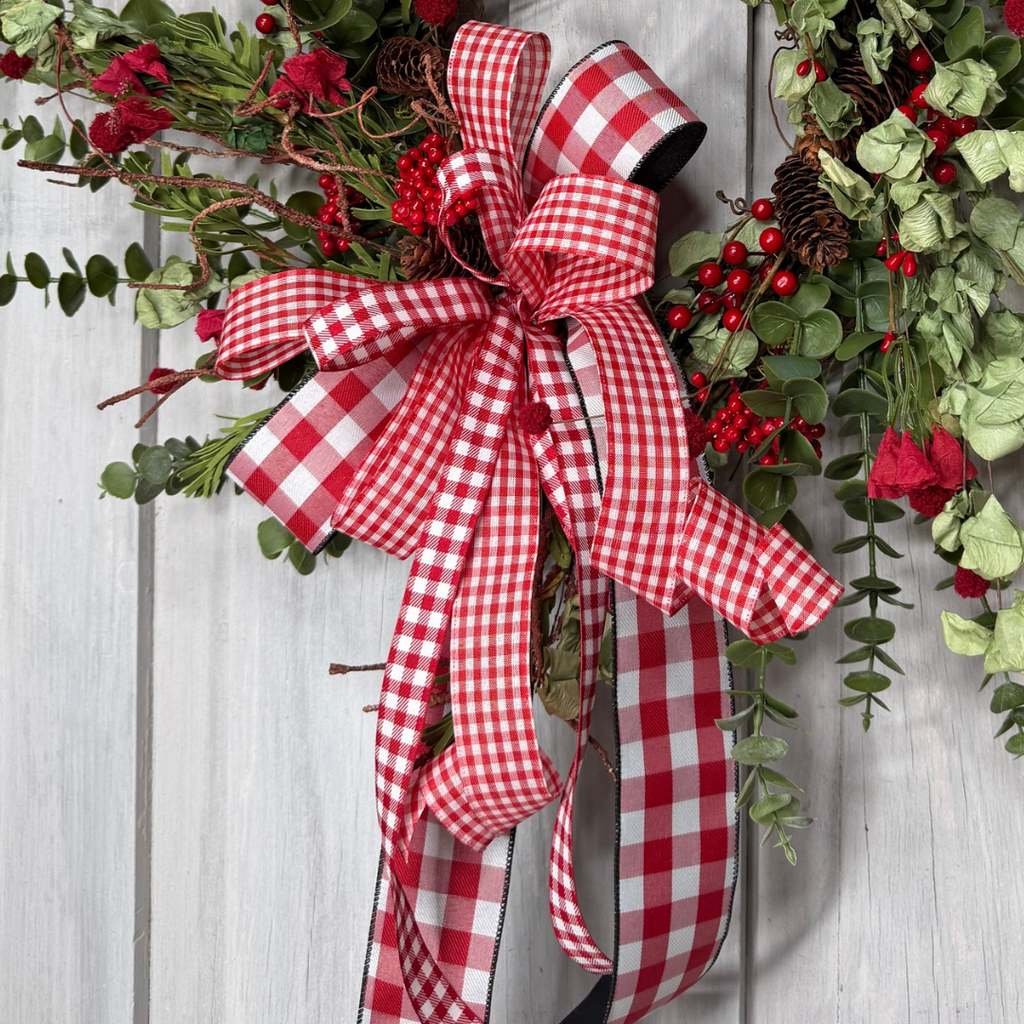
One of Kelea’s most important teaching points comes at the very end.
She uses the remaining berries, twigs, pinecones, and greenery to finish the area around the bow.
Add natural movement
Kelea curls some of the decorative twigs around her finger.
She explains that you can also use a glue stick to create gentle curls.
These small details introduce movement and help the decorative sprays flow outward from the ribbon.
Fill any remaining gaps
A pinecone can be positioned near the top of the bow, while small berry clusters can be tucked around the ribbon loops.
If you don’t have leftover materials, Kelea suggests trimming a small piece from an area where it’s less visible and moving it to the focal point.
The goal is to create a polished, complete design without wasting supplies.
Kelea’s tip: It’s the little details that separate an ordinary wreath from a thoughtfully finished floral design.
Why This Cottage Christmas Wreath Works
This wreath combines several floral design principles that Kelea teaches throughout her classes.
A balanced perimeter
The eucalyptus creates a consistent foundation and establishes the overall shape.
Natural texture
Twigs, pinecones, dried-look leaves, and berries provide variety without overwhelming the design.
Traditional Christmas colors
Olive-green eucalyptus and red berries create a timeless combination that coordinates with many decorating styles.
A well-placed focal point
The ribbon bow draws attention while remaining connected to the surrounding greenery.
Thoughtful finishing details
Curled twigs, small berry clusters, and carefully placed pinecones bring the entire design together.
Frequently Asked Questions
What size wreath base does Kelea use?
Kelea uses a 14-inch grapevine wreath base. The base is purchased separately from the Christmas at the Cottage Wreath Kit.
Is this Christmas wreath beginner-friendly?
Yes. Kelea demonstrates the project step by step, beginning with preparing the eucalyptus and establishing the perimeter before adding the decorative materials.
Why does Kelea use Spanish moss?
Spanish moss helps conceal glue and supports the stems within the grapevine wreath. Kelea uses chartreuse Spanish moss in this project.
Can I move the bow after deciding where it should go?
Yes! Kelea changes her original bow placement as the wreath develops. It’s perfectly fine to adjust your design as you work.
How do I make the wreath look fuller?
Build the perimeter with longer eucalyptus pieces, then add shorter decorative sprays to the inside. This creates fullness and dimension without overcrowding the design.
What other Christmas decorations coordinate with this wreath?
Kelea mentions that the country-inspired style works beautifully with gingerbread decorations, peppermints, and traditional Santa-themed decor.
Bring Christmas at the Cottage to Your Front Door
There’s a reason traditional Christmas greenery, red berries, and natural pinecones never go out of style.
They bring back memories of holidays past while creating something beautiful for the Christmases still to come.
This Christmas at the Cottage Wreath is a wonderful way to add that familiar holiday feeling to your home.
And with Kelea guiding you through the process, you’ll learn floral design techniques you can use long after Christmas.
🎄 Shop the Christmas at the Cottage Wreath Kit
Want to learn more about wreath making, floral design, and creating coordinated seasonal collections? Visit Kelea’s Design School to explore Kelea’s classes and membership.
Don’t just decorate, design!