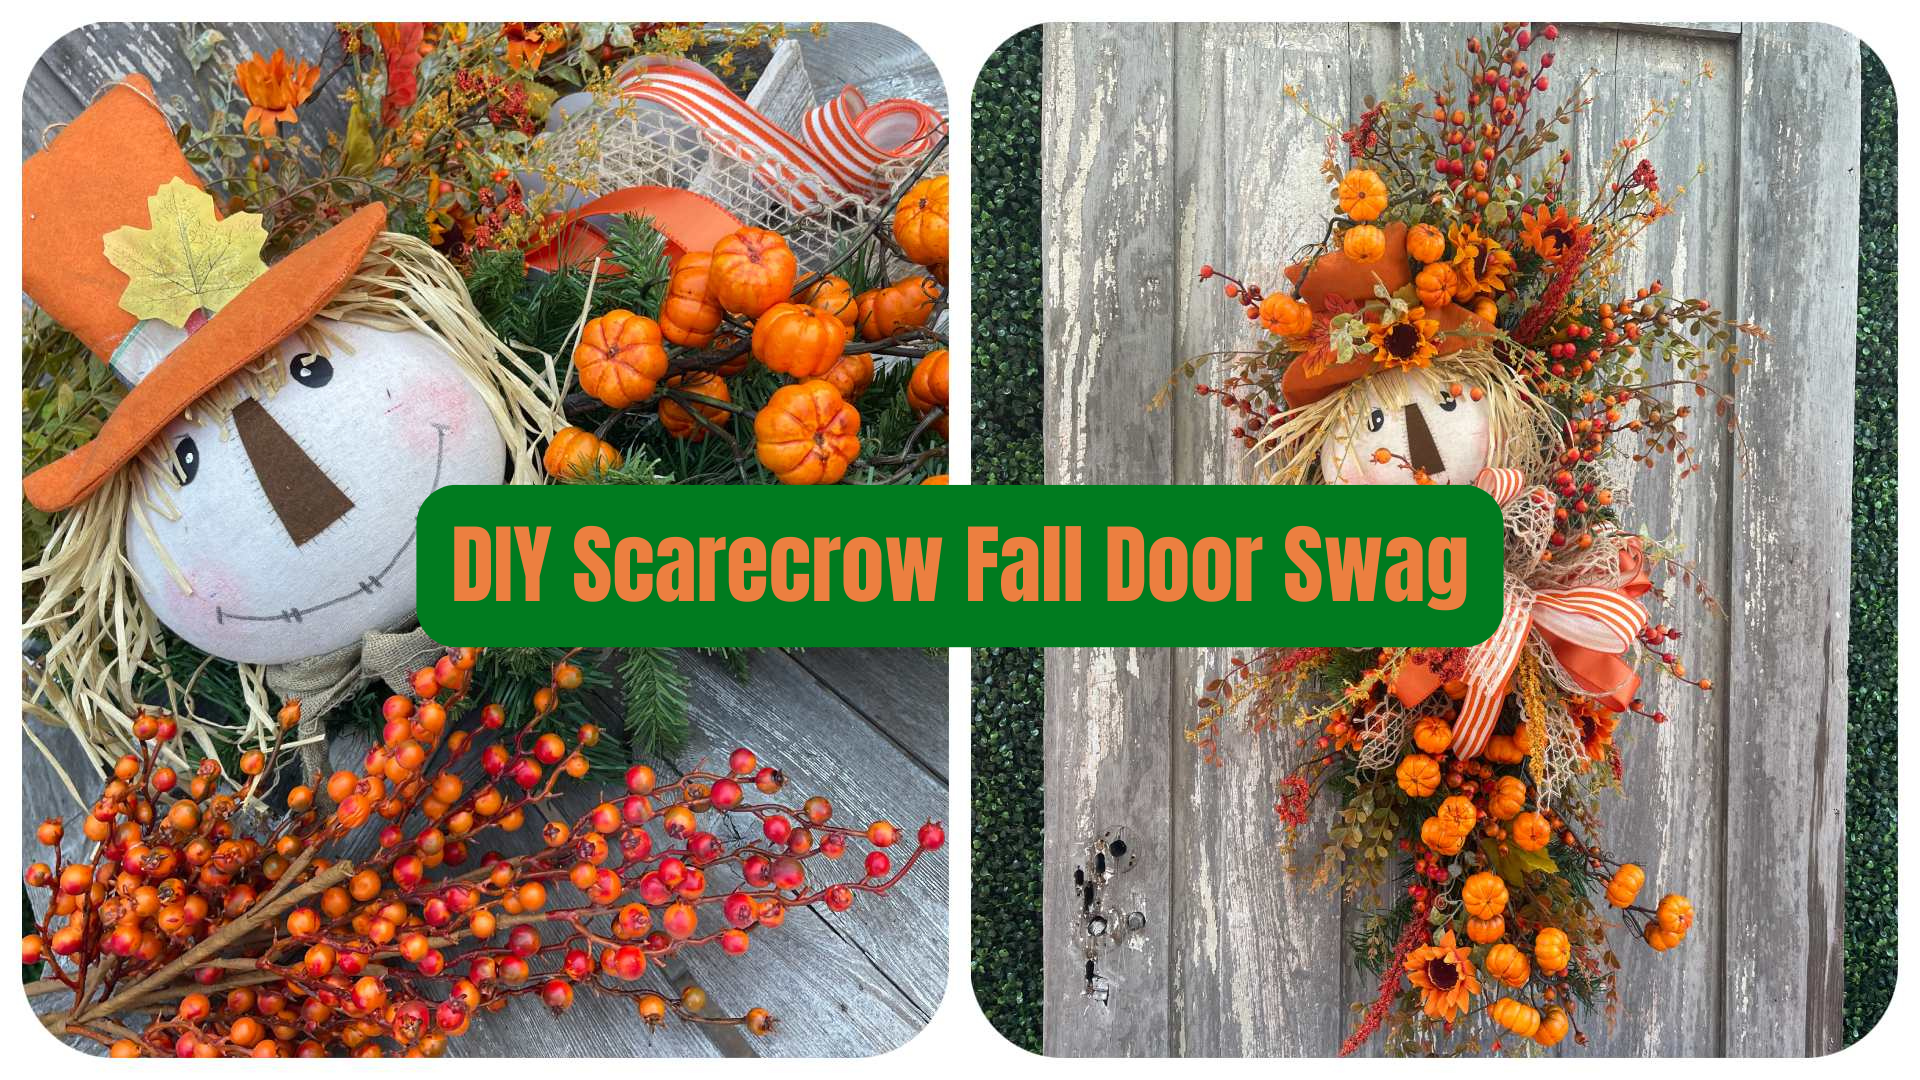
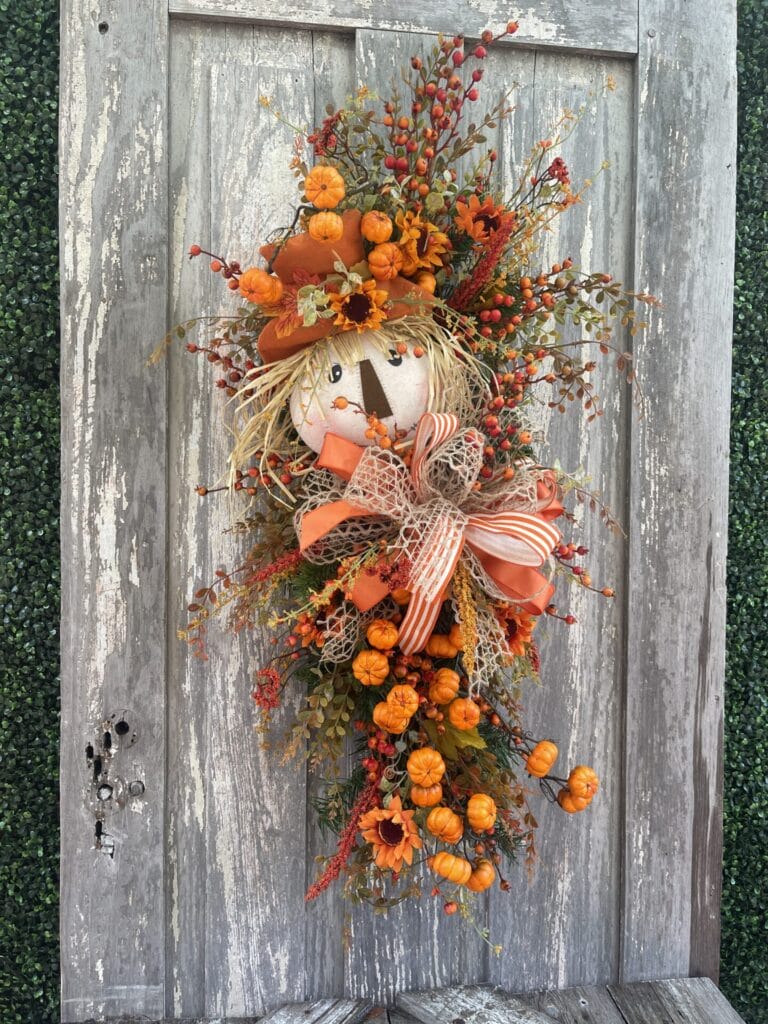
Nothing says “welcome” quite like a beautiful fall door swag filled with rich autumn colors, cheerful sunflowers, pumpkins, berries, and an adorable scarecrow greeting your guests.
If you’ve been searching for a DIY Fall Door Swag Kit that’s both beginner-friendly and designer inspired, this project is a wonderful choice. The Scarecrow Pumpkin Sunflower Fall Door Swag Kit combines classic fall elements with professional design techniques to create a full, dimensional arrangement you’ll enjoy displaying from the first signs of autumn through Thanksgiving.
Whether you’re creating it for your own home or making it as a thoughtful gift, this project is designed to be enjoyable while teaching techniques you’ll use again and again.
👉 Shop the complete kit here:
https://www.keleas.com/product/scarecrow-pumpkin-sunflower-fall-door-swag-kit/
Learn Alongside Kelea
Every project is an opportunity to build your floral design skills.
If you enjoy learning new techniques, consider joining Kelea’s Design School, where you’ll find step-by-step tutorials, creative inspiration, and designer tips that help you create beautiful seasonal décor throughout the year.
Why You’ll Love This DIY Fall Door Swag Kit
This design captures everything people love about autumn.
- Bright orange pumpkins
- Cheerful sunflower accents
- Rich berry sprays
- Layered seasonal greenery
- Textured designer ribbon
- A whimsical scarecrow focal point
The result is a full, flowing door swag with plenty of movement, texture, and dimension that looks beautiful on a front door, covered porch, entryway, or even inside your home.
What’s Included in the Kit
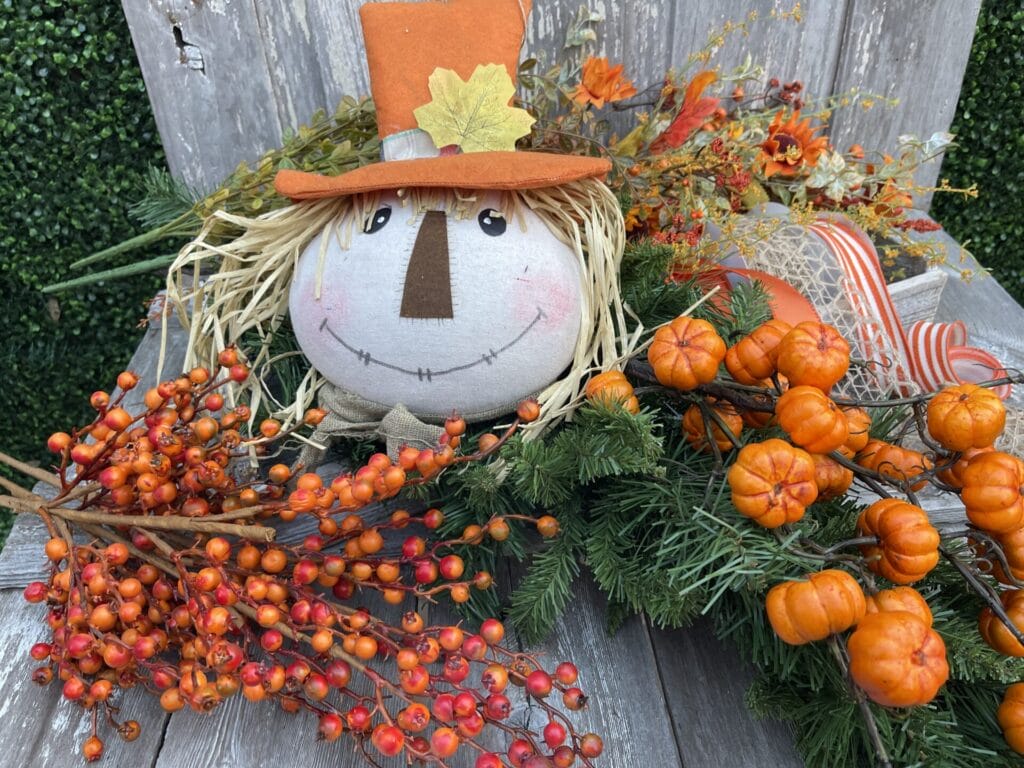
The Scarecrow Pumpkin Sunflower Fall Door Swag Kit includes carefully selected coordinating materials that make designing easier.
Highlights include:
- Pine swag base
- Seasonal greenery
- Berry sprays
- Pumpkin stems
- Sunflowers
- Premium coordinating ribbons
- Scarecrow head
- Additional seasonal accents
Every material has been chosen to work together, making it simple to achieve a professional-looking finished design.
Professional Techniques You’ll Learn
One of the things that makes this tutorial so valuable is that Kelea doesn’t simply show you where to glue flowers.
She explains why each design decision creates a better finished piece.
Throughout the tutorial you’ll learn techniques including:
- Building on a pine swag base
- Setting the perimeter
- Layering greenery for fullness
- Creating visual movement
- Using transitional placement
- Designing with flow
- Balancing focal elements
- Softening ribbon with greenery
- Reinforcing heavier pieces for durability
These are professional design concepts that can be applied to countless future wreaths and floral arrangements.
Start with a Strong Foundation
The design begins with a pine swag base.
One reason Kelea enjoys working with pine bases is because the built-in wires make attaching stems much easier while helping secure materials as the arrangement grows.
Instead of fighting the mechanics, you can focus on creating a beautiful design.
The Secret Is Setting the Perimeter
One of the first lessons in this tutorial is something Kelea calls setting the perimeter.
Rather than placing flowers randomly, the initial greenery establishes the finished size and graceful outline of the swag.
This simple step creates:
- Better balance
- Consistent proportions
- Natural movement
- A professional silhouette
As more layers are added, every element supports that original shape instead of competing with it.
Layer Greenery Before Adding the Focal Pieces
Instead of immediately adding the scarecrow and bow, the greenery is built in stages.
The primary greenery creates the foundation.
Secondary greenery adds texture.
Berry sprays introduce color.
Only after the structure is complete are the focal pieces added.
This layering technique creates incredible depth while allowing every element to remain visible.
Create Natural Movement Throughout the Design
One of the standout techniques in this project is creating flow.
Rather than placing stems straight out from the center, Kelea gently zigzags the greenery, berries, and pumpkin stems to guide your eye through the arrangement.
The finished swag feels organic and full of movement rather than stiff or symmetrical.
Build Around the Scarecrow Focal Point
The cheerful scarecrow becomes the heart of the arrangement.
Once positioned, the bow nestles beside it while the surrounding florals frame the face naturally.
This creates a welcoming centerpiece that immediately draws attention without overpowering the surrounding design.
Make Your Design Last
Kelea spends extra time reinforcing heavier elements.
Using floral pins, wire, glue, and the pine base together helps ensure the scarecrow remains secure whether the swag is displayed on your front door, transported to a craft show, or shipped to a customer.
These construction tips are just as valuable as the decorating techniques themselves.
Add Whimsy with Pumpkin Stems
The playful pumpkin stems give this project its personality.
Instead of simply filling empty spaces, they’re used to continue the visual line established earlier in the greenery.
The result is a design that feels lively, balanced, and full of seasonal charm.
Finish with Designer Details
The final embellishments make all the difference.
Small berries soften the bow.
Additional greenery blends the ribbon naturally into the arrangement.
Tiny accents added around the scarecrow’s hat complete the design without making it feel crowded.
These finishing touches are what transform a pretty project into one that looks professionally designed.
Where to Display Your Finished Swag
This project looks beautiful in many locations, including:
- Front doors
- Covered porches
- Entryways
- Interior doors
- Fireplace mantels
- Gallery walls
- Farmhouse decorating
- Seasonal displays
Its traditional orange palette transitions beautifully from September through Thanksgiving.
Perfect For
This DIY Fall Door Swag Kit is perfect for:
- Beginning floral designers
- Experienced wreath makers
- Seasonal home decorators
- Handmade gift makers
- Craft show vendors
- Anyone who loves decorating for autumn
Frequently Asked Questions
Is this project beginner-friendly?
Yes. The tutorial walks you through the design step by step while teaching professional floral design techniques.
Can I make changes to the design?
Absolutely. Kelea even discusses how you can omit the scarecrow if you’d like a more traditional autumn look while maintaining the overall design.
How long can I display this swag?
Its classic autumn colors make it appropriate from early fall through Thanksgiving.
What makes this kit different?
The kit focuses not only on creating a beautiful finished project but also on teaching professional construction and design techniques you’ll use again.
Is the tutorial included?
Visit the product page for complete details about everything included with this kit and available tutorial options.
Create Beautiful Seasonal Décor with Confidence
One of the most rewarding parts of creating your own seasonal décor is seeing your finished design hanging proudly on your front door.
With layered greenery, cheerful pumpkins, rich berries, beautiful ribbon, and a friendly scarecrow, this project captures everything people love about decorating for fall.
Whether you’re creating your very first swag or adding another seasonal favorite to your collection, the Scarecrow Pumpkin Sunflower Fall Door Swag Kit offers a fun project filled with techniques you’ll use for years to come.
🧡 Shop the kit today:
https://www.keleas.com/product/scarecrow-pumpkin-sunflower-fall-door-swag-kit/
Continue Learning with Kelea’s Design School
If you enjoyed this project, you’ll love continuing your floral design journey with Kelea’s Design School.
Discover even more seasonal wreaths, swags, centerpieces, floral arrangements, bows, and decorating inspiration while learning professional techniques that help every project look polished and beautifully finished.