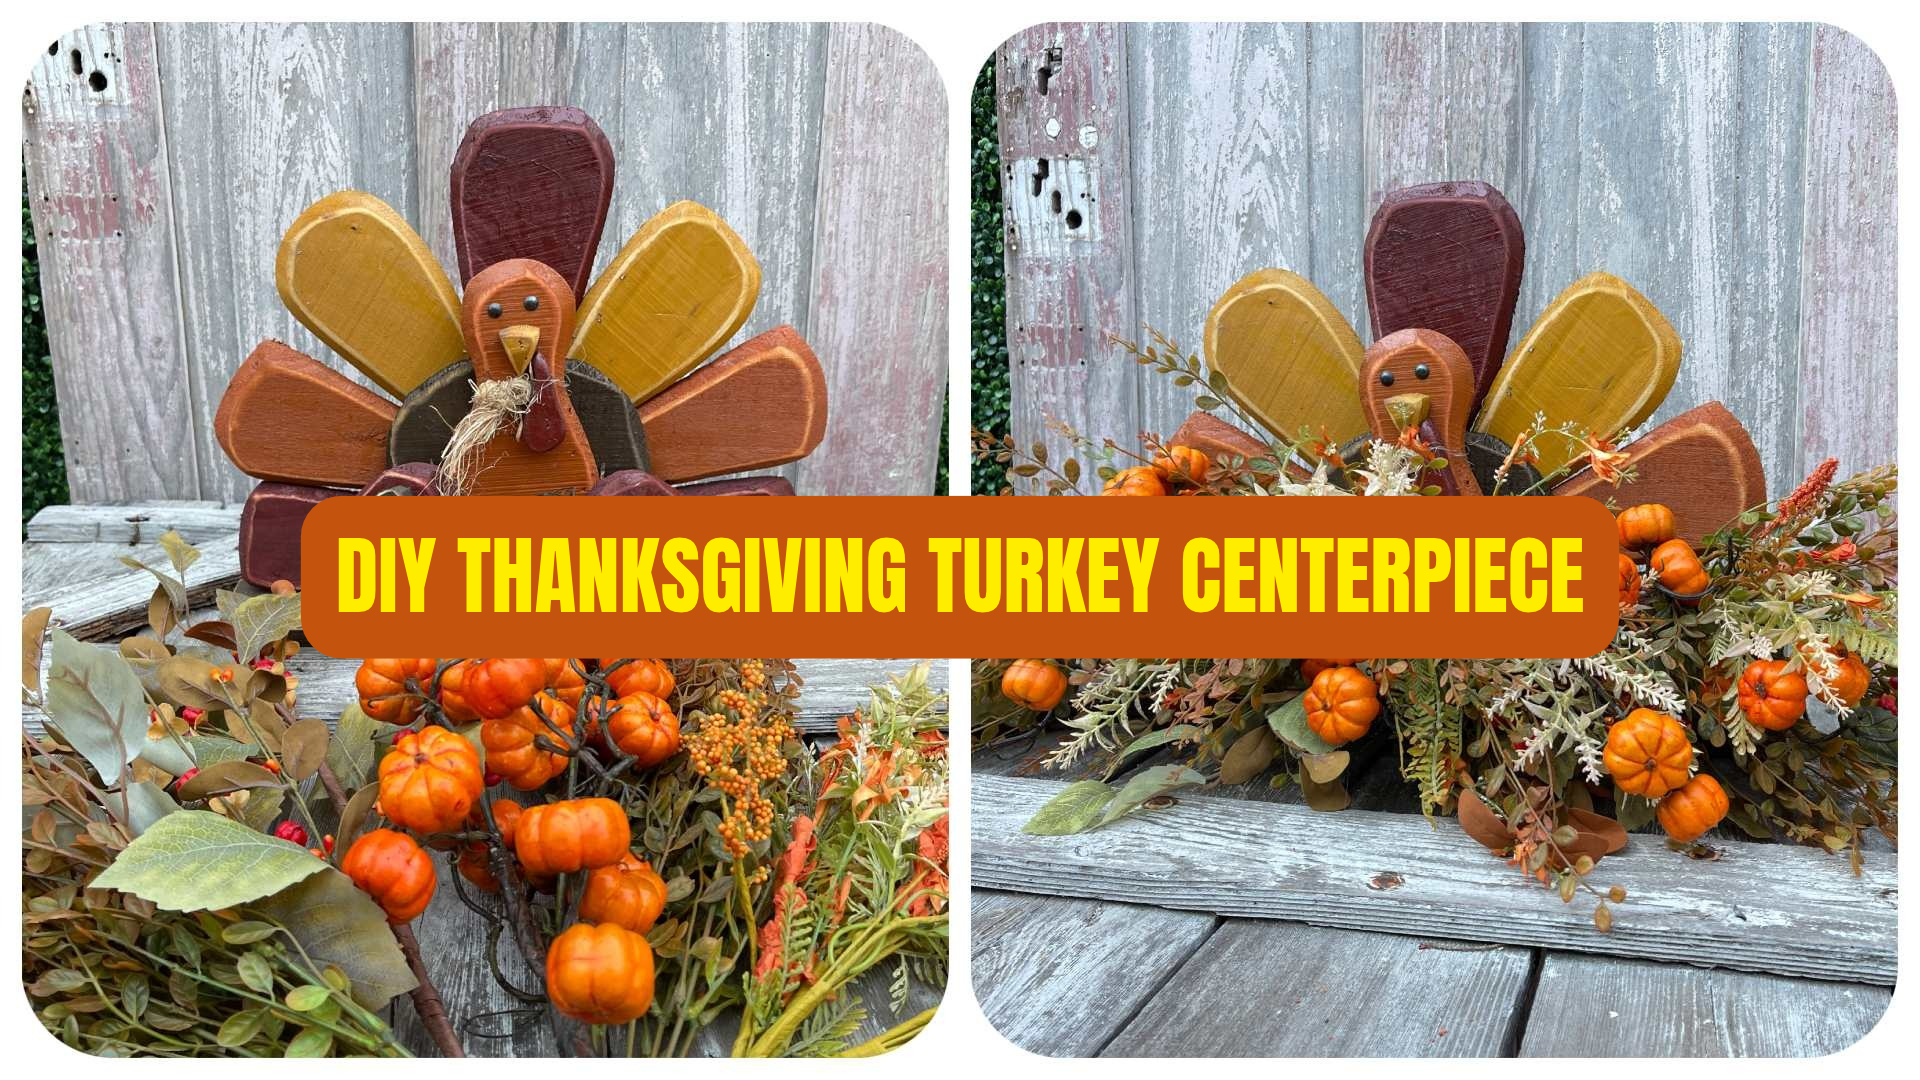
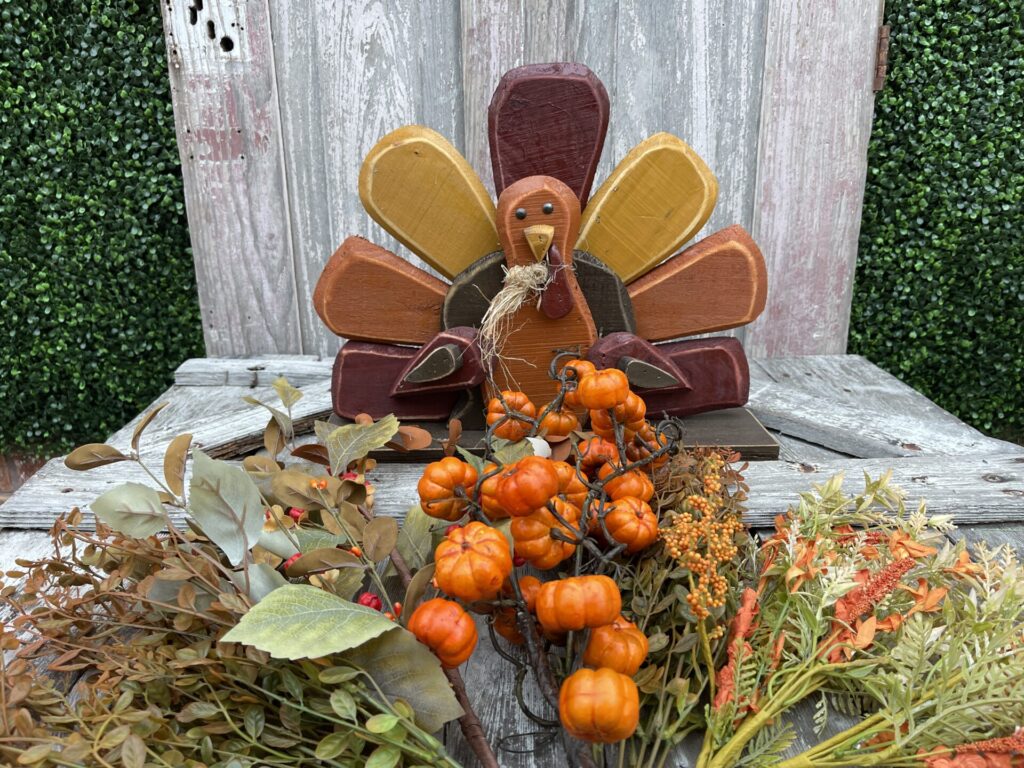
Celebrate the season of gratitude with a show-stopping Thanksgiving Turkey Centerpiece!
This design is full of autumn charm — featuring rich foliage, mini pumpkins, and a rustic wooden turkey that ties it all together. Whether you’re hosting Thanksgiving dinner or simply love to decorate for fall, this centerpiece brings that cozy harvest warmth straight to your table.
Looking for a Thanksgiving centerpiece that’s festive, full of personality, and fun to make? This adorable turkey arrangement brings together miniature pumpkins, beautiful Autumn greenery, orange grasses, and soft neutral accents for a design that makes you smile.
In this tutorial, Kelea shows you how to build a Thanksgiving turkey centerpiece with a strong foundation, balanced greenery, and plenty of movement. The finished arrangement is especially pretty on a mantel, where the greenery and pumpkins can extend gracefully toward both ends.
🦃 Find the project and supply list: Thanksgiving Turkey Centerpiece Supply List
Start with a Strong Floral Foam Foundation
Every beautiful arrangement needs a dependable foundation, and that’s exactly where Kelea begins.
She cuts small pieces from a larger sheet of floral foam, making the most of her supplies rather than using more than necessary. Each piece gets a generous coating of glue before being attached around the turkey base.
Kelea places foam on both sides and in front of the turkey’s tummy. This gives her several areas to insert greenery, grasses, and pumpkins as the arrangement takes shape.
Why the foundation matters
A well-planned foundation makes it easier to build a full arrangement without wasting materials or struggling to find space for stems later.
Kelea also reminds her students that learning solid construction techniques is especially important when creating floral designs to sell.
Kelea’s design tip: Use only the foam you need, but make sure you have enough placement areas to build the arrangement securely.
Green the Perimeter with Autumn Leaves and Berries
Next comes one of Kelea’s favorite techniques: greening the perimeter.
She begins with a bush featuring leaves, berries, and miniature pumpkin accents. The leaves are moved toward the background while the pumpkins and berries remain visible toward the front.
This establishes the arrangement’s shape before adding the fuller greenery.
Build outward from the turkey
Kelea trims the stems and begins placing them on either side of the turkey, extending the longest pieces approximately 10 inches in each direction.
Because this is a fairly symmetrical design, she repeats similar placements on the right and left.
The greenery stays relatively low, allowing the turkey to remain the star of the centerpiece.
For a mantel display, these longer pieces help create a graceful horizontal shape that can drape slightly over the edge.
Design lesson: Establish the width with your longest greenery first. Everything added afterward can be shorter and fuller.
Add Fullness Without Hiding the Turkey
Once the perimeter is established, Kelea brings in larger greenery bushes to fill the space between the outer edges and the turkey.
She separates the bushes into smaller sections, trims the stems, and works back and forth between the right and left sides.
Layer greenery at different heights
Some pieces sit low along the foam. Others extend slightly upward or forward, creating depth and dimension.
Kelea pays special attention to keeping the greenery below the turkey’s face and body so the decorative centerpiece remains clearly visible.
She also uses leafy, branching greenery to fill gaps and soften the arrangement.
Kelea’s design tip: Don’t be afraid to shorten a stem, bend a branch, or change its direction. Small adjustments make a big difference in how a finished design looks.
Add Orange Grasses for Beautiful Autumn Color
With the greenery foundation in place, it’s time to introduce warm seasonal color.
Kelea takes an orange grass bush and separates it into smaller sections. She trims the stems so the grasses can be positioned throughout the arrangement rather than inserted as one oversized piece.
Distribute the color evenly
She places orange grasses toward the right, left, and center, allowing some pieces to cascade between the greenery.
This introduces color without overwhelming the turkey or the surrounding leaves.
The orange grasses also help connect the greenery with the miniature pumpkins that come next.
Design lesson: Don’t concentrate all your orange accents in one area. Repeat the color throughout the centerpiece to create balance.
Arrange the Miniature Pumpkins
Now comes one of the most playful parts of the design: adding the pumpkins!
Kelea separates the pumpkin stems into longer and shorter sections. The longer pieces retain their interesting wires and vine details, which add natural-looking movement.
Start with the longer pumpkin stems
She positions these pieces near the center, extending outward toward the right and left.
Their shape allows the pumpkins to reach toward the ends of the arrangement and drape beautifully over a mantel.
Fill in with shorter pumpkin clusters
Next, Kelea places smaller pumpkin sections near the outer ends and through the center.
Some pumpkins are tucked deeper into the greenery, while others sit farther forward.
This variation creates dimension and keeps the arrangement from looking flat.
A fuller pumpkin cluster near the middle adds visual weight, while smaller accents carry the design outward.
Kelea’s design tip: Position some pumpkins slightly underneath the greenery instead of placing every pumpkin directly on top. This gives the arrangement a more layered appearance.
Soften the Arrangement with Neutral Accents
With the pumpkins in place, Kelea returns to the remaining floral materials.
She adds soft brown-and-white accents with touches of orange, distributing them across the design.
Rather than grouping each color separately, she repeats the neutral tones throughout the arrangement.
This creates a smooth transition between the warm pumpkins, orange grasses, and green foliage.
Finish with greenery and Spanish moss
Kelea uses the remaining greenery to soften the front of the centerpiece and fill any areas that need attention.
Finally, she checks for visible floral foam or other mechanics.
A little chartreuse Spanish moss tucked into exposed areas provides the finishing touch.
The result is a full, balanced Thanksgiving turkey centerpiece with beautiful color, movement, and personality.
Kelea’s Best Design Lessons from This Project
1. Build the foundation before adding decorations
A secure base makes the rest of the arrangement easier to construct.
2. Establish the longest lines first
The outer greenery determines the width and overall shape.
3. Work from right to left
Repeating similar placements on both sides creates balance in a symmetrical centerpiece.
4. Keep the turkey visible
The decorative turkey is the focal point. Greenery and pumpkins should frame it, not hide it.
5. Repeat colors throughout the arrangement
Orange, brown, white, and green should transition naturally across the design.
6. Create depth with varied stem placement
Tuck some pieces farther back, bring others forward, and allow a few to extend beyond the main arrangement.
Frequently Asked Questions
Can I use this Thanksgiving centerpiece on a mantel?
Yes! Kelea specifically designs this arrangement with mantel decorating in mind. The greenery and pumpkin stems extend horizontally, creating a beautiful display that can be paired with candlesticks or additional pumpkins.
Do I need to use the exact same greenery?
No. Kelea explains that you can adjust the supplies to coordinate with your own home. The important part is maintaining the arrangement’s shape, balance, and movement.
How do I keep the turkey visible?
Keep the surrounding greenery low and use the longest pieces to establish the width rather than building too much height directly in front of the turkey.
How do I hide floral foam in a centerpiece?
Use smaller greenery pieces to fill gaps, then tuck Spanish moss over any exposed mechanics.
Can I make this centerpiece to sell?
Absolutely. Kelea discusses the importance of secure construction and thoughtful floral placement for designers who sell finished arrangements through Etsy or at craft shows.

Create Your Own Thanksgiving Turkey Centerpiece
This adorable turkey centerpiece is a wonderful way to bring a little personality to Thanksgiving decorating.
Whether you’re making one for your mantel, giving it as a gift, or creating finished arrangements to sell, the techniques Kelea teaches will help you build a design that’s full, balanced, and beautifully finished.
🍂 Get started here: Thanksgiving Turkey Centerpiece Supply List
Want to learn more about building strong foundations, working with greenery, and creating professional-looking floral designs? Visit Kelea’s Design School for more floral design education.
Don’t just decorate, design!
You’ll love how easily this piece transforms your table into a festive focal point for your holiday gatherings!
👉 Find everything you need to make it yourself in the Thanksgiving Turkey Centerpiece Supply List.
🌿 Tips from Kelea:
- Start by placing your largest stems first for structure.
- Use layering to build fullness — alternate greenery and accents.
- Keep your focal point (the turkey!) slightly elevated for balance and visibility.
This project is beginner-friendly and a great way to enjoy creative time while preparing for your Thanksgiving feast.
🎨 Want to Learn More About Floral Design?
If you love projects like this, you’ll love what we do inside Kelea’s Design School (KDS).
It’s where creative decorators and aspiring florists learn professional design techniques, explore seasonal trends, and grow their confidence — all inside a supportive community.✨ Learn more at KeleasDesignSchool.com and take your floral skills to the next level!