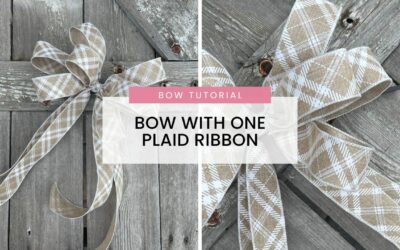
These fancy ribbon funky bows are perfect to work with and learn how to make beautiful bows. With these bows, you can dress up a festive Bunny for Easter or add to another quick design and elevate it to the next level.
Make Beautiful Bows with Fancy Ribbon
Today we are treating ourselves and working with some beautiful, fancy four-inch ribbon that will knock your socks off! Each pattern also has a coordinating back side pattern that is just as beautiful as the front. The quality is so great that you don’t have to use a lot of it to make a big impact and bring an elegant and high-end look to your bows.
Bow tutorials are a great time to show you how to create a variety of different bows that will work for a variety of different floral designs and styles. I love working with the fancy, wide ribbon because it can add so much depth to your design. The backside of the ribbon is just as beautiful and can be used with coordinating projects also. I like to back fold the ends of the ribbon tails to show a touch of the back pattern to add a fun twist to the color scheme of the bow.

Each bow we make today is a Funky bow with shorter tails that will work well with our Easter Bunnies. We are going to add a touch of drama with some black in the ribbon, even for Spring! Funky bows are great to make with fancy ribbon because it allows you to get a bigger bang for your buck. You can create beautiful designs while not needing to use a ton of your fancy ribbon. That means more fancy ribbon bows to use for more high-end projects for yourself or your customer base. I can’t wait to show you how to work with this beautiful ribbon. Let’s get started!

Ingredients
4″ Faux Dupioni Check Micro, Check Back, Black-White on a 10 Yard Roll
1.5″ Ivory Linen with Black Cabana Stripes Ribbon on a 10 Yard Roll
1.5″ Daisies and Bees on Black White Gingham Ribbon on 10 Yard Roll
Directions for bow #1 black plaid/white stripe ribbon funky bow:
- Start with the 4” wide plaid on the EZ Bowmaker and measure 7 inches. Hand pleat it and stick into the center of the wooden dowels. Make one 7” loop on each side and scrunch the center down into the dowels. Trim the tail and back fold the bottom.
- Add the black and white stripe ribbon with 7” tails and two 6” loops on each side. Trim the tails and curl up the ends with your finger.
- With your 4” plaid measure a 7” tail on each side, leaving a tiny bit extra to all you to fold the ends up.
- Run a cable tie down the side of the dowels. Put a finger on top of the center and pull your bow off and fluff. Cinch the cable tie, leaving a space to insert an attachment cable tie in the back. Cinch tight.
- Cut a piece of black and white striped ribbon and fold over itself widthwise. Tie around the center to hide the cable ties.
Directions For Bow #2: Buffalo Check/Green polka dot with black and white funky bow
- Make a 7” tail with the 4” Buffalo Check and pleat the center into the dowels. Make one 7” loop on each side. Roll the ends up of the tails to see the green backing.
- With your green polka dot make a slightly longer tail. Make two 6” loops on each side. Trim your tails and curl up the ends with your fingers.
- Run a cable tie down the center and pull the bow from the Bow Maker. Slightly close the tie and fluff each loop and adjust the tails. Add a second cable tie through the back and cinch tight.
- Cut a piece of buffalo plaid ribbon at half the width and fold it over itself so the solid green side is facing out. Tie around the center to hide the cable ties.
Directions bow #3: Buffalo check burlap/daisy with black and white Blast off bow
- Start with an 8” tail of the Buffalo check burlap and dovetail the ends. Make three 7” loops on each side, twisting into the center dowels. Trim the tail and dovetail the ends.
- Add your Daisy with check and make an 8” tail. Make two 6” loops on each side. Trim the tail and dovetail the ends.
- Grab the Buffalo check and make an 8” tail with a dovetail end. Make one 5” loop on each side and trim the tail. Dovetail the ends.
- Run a cable tie down the center and pull the bow from the Bow Maker. Slightly close the tie and fluff each loop and adjust the tails. Add a second cable tie through the back and cinch tight.
- Cut a piece of Daisy with check ribbon and fold over itself widthwise. Tie around the center to hide the cable ties.
Want to learn more?
Join the free Facebook group Keleas Bloomarino Buds Wreath Making Community


