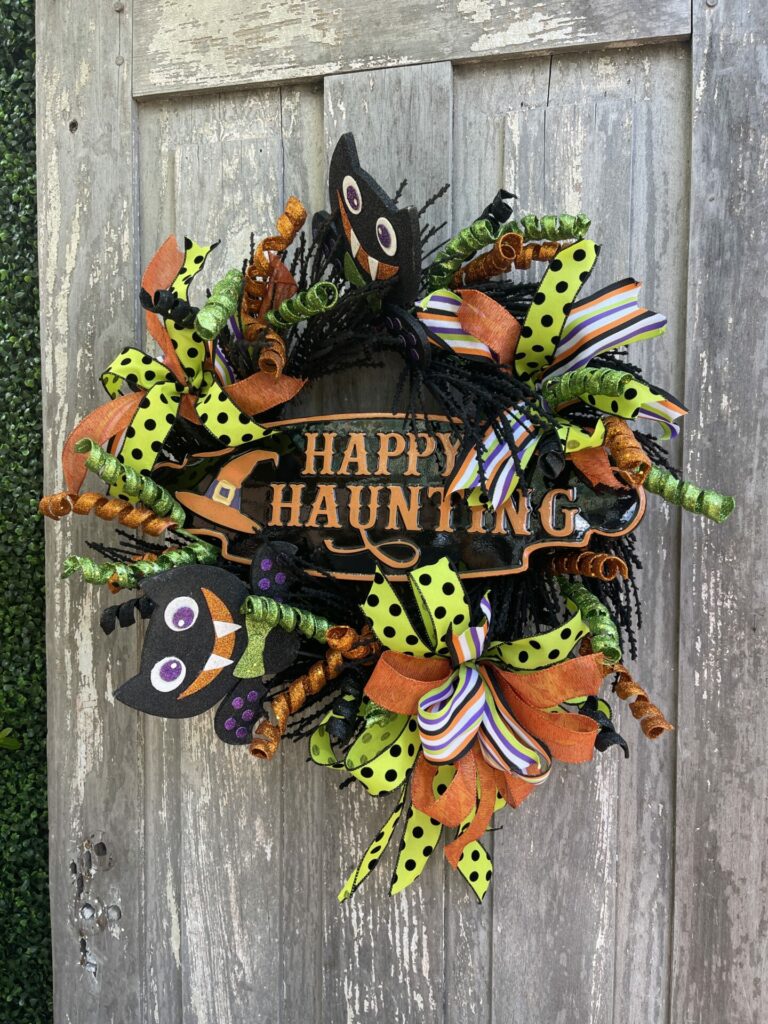
A Halloween bat wreath doesn’t have to be spooky to make a statement. This colorful design combines playful bats, glittery curls, bold Halloween ribbon and a Happy Haunting sign for a front door that is much more fun than frightening.
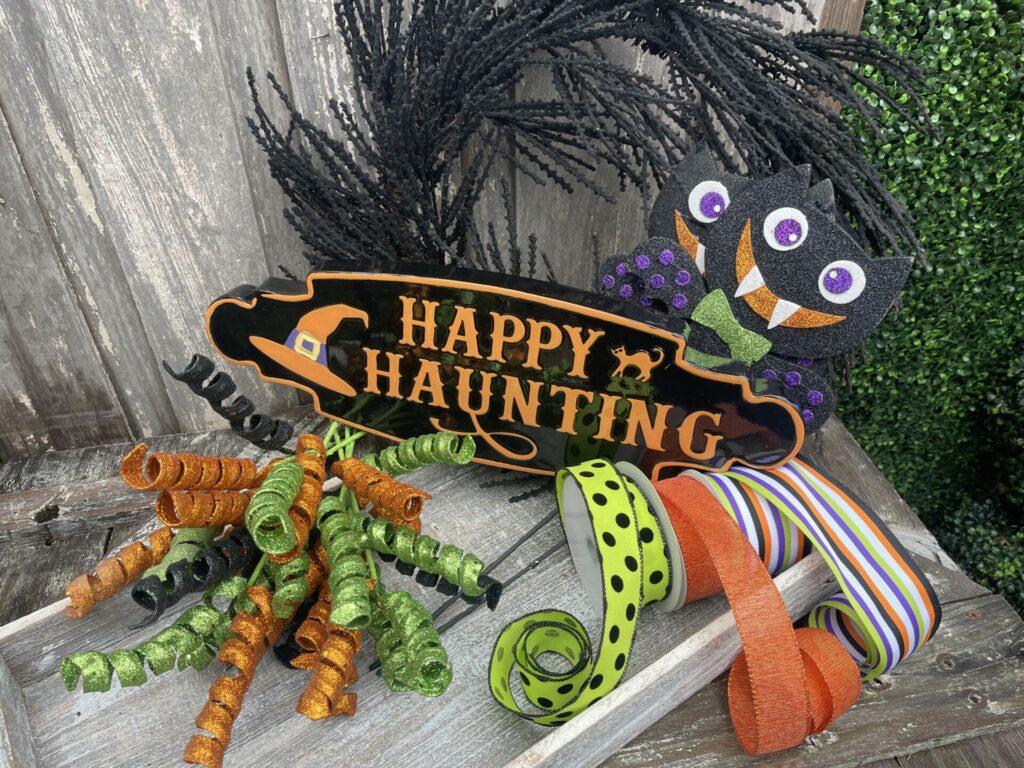
Kelea starts with a textured black wreath base and builds the design around bright orange, lime green, purple and black. The Happy Haunting sign establishes the color palette, while the bats, bows and curly picks add movement and personality. The kit includes the wreath base, sign, six curly picks, two bat stems and three coordinating ribbons.
Want to make this design?
Use the Batty Happy Haunting Wreath Kit Supply List – Kit 1215 to find the supplies and project details.
Batty Happy Haunting Wreath Kit Supply List – Kit 1215
Watch Kelea Make the Happy Haunting Halloween Bat Wreath
Before you start, watch the complete tutorial. Kelea walks through the construction from the black wreath base to the final curls, showing not only where the pieces go but why their placement works.
What You Need to Make This Halloween Wreath
The black wreath base does a lot of the visual work before you add anything. Its flocked texture and subtle glitter create a dark foundation that makes the orange, lime green and purple details stand out.
The kit includes the Happy Haunting sign, two playful bat stems, six curly picks and full rolls of three coordinating ribbons. You’ll also want scissors, wire cutters and dark cable ties.
Kelea specifically recommends dark cable ties because they disappear into the black base much more easily than lighter-colored mechanics.
Start by Fluffing the Wreath Base
One of the easiest steps to overlook is preparing the base before decorating it.
Kelea calls this “shaking hands” with your materials. Instead of using the wreath exactly as it comes out of the package, separate and shape the wired pieces. This immediately gives the base more body and creates space for the other elements.
This is a small step, but it affects everything you add afterward.
Attach the Happy Haunting Sign First
The sign becomes the visual anchor for this Halloween bat wreath, so Kelea adds it before the bows and decorative picks.
The sign has two attachment points. Rather than tightening both sides immediately, secure one side loosely, attach the second side, and then adjust the sign until it hangs level.
Most importantly, attach it to the actual wreath frame rather than relying on the decorative greenery to support its weight.
Check Your Design While It’s Hanging
Here’s a technique worth remembering for other wreaths, too.
Kelea prefers to check the sign placement while the wreath is hanging rather than lying flat on a table. That lets you see how gravity affects the finished design and make adjustments before everything is tightened.
That is the difference between decorating something while it is flat and designing it for the way it will actually be displayed.
Use Ribbon to Move Color Around the Wreath
The ribbon isn’t confined to one giant bow.
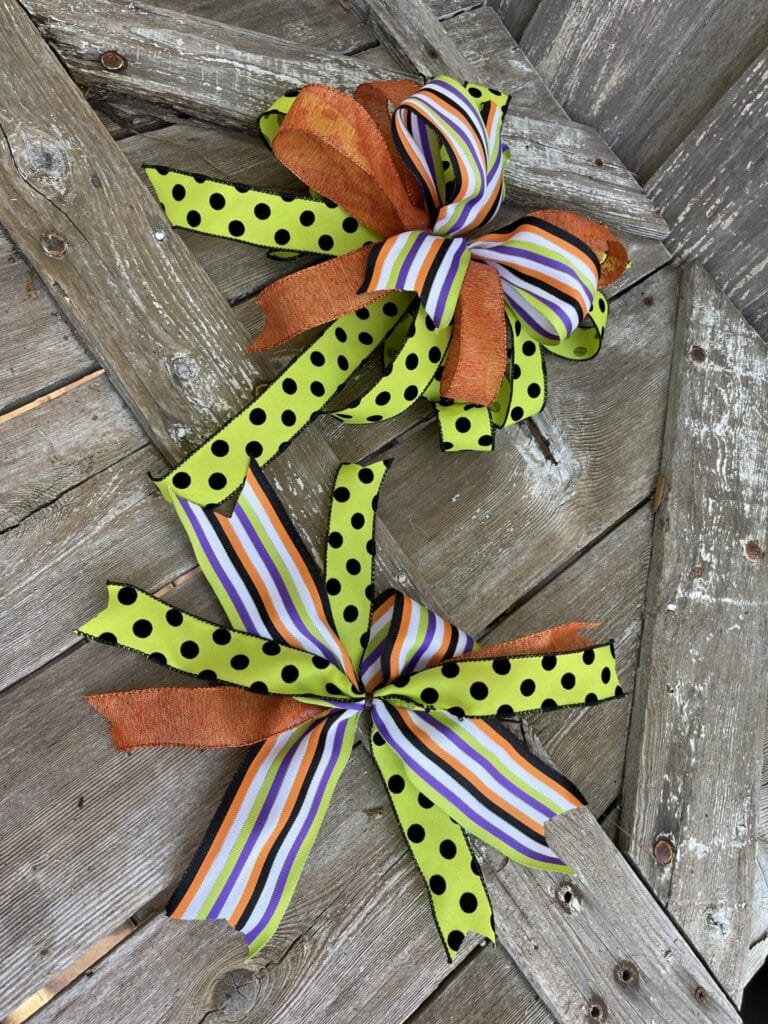
Instead, the design uses a combination of bows and ribbon-tail clusters placed in different areas. This moves the orange, lime, purple and black color palette around the entire wreath.
For someone newer to wreath making, Kelea explains that adding the bows earlier can also be useful because they establish how much visual space the bows will occupy before you begin placing the remaining elements.
Learn the Why Behind the Design
You can absolutely follow Kelea’s tutorial and make this wreath step by step. But learning why the placement works gives you the ability to take those same techniques into completely different projects.
That’s part of what Kelea teaches inside Kelea’s Design School—placement, balance, mechanics, movement and how to make design decisions when you don’t have a tutorial telling you exactly where the next piece should go.
Learn more about Kelea’s Design School
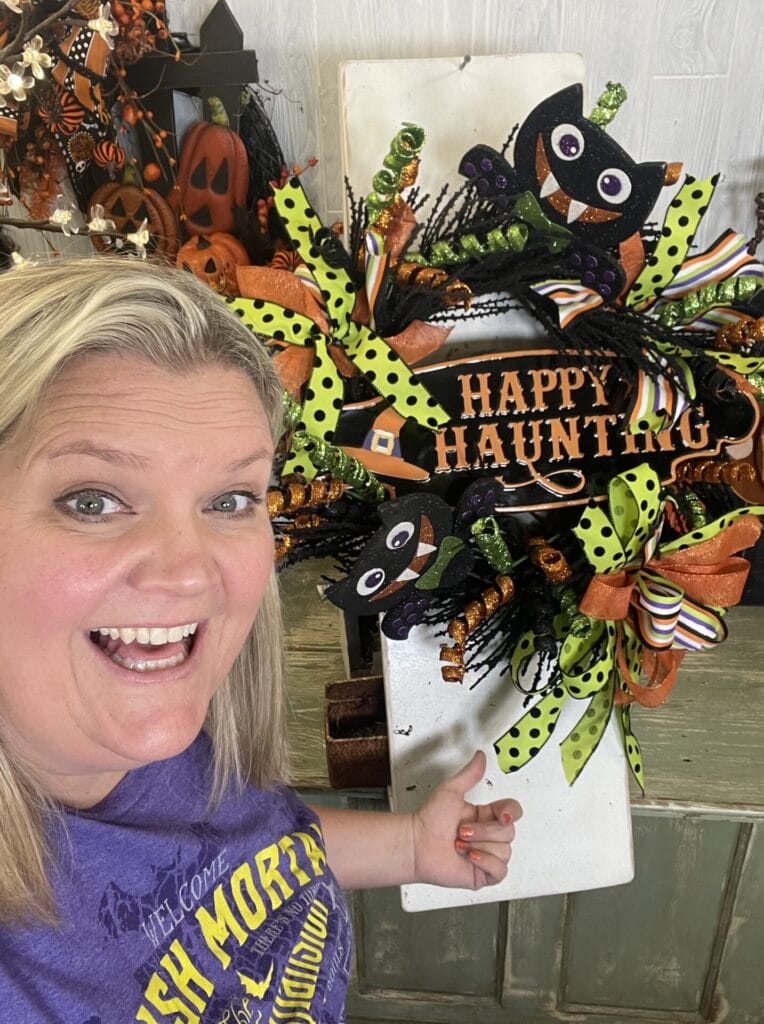
Secure the Bats for Long-Term Display
The bats are too important to simply glue onto the outer pieces of the wreath and hope they stay put.
Kelea runs dark cable ties through the actual wreath frame and uses the wired stems to shape the bats after they’re attached. She specifically points out that wiring pieces this way takes a little more construction work but produces a more secure, professional result.
Let the Bats Follow the Shape of the Wreath
Notice that the bats don’t sit stiffly against the wreath.
Their wired stems allow you to bend and position them so they appear to move around the design. Once you choose that direction, continue it through the surrounding elements.
That’s what helps a whimsical wreath still feel intentional rather than chaotic.
Use Curly Picks to Create Movement
Now the Halloween personality really starts showing.
The six glittery curly picks are distributed around both sides of the wreath rather than being concentrated in one spot. Kelea initially places them without permanently securing them, checks the overall distribution, and then ties them directly to the frame once she’s happy with their positions.
That’s another technique you can borrow: dry-place first, secure second.
It gives you permission to change your mind.
Let Some Pieces Break Into the Bow
One curly pick comes directly out of the bow area rather than sitting neatly beside it.
That overlap helps connect the ribbon to the rest of the design. Instead of seeing “bow here, pick there, bat over there,” your eye starts reading everything as one composition.
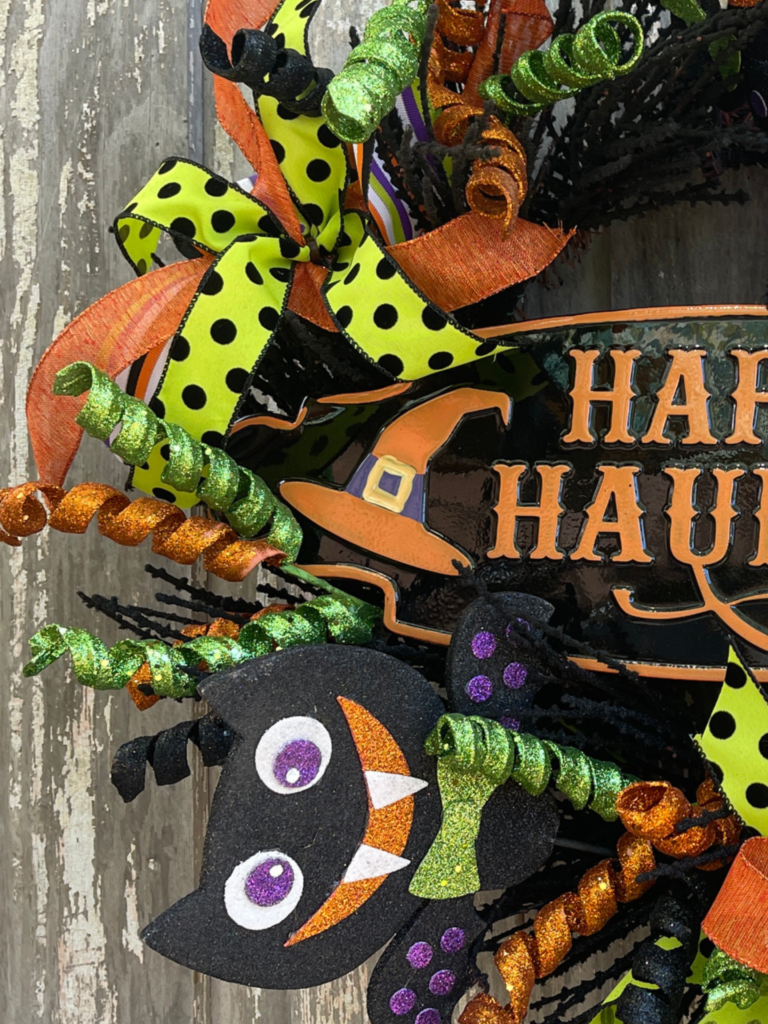
Add Depth Instead of Keeping Everything on One Level
This is one of my favorite teaching points from the tutorial.
Toward the end, Kelea actually moves one of the bows deeper into the wreath so a curly pick can come forward from it. The result creates visible in-and-out depth instead of having every element sitting on the same flat plane.
When you’re finishing your own wreath, look at it from the side as well as from the front.
Ask yourself:
Does everything stop at the same depth?
If it does, pull some pieces forward, push others slightly back and reshape the wired elements. That’s often all it takes to make a design feel fuller.
See the Transformation in 10 Seconds
Here’s where your Short belongs.
We’ve now shown the reader the individual techniques. This gives them a fast visual payoff showing those supplies becoming bows and then the completed design.
🎥 EMBED YOUTUBE SHORT HERE
Watch the 10-second Batty Happy Haunting wreath transformation
Keep the Short right here. I would not move it beside the long-form video. Separating the two gives each video a different job:
Long video = teach.
Short = inspire/re-engage.
Finish by Fluffing and Hiding Your Mechanics
Don’t stop just because every component has been attached.
Pull the curls out, reshape the bows, adjust the ribbon tails and look for visible mechanics. Kelea uses the dark wreath base and dark cable ties strategically so the construction disappears into the background.
The viewer should notice the bats, bows and Happy Haunting sign—not how you attached them.
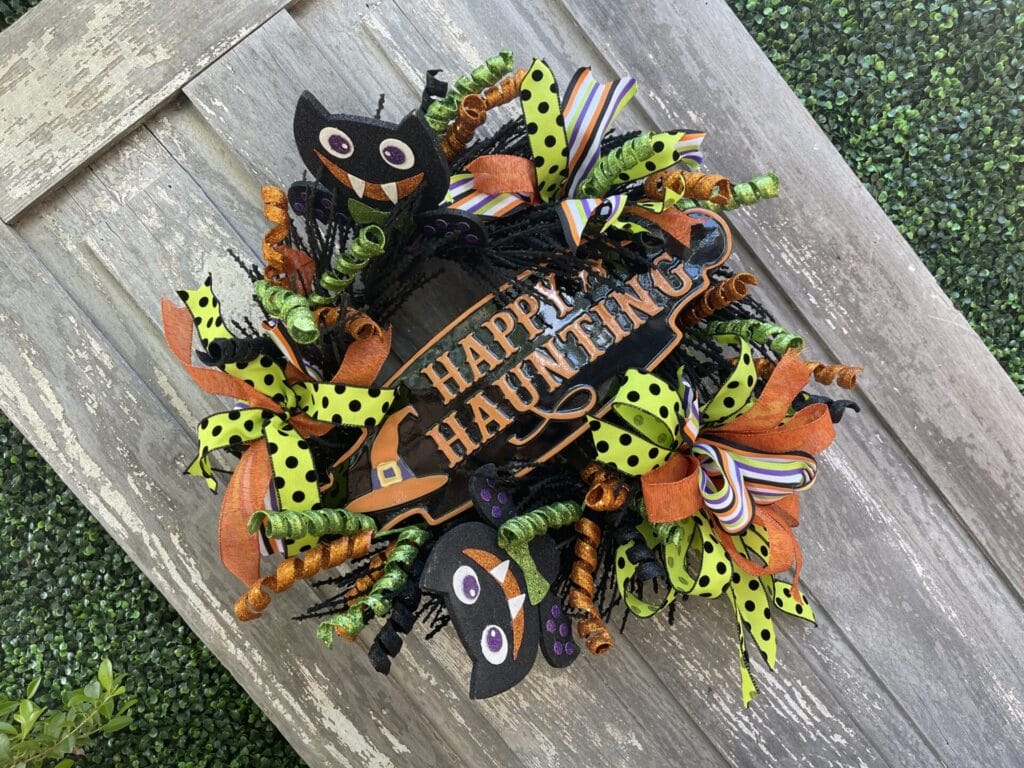
Why This Halloween Bat Wreath Works
There is a lot happening in this wreath, but it doesn’t feel like a random collection of Halloween decorations.
The black base gives everything a common foundation. The Happy Haunting sign establishes the palette. Repeating the same orange, lime, purple and black throughout the bows and picks moves your eye around the wreath, while the bats provide recognizable focal elements.
Most importantly, the mechanics support the design instead of competing with it.
That’s a lesson you can carry into far more than this one Halloween project.
Halloween Bat Wreath FAQ
What comes in the Batty Happy Haunting Wreath Kit?
The kit includes the black wreath base, Happy Haunting sign, six curly picks, two bat stems and rolls of lime, orange and striped Halloween ribbon. You’ll also need basic tools and mechanics such as scissors, wire cutters and cable ties.
Can a beginner make this Halloween wreath?
Yes. The project uses straightforward attachment techniques, and the wreath base already provides much of the structure. Kelea also demonstrates how to establish the placement of the sign and bows before adding the smaller decorative elements.
Do I need hot glue?
Not necessarily. Kelea completes this version primarily with cable ties and notes at the end of the tutorial that the project can be assembled without really needing glue.
Why use black or dark cable ties?
Dark cable ties blend into the black wreath base, helping hide the mechanics so the decorative elements remain the focus.
How do I keep a Halloween wreath from looking flat?
Use the wired elements to create different depths. Push some elements farther into the base while bringing curls, bows and bats forward. Overlapping neighboring elements also helps visually connect the design.
Where can I find the supplies for this wreath?
The complete project and supply information is available on the Kit 1215 Batty Happy Haunting Wreath Supply List.
See the Batty Happy Haunting Wreath Kit Supply List
Make Your Own Happy Haunting Wreath
This Halloween bat wreath proves Halloween decorating can be playful, colorful and full of personality without being scary.
Start with a strong foundation, establish your focal point, repeat your colors, secure the important pieces well and then give yourself time at the end to shape everything.
And don’t be afraid to make it your own. Add another bow, change the placement of a curl or let your bats fly in a slightly different direction.
That’s part of the fun.
Keep Learning with Kelea’s Design School
If you enjoy following Kelea’s projects but want to understand more of the how, why, when and where behind floral design, continue learning with Kelea’s Design School.
You’ll build the skills to look at a collection of supplies and make confident design decisions of your own—not simply copy the placement in one project.