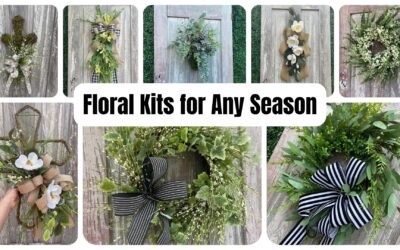
Arrangement
Have you ever stumbled upon an arrangement that just brings an instant smile to your face? Something that gives you all the good vibes right away? Well, this adorable Sunflower centerpiece arrangement speaks to my soul in the very best of ways.
I can’t get enough of the neutral colors used instead of the typical bright pops of yellow in the summer sunflower. I think that is why I love this centerpiece so much. Because of its neutral shades, fun elements, and multiple textures, this centerpiece can be used all year round. Now tell me that doesn’t put a big smile on your face!
How To Make A Sunflower Centerpiece
This DIY floral arrangement is perfect for those who are first-timers or skilled professionals. It is so easy to make this on your own with a little bit of help, here and there, from my step-by-step tutorial. You, no matter your skill level or experience, can create this adorable Bucket Sunflower Wreath Arrangement. Just sit back and admire it as it brings all that sunshine and joy to your home.
Y’all, if you have crafted with me before, you know I am not always a “Matchy Matchy” kind of crafter. I do not always have everything aligned perfectly on both sides of the piece. For some of you, that is hard to deal with, and I completely understand. But this asymmetrical craft is so stinking cute, I want to encourage you to break out of your comfort zone. Try to do something that you know will be so adorable, even if it is not completely symmetrical. I promise you will love the end product. You will be proud of yourself for sure. And this low to high technique is one you just might end up loving.
The multiple textures and shades of green help this piece feel so fresh and airy. The use of neutral colors helps this piece be practical for all year round. The shape provides the perfect decor for your mantle or dining room table. There is so much to love about the summer sunflower arrangement. So, why are we still talking about it? Let’s gather our supplies, and get crafting already! I am excited to have some fun with flowers. Aren’t you?
Ingredients
Directions
- Grab your Black and White Plaid Bucket set and insert your foam pieces to make sure their size fits perfectly. Once happy with a secure fit, add some gorilla glue to the bottom along with hot glue to attach inside your buckets. A little foam and a little glue will be fine.
- Prep your Mixed Greenery Bush by trimming from the main bundle. Let’s begin by adding some height.
- Manipulate your grass so they are nice and full. Be sure to dip ends in hot glue before adding them into your foam along the edge.
- Grab your Floral Dogwood Spray and trim pieces from the main stem with wire cutters. Insert right in front of your grass, keeping its height. We will be using the high to low or low to high technique.
- Flowing down to create the asymmetrical look, trim your grass a little smaller to add to the other side of your Sunflower Bucket Arrangement. Bend your grass, so it is malleable and creates the flow we want in this piece. Some of it should spill over the front.
- Insert a low Dogwood stem on that side as well, keeping that smaller height.
- Grab your Mixed Olive Spray. Trim to be height needed and fluff before you add into your designs. Add them, flanking the pieces previously added. This creates some new greens and textures in the arrangement.
- Next let’s work in your Cream Sunflowers mix, paying attention to the height. Keep them low and tight to the base. Remove the big leaves from the sunflower stems. Add them accenting throughout the center, allowing the height to come from the dogwood flowers on both sides.
- To fill in a bit, grab your Gypso Bush. Push up so they are big and full at the tops of stems. Trim short so they stay close to the base.
- Insert your small bundles of gypso flowers throughout the arrangement, keeping them low. Place 3 in the back and add several small pieces in the front. Fill in where necessary.
- Trim, thin out, insert, twist, and manipulate wherever you see fit for your arrangement. Take a step back from time to time as you craft.
- Grab your Green Red Brown Uluhe Fern bundle and let’s add first to the high zone. Roll your tip down a bit so you don’t need to trim the piece. But if you do need to trim, use good scissors or wire cutters. Insert 3 pieces in the back. Play with placement, allowing some to spill out forward at some angles.
- Add 2 shorter pieces of Uluhe Fern in the front maintaining the lower height created from the other sprays and florals.
- Adjust and fill in any spots that may need attention.
How do you make fake flowers look good?
Y’all, you fluff and fancy your picks, flowers, and sprays to make your piece look extra full from the beginning. If you take the time to manipulate your pieces before inserting them into your arrangments, it occupies the desired space from the start.
In the long run, this saves time and money! You do not want to add too many pieces that are not totally necessary. Save yourself some time, money, and headaches.
Are you searching for a unique DIY project this Halloween? Look no further than the Frankie Centerpiece Kit, perfect for adding a personalized and cute spooky touch to your Halloween decor. This DIY arrangement kit blends creativity with simplicity, making it an ideal craft for all skill levels.
DIY Frankie Centerpiece for Halloween Home Decor
Crafting your centerpiece is straightforward and enjoyable. You’ll need some basic tools like styrofoam, wire cutters, scissors, and hot glue. Begin by setting styrofoam inside the bucket, strategically place the twig sprays and, and use the eyeball picks for a finishing touch of flair.

Let me show you how to create your own DIY Frankenstein Halloween Centerpiece that is a cute not spooky decoration for Halloween. Mixing your spooky decorations with old and new gives you fun times spent crafting together now while reminiscing about the Halloweve of yester years. It’s a wonderful way to start a family tradition or simply enjoy some seasonal crafting magic.
Ingredients
Directions
- Start by finding cutting the styrofoam so it is nestled inside of the Green Frankenstein Bucket so that it sits nicely inside and glue down. I like to use both Gorilla Glue and Hot Glue to really secure it for both now and long term.
- Cut Black Garland Base into small sections and set your base, spreading for maximum coverage.
- Prep your picks by grabbing your Purple Green Orange Felt Ball Twig Sprays. Sseparating them into smaller picks. You can also twist the black chenille around your finger to create a fun effect.
- Trim your Glitter Eye Ball Picks and add to the stryofoam. Be sure to space them for the best visual display.
- Cut and prep the White Black Chenille Curly Stems add some dimension to them by curling with your fingers to really give them life.
- Stem back and look at your your centerpiece. Are thier bald or blank spaces? Fluff you black garland to fill and use the wires in your products from Keleas.com to really get the pieces where you want them.
- Grab one of your Glitter Curly Velvet Ball Picks and trim the stem down to a couple of inches. Fluff out your pick, and then place it to the left of your bow, tucking it behind the bow to have it peek out from behind it.