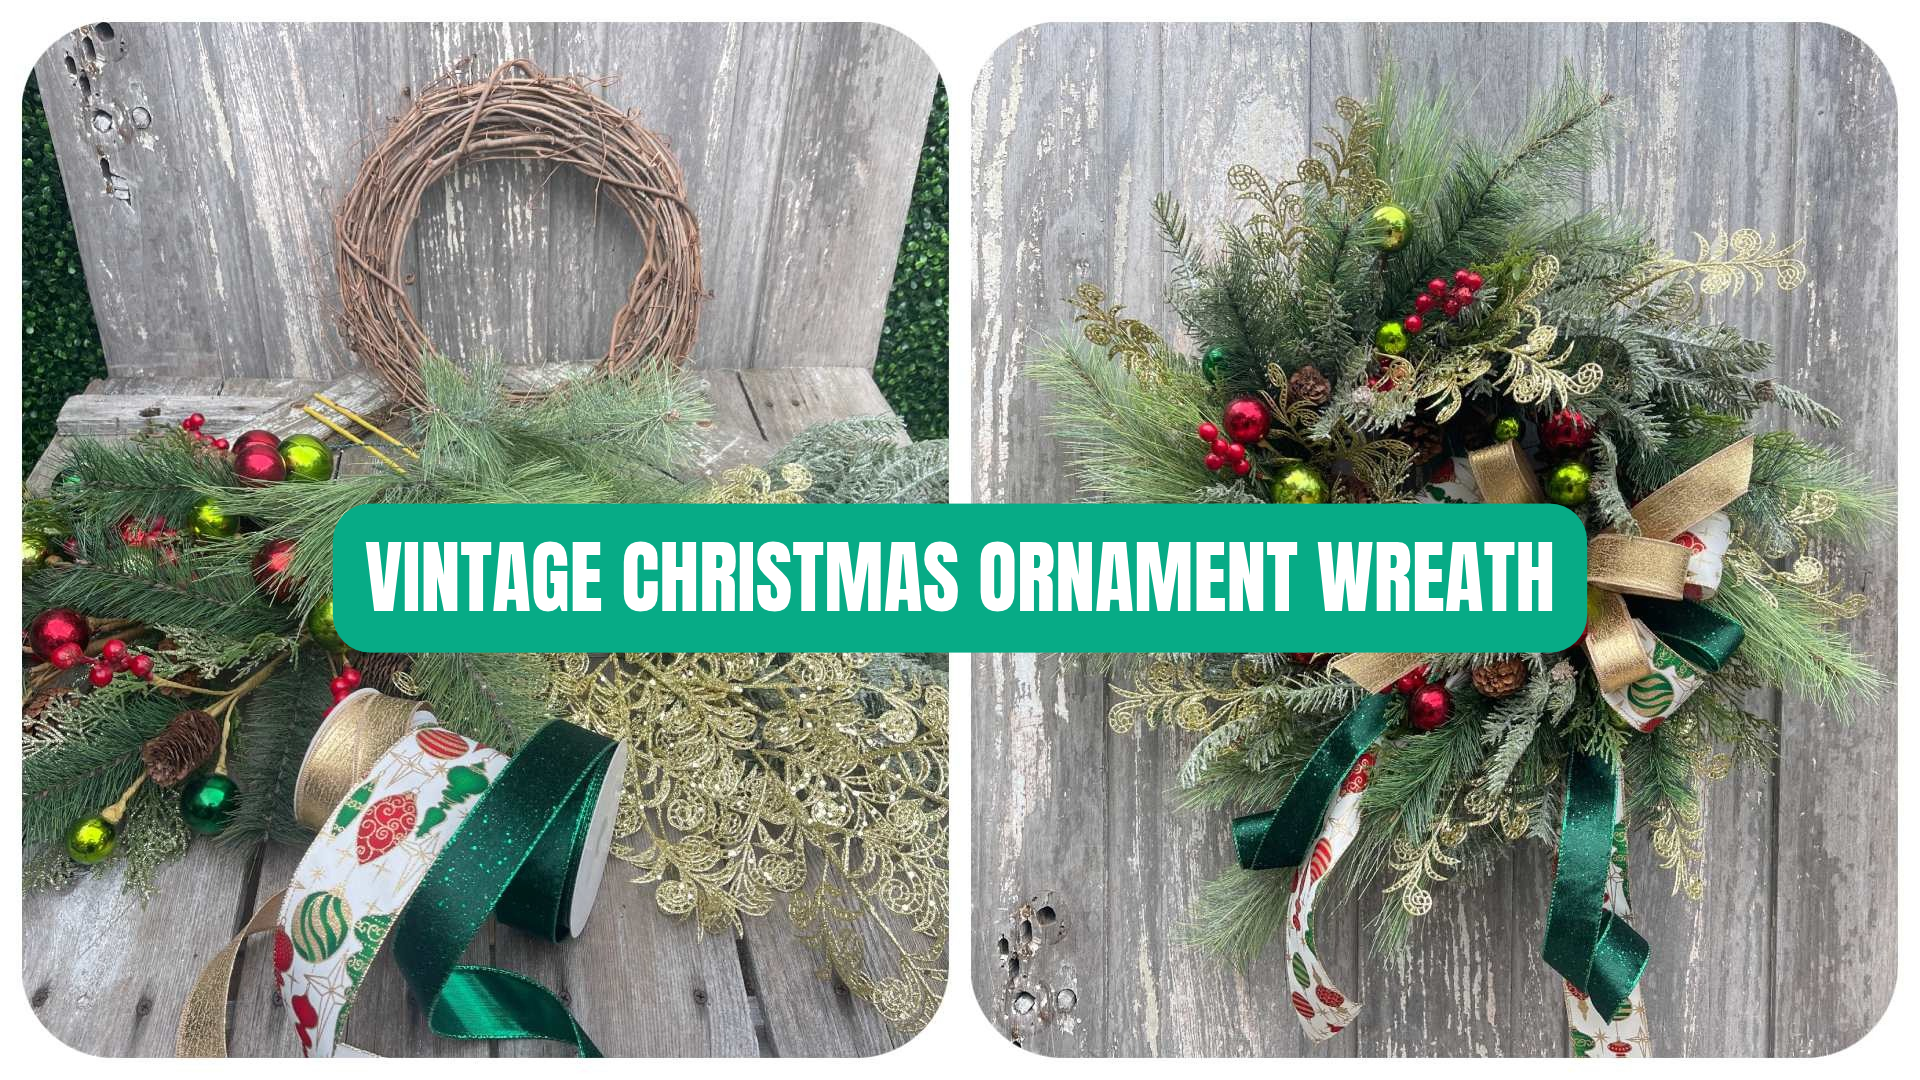
Love the charm of classic Christmas ornaments but want a wreath that looks professionally designed? This vintage Christmas ornament wreath combines rich pine greenery, shimmering ornaments and carefully placed gold accents for a beautiful holiday statement.
In this tutorial, Kelea shows how to build a full Christmas wreath using layers of greenery, decorative ornament picks and ribbon. More importantly, she explains how to create depth, balance the sparkle and make the finished design feel substantial without looking crowded.

Explore Vintage Christmas Ornament Wreath Kit #1461
Watch Kelea Make the Vintage Christmas Ornament Wreath
Follow along as Kelea builds the wreath from the outer greenery framework to the final ornament and ribbon details.
Start With a Strong Christmas Wreath Foundation
Kelea begins by attaching the hanger before adding any floral materials.
Next, she establishes the wreath’s outer perimeter using pine picks.
Use the Clock Method for Balanced Placement
Imagine your wreath as a clock.
Kelea starts by placing greenery at the 12, 3, 6 and 9 o’clock positions.
These four areas establish the basic structure and help distribute the materials evenly.
She also shapes the pine branches before placing them, allowing the greenery to flow around the wreath rather than sticking straight outward.
Designer tip: Establish the outer shape first. It’s much easier to maintain balance when you have a framework to follow.
Layer Iced Pine for Depth and Texture
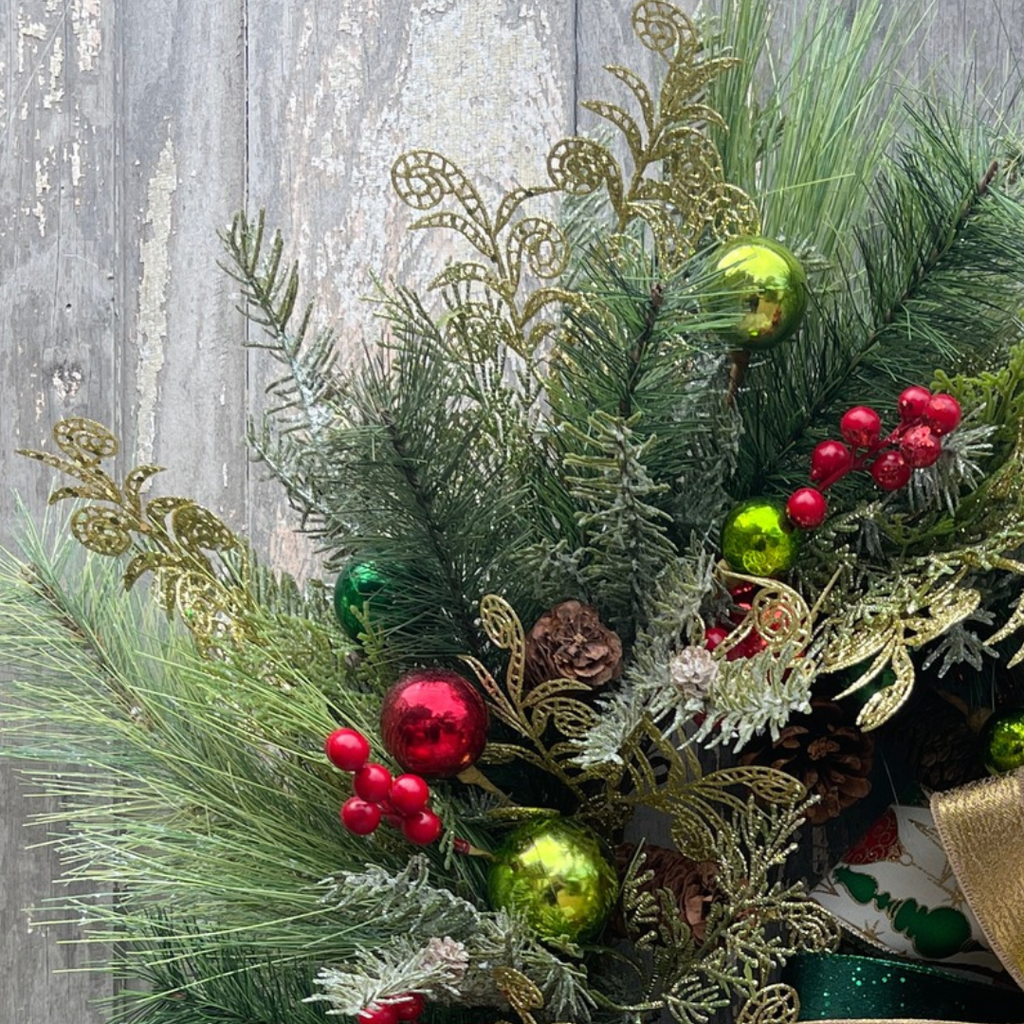
Once the first pine layer is in place, Kelea introduces a beautiful glazed or iced pine with a soft silver-toned finish.
She cuts the bush into smaller sections and positions them between the original greenery.
The contrasting finishes create dimension without requiring completely different colors.
Why Depth Matters in a Christmas Wreath
Kelea explains that depth contributes to the perceived value of a floral design.
Instead of positioning every stem at the same level, she layers the iced pine between and slightly around the original greenery.
As a result, the wreath begins to look fuller and more detailed before the ornaments are added.
She also watches the outer perimeter as she works, filling small openings while keeping the overall shape consistent.
Add Vintage Ornament Picks in Layers
Next come the decorative ornament picks.
These include classic round ornaments, greenery and subtle gold details that give the wreath its vintage-inspired personality.
Rather than inserting each large pick as one piece, Kelea separates the stems into smaller sections.
This gives her greater control over the placement of individual ornaments.
Use Triangle Placement for Balance
Kelea begins positioning matching ornament sections in a triangle pattern.
Then she adds the remaining pieces between those placements.
This keeps similar ornaments from collecting in one area and helps distribute the decorative details throughout the wreath.
She also works slightly toward the outer edge, allowing the ornaments to sit among the greenery instead of disappearing inside it.
Designer tip: When several picks contain the same ornament, stagger them around the wreath to create a balanced look.
Make a Classic Christmas Bow

The bow adds another important element to the design.
Kelea uses a layered bow arrangement with longer ribbon tails and a touch of gold near the center.
The combination complements the ornaments without competing with them.
Position the Bow Without Flattening the Wreath
One of Kelea’s teaching points is how tightly to secure the bow.
Pulling it too tightly can compress the greenery underneath.
However, leaving it slightly looser allows the bow to sit more naturally among the surrounding materials.
She positions the bow a little higher to account for possible settling, then adjusts the loops until she’s happy with the shape.
Add Gold Sparkle Without Overdoing It
With the bow in place, Kelea introduces the more glittery gold stems.
She wants the gold to provide a beautiful finishing touch without overpowering the classic ornament details.
Distribute Glitter Throughout the Wreath
First, she separates the glitter stems into smaller pieces.
Next, she places several around the outer sections of the wreath, tucking them among the pine and ornaments.
She also reserves a few pieces for the center.
This approach creates a consistent sparkle without making any one area too bright.
Designer tip: When working with glittery materials, place some deeper in the greenery and bring smaller accents forward. The contrast makes the sparkle more interesting.
Use Spanish Moss to Secure and Conceal Stems
Grapevine wreaths sometimes have openings where a floral stem doesn’t fit tightly.
When Kelea encounters one of these areas, she uses Spanish moss to help secure the stem.
She adds hot glue and presses a small amount of moss into the opening.
The moss helps fill the gap while concealing the attachment point.
This technique is especially useful when the wreath has an open structure.
Finish the Center With Ornament Details
After establishing the outer layers, Kelea turns her attention to the middle of the wreath.
She adds a few remaining gold accents using triangle placement.
Then she brings smaller ornament pieces closer to the bow and fills openings around the center.
Some ornament sections extend forward, creating additional depth.
Finally, she uses leftover iced pine pieces to connect the background greenery with the details at the front.
The result is a rich, dimensional Christmas wreath with decorative interest throughout.
Check Your Christmas Wreath From Every Angle
Before finishing, Kelea steps in front of the wreath to inspect the overall design.
She looks for openings, checks the perimeter and adjusts any ribbon loops that need attention.
She also examines the back.
Any exposed wire or attachment that might scratch a door should be bent inward or secured.
A Final Designer Check
Before hanging your wreath, ask yourself:
- Does the greenery flow naturally around the design?
- Are the ornaments distributed evenly?
- Is the gold sparkle balanced?
- Does the bow sit comfortably among the materials?
- Are the attachment points secure and concealed?
These final adjustments can make a noticeable difference in the finished design.
Can You Make a Smaller Vintage Christmas Ornament Wreath?
Absolutely.
Kelea explains that the same techniques can be adapted for a smaller wreath or a different budget.
You can begin with a smaller base, divide the greenery picks into additional sections and use fewer decorative materials.
The important part is preserving the overall design principles.
Establish the perimeter, layer your greenery, distribute the ornaments and add finishing details.
A smaller wreath can still look beautiful when those elements are balanced.
Frequently Asked Questions
What makes this a vintage-style Christmas ornament wreath?
The combination of classic round ornaments, traditional pine greenery, layered ribbon and subtle metallic accents creates a nostalgic Christmas look.
How do you arrange ornaments evenly on a Christmas wreath?
Kelea uses triangle placement for similar ornaments, then fills the spaces between them with additional decorative pieces.
Can you make a Christmas ornament wreath without using a lot of glitter?
Yes. Use the glitter stems sparingly, tuck them deeper into the greenery and reserve a few small pieces for the front.
How do you make a Christmas wreath look fuller?
Begin with an evenly distributed greenery framework, then add contrasting pine textures and ornaments at different depths.
How can I make a less expensive version?
Choose a smaller wreath base and reduce the number of greenery and ornament picks. Kelea explains that the same design techniques work on a smaller scale.
How do you hide glue on a grapevine wreath?
Spanish moss can help conceal glue and fill openings around floral stems.
Create Your Own Vintage Christmas Ornament Wreath
This project is a beautiful example of how classic Christmas materials can become something special through thoughtful placement and layering.
By establishing the perimeter first, adding greenery at different depths and distributing the ornaments and gold accents throughout the design, you can create a wreath that feels rich, balanced and timeless.
Explore Kit #1461 — Vintage Christmas Ornament Wreath
For more floral design techniques, visit Kelea’s Design School to explore tutorials and membership options.
Would you decorate your Christmas wreath with subtle gold sparkle or a little more shimmer?