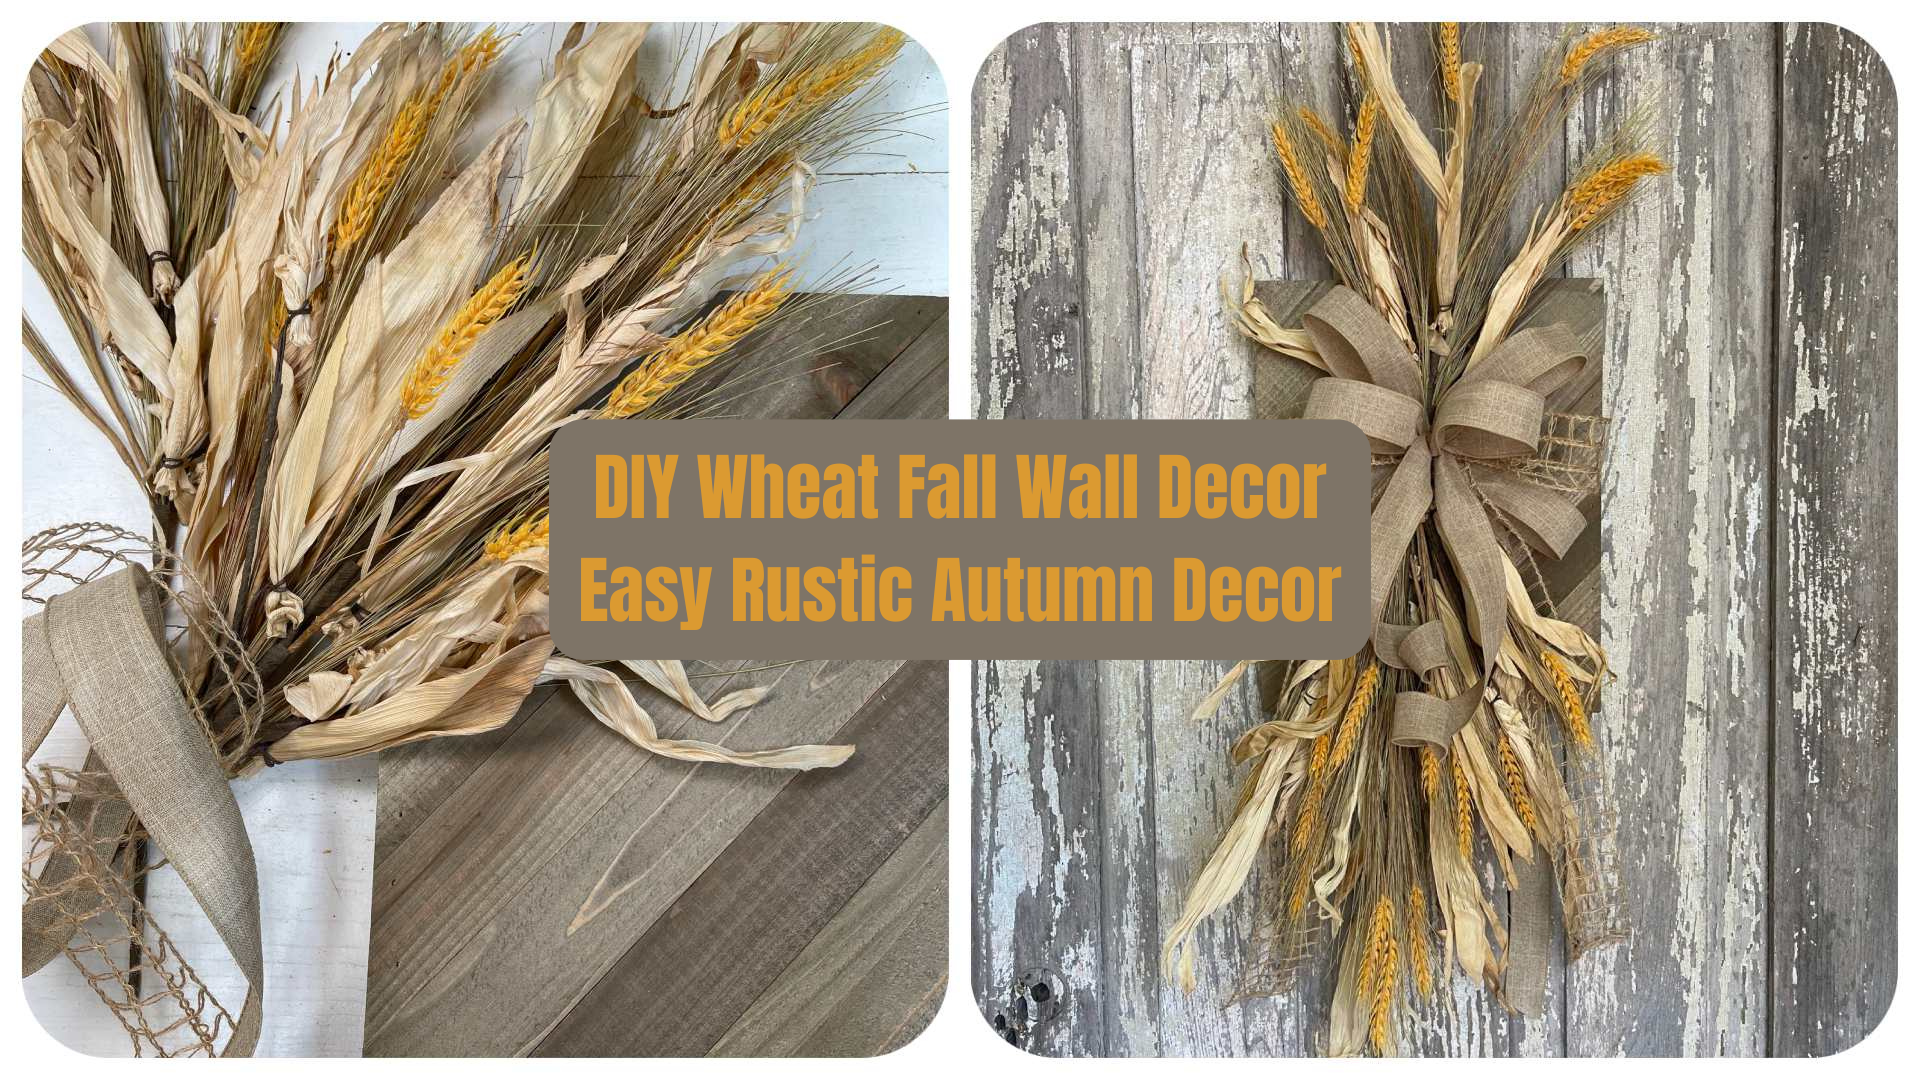
This wheat fall wall decor project proves that autumn decorating doesn’t have to mean pumpkins, bright orange florals or another traditional wreath. By combining a rustic wood base with wheat, dried-look corn husks and natural ribbon, Kelea creates a simple design that feels warm, textural and perfect for harvest season.
Even better, this project teaches you how to take an unexpected base and turn it into floral decor. The secret isn’t covering the entire board with materials. It’s learning how to use shape, proportion, texture and movement to make the floral design and wood base work together.
➡️ Design 682 Supply List:
Fall Wall Decor Supply List
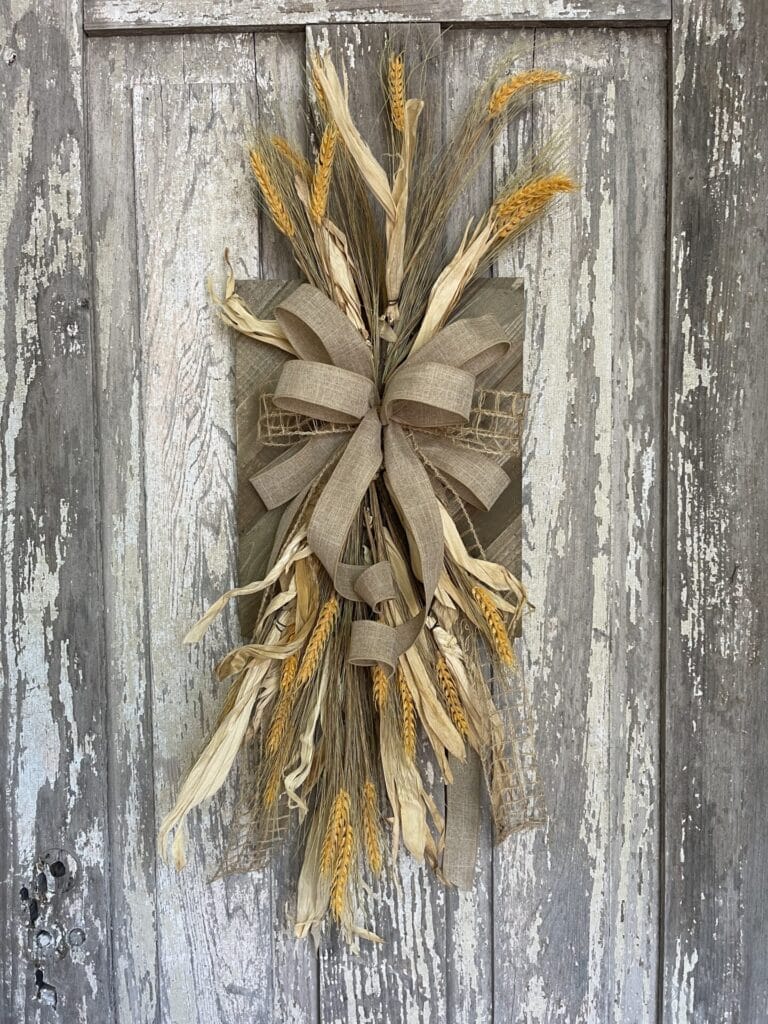
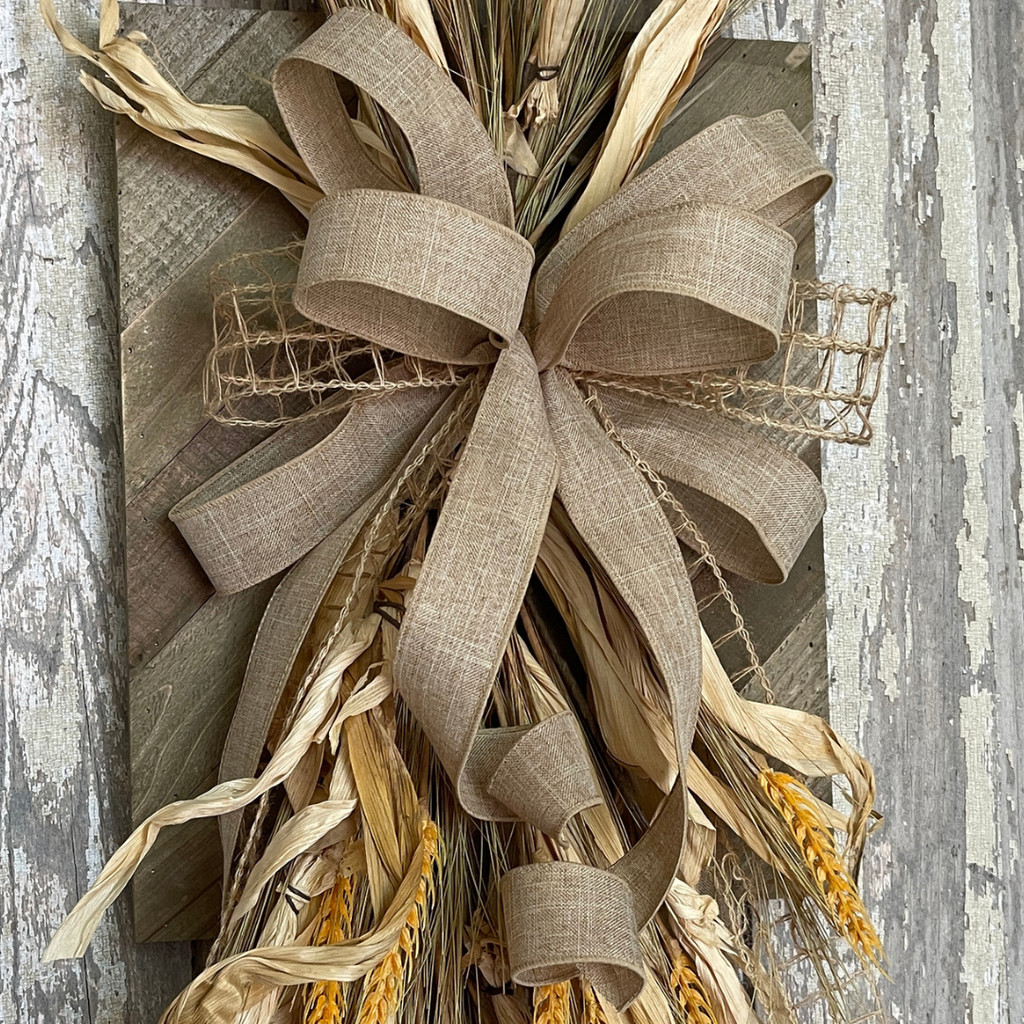
Design 682 combines a rustic wood base with wheat, corn husks and natural ribbon for a simple harvest-inspired look.
Why Wheat Fall Wall Decor Works So Well for Autumn
One of the strongest things about this design is its limited palette.
Instead of using lots of competing colors, Kelea lets the warm wheat, pale corn husks, natural ribbon and weathered wood provide the interest. The texture becomes the star.
Kelea also deliberately uses a larger floral spray at the bottom with coordinating wheat and corn-husk pieces extending above it.
That gives the finished piece length without requiring a wide or bulky arrangement.
It’s especially useful when you want autumn decor that feels seasonal without being overly themed.
Start With an Unexpected Base
One of the best ideas in this project is simply looking at a wood wall piece and asking:
What else could I do with this?
Instead of treating the wood as the finished decoration, Kelea uses it as the foundation for a floral design.
Before attaching anything, she lays the materials over the board to determine the height and placement. She also positions the floral so it helps camouflage the existing jute hanger.
That’s an important habit to develop.
Don’t attach your materials as soon as you pick them up.
Lay everything out first. Check your proportions. Look at the piece vertically. Decide where you want the eye to travel.
Then attach it.
Break the Plane of the Wood Base
Here’s one of the most useful floral design lessons in this project.
Don’t let the edges of your base become the boundaries of your design.
Kelea intentionally extends the wheat and corn husks beyond the wood. In Design School terminology, she describes this as breaking the plane of the base.
Look back at the finished design.
The wheat travels well above the wood. The corn husks and grasses extend beyond the sides. The lower portion drops below the board.
That’s what keeps this relatively narrow wood base from looking like a rectangle with flowers stuck to it.
Use Your Materials to Change the Silhouette
When you’re working with a solid base—a wood sign, door hanger, basket or another container—ask yourself:
Am I following the shape of the base, or am I creating a new shape with my florals?
The second option is often where the more interesting design begins.
Create a Secure Attachment Without Adding Floral Foam
This project also has a clever mechanics lesson.
Kelea wanted the arrangement to be secure without building a large floral-foam structure on the front of the wood.
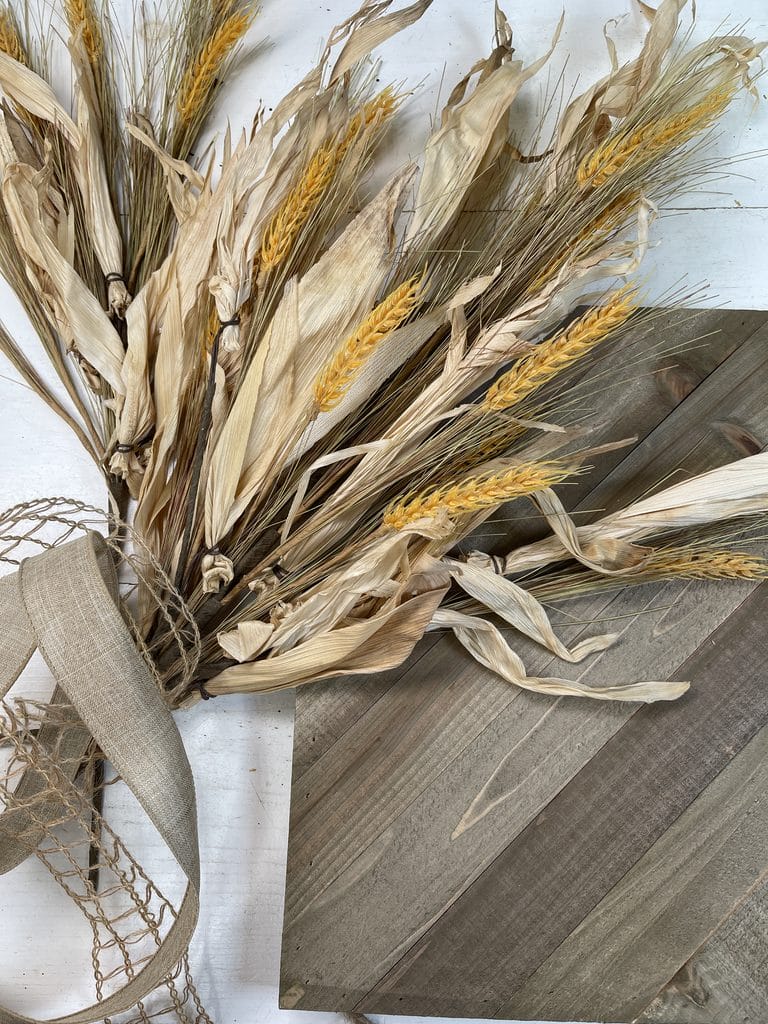
Her solution was to create a ribbon sleeve.
She staples a strip of ribbon tightly to the wood, creating a pocket that holds the floral stems against the board. The larger lower spray overlaps with the upper pieces, and she reinforces the mechanics so the arrangement remains secure.
It’s simple, but that’s exactly why it’s useful.
You don’t always need complicated mechanics to create a professional result.
Think About How the Finished Piece Will Be Handled
Kelea brings up something here that comes directly from her years of selling at craft shows: people don’t always pick up a design the way you expect them to.
That means your mechanics need to withstand handling—not just look good while the piece hangs untouched.
That’s especially important if you’re creating pieces to sell, ship or display at a craft show.
Hide Your Mechanics With Materials Already in the Design
Once the arrangement is secure, there’s still another job:
Make the mechanics disappear.
Instead of automatically reaching for Spanish moss, Kelea makes a smart color decision.
Moss would introduce another color that isn’t really part of this neutral design. So she removes small pieces of corn husk from the existing materials and uses those to camouflage the attachment areas instead.
That’s a tiny detail, but it’s a very good designer lesson.
Camouflage Should Belong
When you’re hiding glue, cable ties, staples or attachment points, look at the materials already in your arrangement first.
Could you use:
- a leaf?
- a piece of greenery?
- a flower?
- ribbon?
- a small section cut from another pick?
Your mechanics need to disappear, but the material hiding them should also make sense in the design.
Know When NOT to Add More Florals
This may be my favorite lesson from Design 682.
More isn’t always better.
Kelea specifically describes this piece as a cleaner, more polished look rather than one of her wilder, fuller designs.
That’s exactly what works here.
The wood needs to remain visible.
The negative space around the wheat is part of the design.
The neutral palette needs room to breathe.
If Kelea had continued filling every opening with greenery, flowers and picks, this would become a completely different piece.
Let the Style Tell You When You’re Finished
Before adding another stem, ask:
Does this design actually need more—or am I adding something simply because there’s an open space?
Open space isn’t always a problem.
Sometimes it’s part of the composition.
Add a Simple Bow Without Overpowering the Wheat
The bow follows the same philosophy as the florals: keep it intentional and restrained.
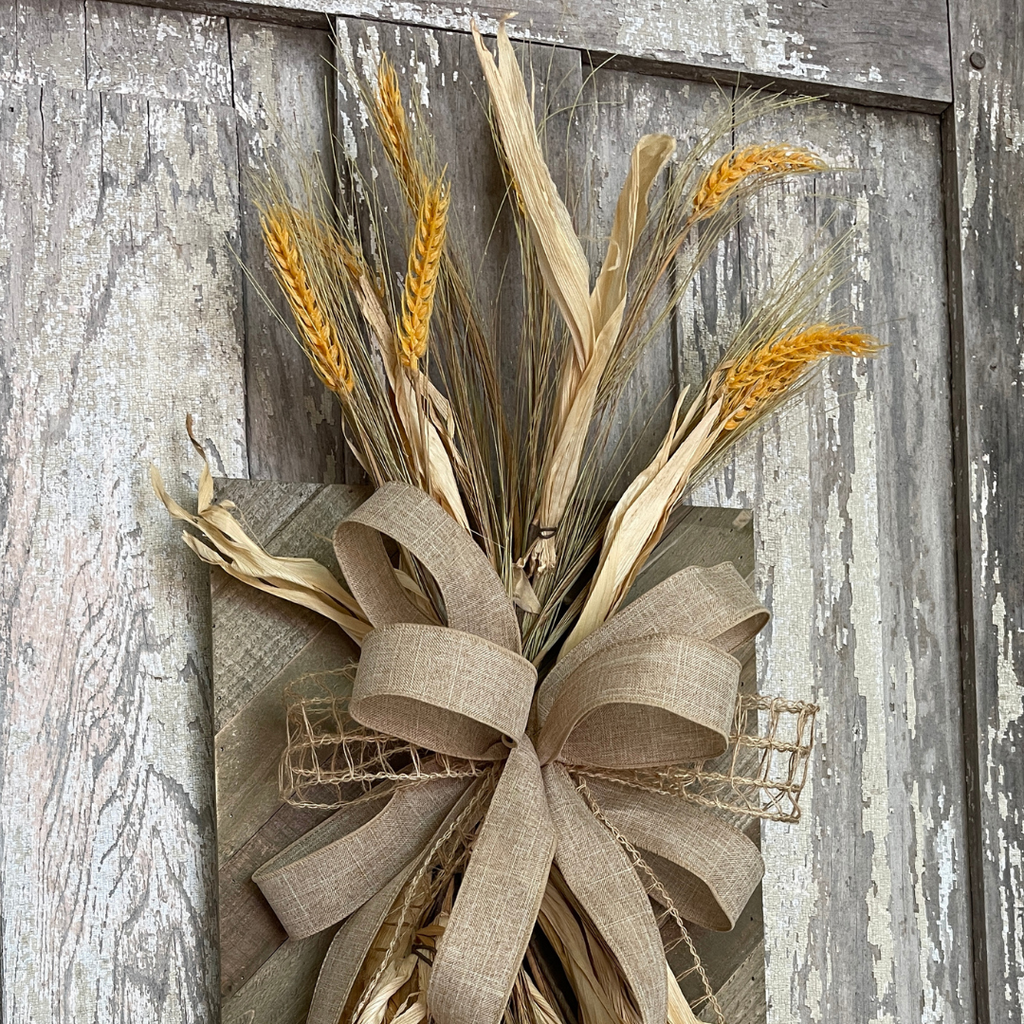
Kelea creates longer tails to complement the vertical shape, then uses fewer loops than she might in a fuller design. She specifically explains that she doesn’t want a heavily looped bow because this project has a classic, clean look.
A second open-weave ribbon adds another texture and a little dimension without introducing a competing color.
Notice what that does in the finished photo.
The bow isn’t the entire focal point.
Instead, it becomes the transition between the wheat extending upward and the corn husks and wheat flowing downward.
That’s a much more integrated use of ribbon.
Use Long Ribbon Tails to Continue the Vertical Line
The ribbon tails also reinforce the shape Kelea established with the florals.
Rather than stopping abruptly beneath the bow, the tails weave down into the wheat and corn husks.
That continuation helps your eye travel through the whole piece.
When making your own wheat fall wall decor, don’t automatically trim every ribbon tail to the same length. Consider what each tail can contribute to the shape.
Some can remain shorter near the bow.
Others can travel farther down.
And because wired ribbon can be manipulated, you can give the tails curves and movement rather than allowing them to hang flat.
Could You Make This Fall Wall Decor Without a Bow?
Absolutely.
Kelea actually discusses another option during the tutorial.
For someone who doesn’t want ribbon, she suggests using natural elements such as smaller pinecones or a lotus pod in the center instead.
That’s another reason this project is useful beyond simply recreating Design 682.
The structure can stay the same while the finishing details change.
You could create a very natural version with no ribbon at all, or use a different neutral ribbon to coordinate with your own home.
A Great Alternative to a Traditional Fall Wreath
Because this design stays relatively narrow, Kelea points out that it could work especially well for places where a large, full wreath isn’t practical—including a screen door.
It could also work beautifully:
- on an interior door,
- beside an entry table,
- in a kitchen,
- on a narrow wall,
- as part of a harvest display,
- or as a pair flanking a larger arrangement.
Kelea even suggests creating two coordinating pieces and placing an arrangement between them for an entry display.
That’s a great example of taking one floral project and thinking beyond its original purpose.
Learn the Why Behind Floral Design
Projects like this are a perfect example of why Kelea’s Design School goes beyond simply telling you where to put a stem.
The bigger lessons are things you can reuse:
Why should the florals extend beyond the base?
How do you create a strong vertical line?
When should you leave negative space?
How can you hide mechanics without introducing an unrelated material?
When does a bow support a design instead of overpowering it?
Those principles can be applied to completely different supplies and projects.
➡️ Learn more about Kelea’s Design School
Wheat Fall Wall Decor FAQ
What kind of base can I use for wheat fall wall decor?
Kelea uses a rustic wood wall piece for this project. The important thing is choosing a base that can safely support your floral materials and attachment method.
Do I need floral foam for this project?
No. Kelea specifically designed this project without floral foam. She creates a ribbon sleeve attached to the wood to hold the floral pieces and reinforces the arrangement for stability.
Can I make this without a bow?
Yes. For a more natural look, Kelea suggests replacing the bow area with elements such as smaller pinecones or a lotus pod.
How do I keep fall wall decor from looking flat?
Allow your floral materials to extend beyond the physical edges of the base. Varying the height, width and direction of your stems changes the silhouette and creates movement.
How do I hide the attachment points?
Use materials already present in the design whenever possible. In this project, Kelea uses pieces of corn husk to camouflage mechanics rather than introducing moss in a different color.
Can this design be used on a door?
Yes. Its narrow profile makes it an interesting alternative to a traditional round wreath, and Kelea specifically mentions its potential for screen doors.
Make Your Own Rustic Autumn Wall Decor
Design 682 is simple, but that’s exactly what makes it such a good teaching project.
The wheat creates height. The corn husks provide natural movement. The wood adds rustic texture. The restrained bow connects the upper and lower portions without taking over the arrangement.
Most importantly, you can take the techniques Kelea teaches here—breaking the plane, controlling proportion, leaving negative space, hiding mechanics and creating a strong vertical line—and use them again with completely different floral designs.
➡️ Ready to make it?
Get the Design 682 Fall Wall Decor Supply List