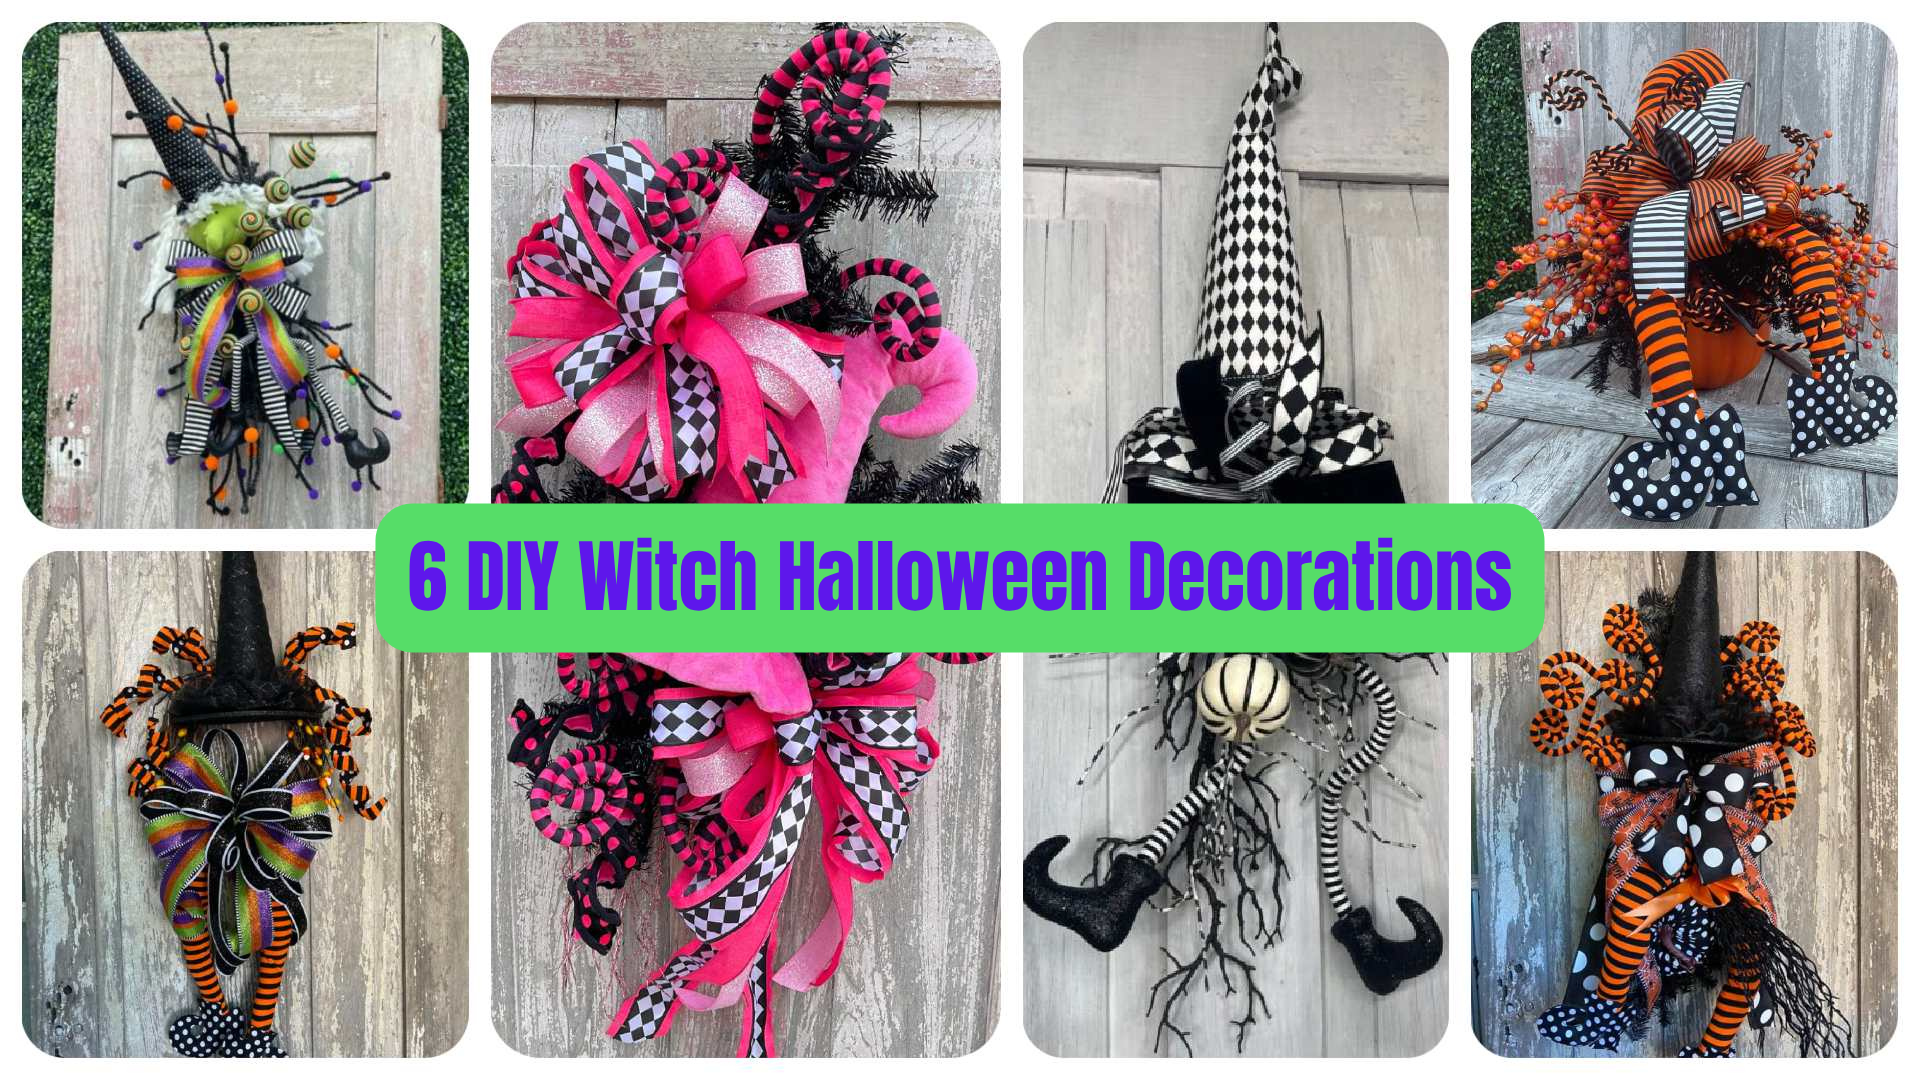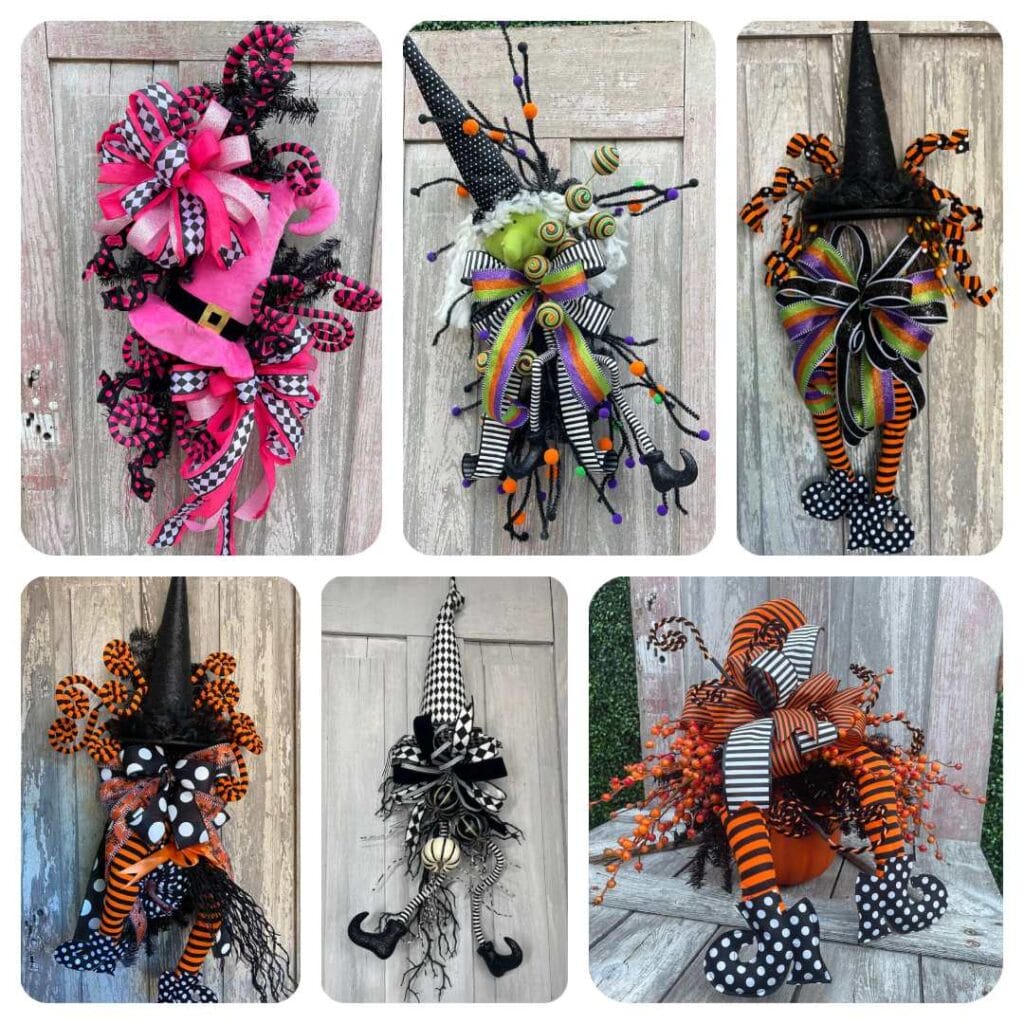
Looking for DIY witch Halloween decorations that are more whimsical than scary? These six designs are packed with witch hats, striped legs, pumpkins, bows, curls, berries and plenty of personality.
This collection includes witch wreaths, Halloween swags and a pumpkin centerpiece, but the real value is in the design ideas behind them.
You’ll see how Kelea builds unconventional bases, creates focal points, layers materials for depth, uses ribbon to connect a design and turns individual Halloween pieces into one cohesive arrangement.
Whether you want to recreate a favorite project or simply borrow an idea for your own Halloween decorating, there is plenty of inspiration here.
Want the supply information for all six designs?
Learn the Techniques Behind These Witch Designs
Whimsical projects are fun, but they still rely on the same design principles Kelea uses when creating more traditional florals.
Placement matters.
Balance matters.
Direction matters.
And even the craziest witch legs need to look like they belong where you put them!
Inside Kelea’s Design School, you’ll learn how to understand those principles so you can create confidently with the materials you already love.
[Learn More About Kelea’s Design School]
1. Create a Witch Swag from an Unexpected Base

One of the most creative ideas in this collection starts with something you probably wouldn’t expect:
A paint stir stick.
Kelea uses the stick as the structural foundation, attaches floral foam and then layers black garland over it to create a completely new swag base.
Two sections of garland are crisscrossed and secured to establish the shape before the witch components are added.
Hide the Mechanics as You Build
The foam is necessary for construction, but it shouldn’t become part of the finished look.
Small pieces of pine are added over the foam to camouflage it.
This is a technique you’ll see repeatedly throughout Kelea’s designs:
Build it strong first. Make the mechanics disappear second.
Once the base is ready, the witch begins to take shape.
2. Give Your Witch Halloween Decor Personality
Witch legs aren’t just something to attach to a wreath or swag.
They’re an opportunity to create movement.
Instead of positioning the legs perfectly straight, Kelea bends and angles them, allowing one to kick outward or rest over a pumpkin.
The wired construction means you can manipulate the position until the witch starts developing her own personality.
Dry-Run Your Placement First
Before permanently attaching the major components, lay them out.
Where will the legs go?
Decide where the hat belongs.
Think about the best spot for the pumpkin.
And most importantly:
Where is your bow going?
Planning those larger elements first prevents you from filling an area you’ll need later.
3. Turn Ribbon into Part of the Witch
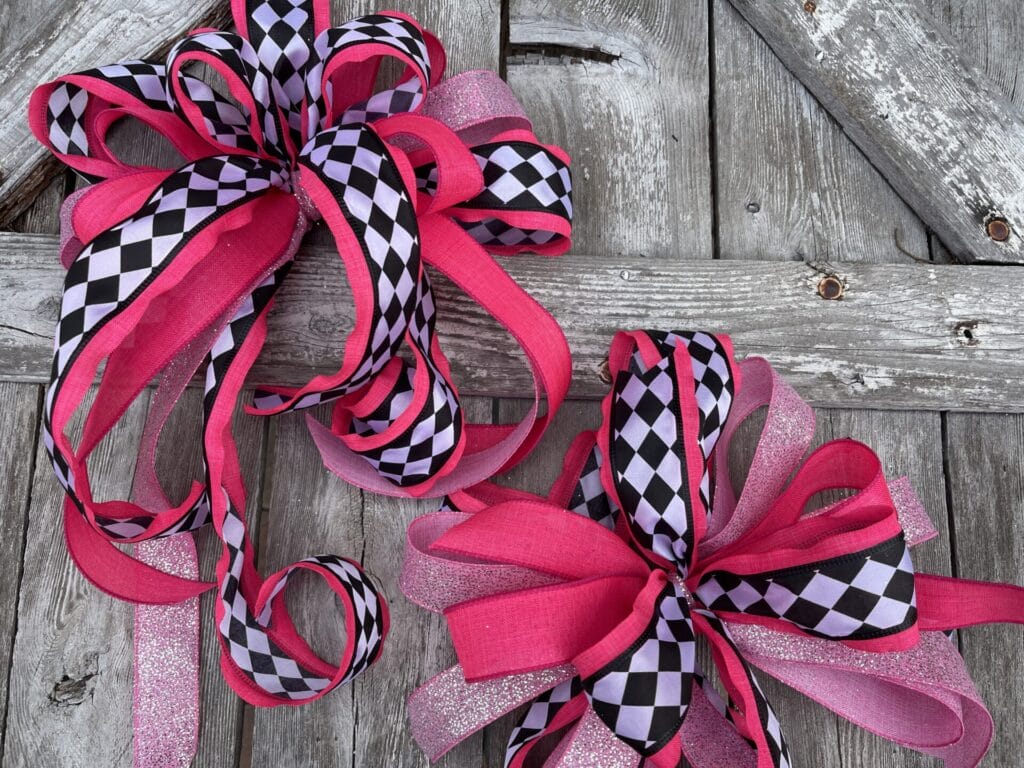
In one of the swags, the bow does much more than decorate the arrangement.
It essentially becomes the witch’s body.
The witch hat establishes the top, the legs establish the bottom, and the large bow fills the area between them.
Long ribbon tails travel behind the legs, making the ribbon look almost like a flowing dress.
That’s a clever way to use ribbon structurally rather than treating a bow as something you simply attach after the design is finished.
Repeat Colors and Patterns
The ribbon also connects the other elements.
For example, polka-dot ribbon repeats patterns found elsewhere in the witch, while orange brings traditional Halloween color into the design.
Repeating those details helps unrelated components feel intentional.
4. Build a Witch Swag Without a Traditional Base
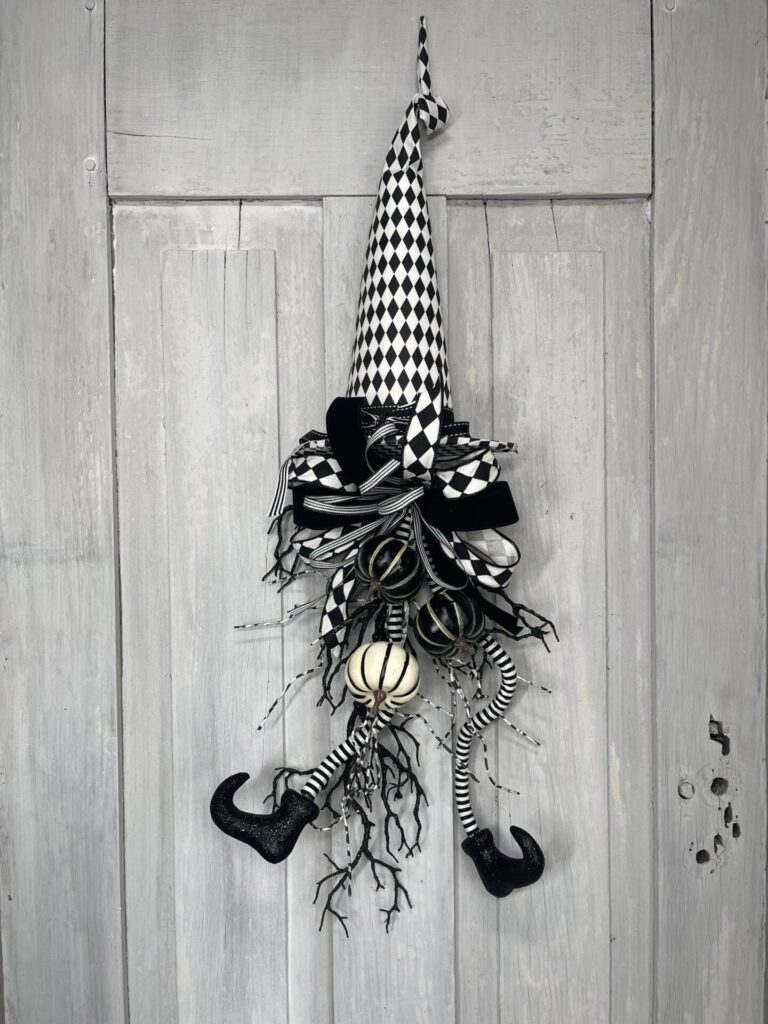
Another project takes the idea even further.
You don’t necessarily need a wreath frame or premade swag base.
Kelea shows how large wired elements can be clustered together and secured with cable ties to create their own foundation.
A glittery branch becomes the background.
Witch legs create movement.
A hat establishes the upper focal area.
Black-and-white pumpkin picks bring in another layer of Halloween detail.
This is a great technique to remember when you find a large seasonal spray or decorative stem that you love.
Sometimes the decoration itself can become the base.
5. Use Black Garland as Halloween “Greenery”
Greenery doesn’t have to be green.
For Halloween, Kelea uses sections of black garland in much the same way she’d use foliage in another seasonal design.
It adds body to the design.
Empty areas can be filled without adding more traditional greenery.
The black color also creates a dramatic background for brighter Halloween materials.
And because a garland can be cut into multiple sections, a relatively small amount can fill several areas of a design.
Use Filler to Support Your Focal Pieces
This is especially effective behind curls, bows and brighter witch components.
Rather than leaving those pieces floating visually against an empty background, the black garland gives them something to sit against.
The result has much more depth.
6. Manipulate Wired Picks Instead of Accepting Their Original Shape
This is one of the most useful lessons throughout the compilation.
Just because a pick came out of the package in a certain shape doesn’t mean it needs to stay that way.
Bend it.
Curve it.
Spread it.
Change its direction.
Kelea specifically teaches her Design School students to manipulate the pieces to work for the design, rather than allowing the original shape of the material to dictate the finished arrangement.
That’s a big part of creating movement.
7. Break the Plane for More Dimension
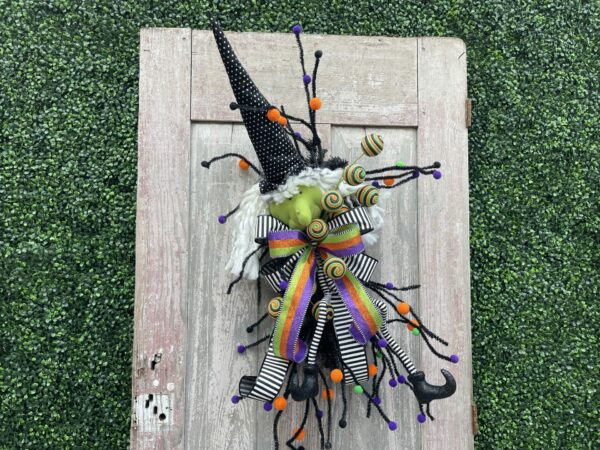
One technique you’ll see repeatedly in these DIY witch Halloween decorations is overlapping elements.
A curl might come across the edge of a witch hat.
A bow might overlap another focal element.
Ribbon might travel behind one piece and emerge in front of another.
Kelea refers to this as breaking the plane.
Instead of every element occupying its own separate area, some pieces cross into neighboring areas.
That overlap makes the design look integrated rather than assembled from individual parts.
8. Create a “Bow Zone” Before Adding Florals
This is one of those simple concepts that can prevent a lot of frustration.
Decide where the bow is going before filling the design.
Kelea calls this the bow zone.
Once that space has been identified, you can build the florals and other materials around it.
In one witch design, she deliberately leaves the center open while building berries and other materials on the left and right. The bow will eventually fill that opening.
Without that planning, it’s easy to create a beautiful floral section—and then realize you have nowhere to put your bow.
9. Create Witch “Hair” with Floral Materials
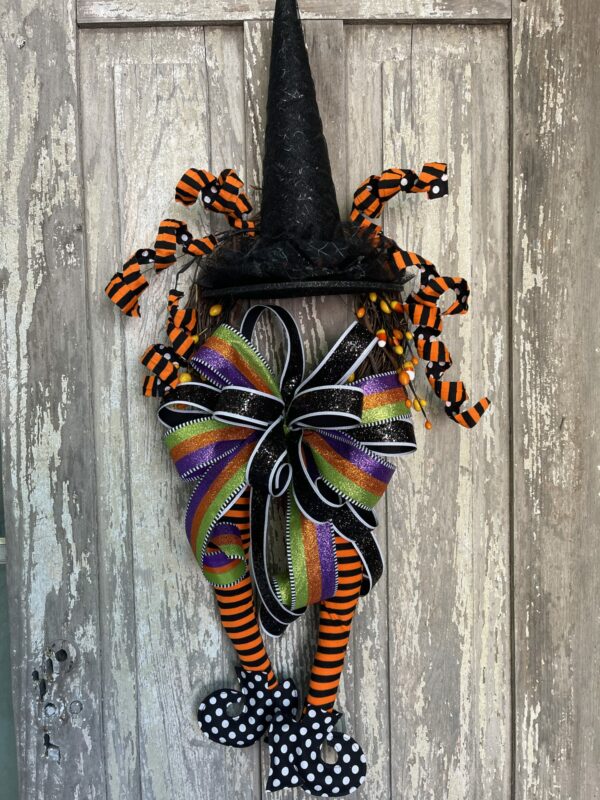
Several of these projects use the florals themselves to suggest hair.
Black pine establishes the background.
Berries add another layer.
Curly wired picks bring movement toward the foreground.
Kelea describes one of these as a three-step approach: black pine first, berries second and curls on top.
Notice that we’re back to layering again.
Background → middle → foreground.
Even something as silly and fun as witch hair benefits from good floral design structure.
10. Make a Witch Halloween Centerpiece on a Pumpkin
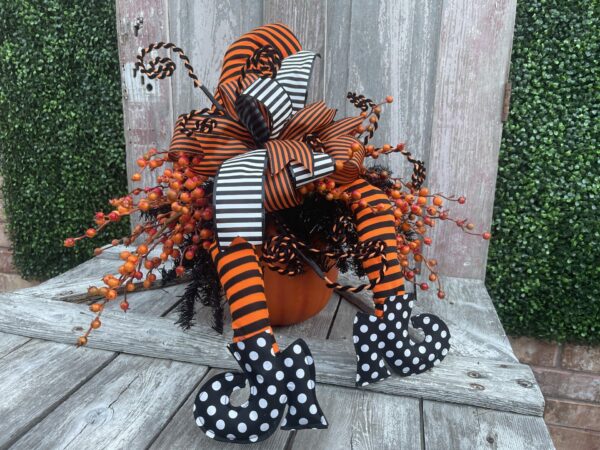
Not every witch belongs on the front door.
One project turns a pumpkin into the foundation for a whimsical witch centerpiece.
Kelea attaches hard floral foam to the pumpkin, securing it before beginning the decorative layers. The foam provides attachment points while black garland helps camouflage the mechanics.
This opens up an entirely different way to use witch-themed materials.
Instead of hanging your design, you can create Halloween decor for:
- An entry table
- Kitchen island
- Dining table
- Buffet
- Party table
- Mantel display
And because you’re using the same basic principles—foundation, focal point, layering, balance and finishing—the skills transfer from wreaths and swags directly into centerpieces.
11. Balance Whimsical Elements with Strong Construction
The crazier the focal pieces get, the more important the construction becomes.
Witch hats, long legs, brooms and oversized bows can shift weight away from the center of a design.
Kelea frequently combines attachment methods rather than relying on only one.
Depending on the project, that may include:
Hot glue + floral pins
Cable ties + frame wires
Floral foam + wired stems
The goal is to make the design look playful without making the construction fragile.
12. Don’t Forget the Back of Your Halloween Design
The front gets all the attention while you’re creating, but turn your piece around before calling it finished.
Can you see cable ties?
Foam?
Glue?
Loose wires?
Exposed attachment points?
Kelea points out that visible mechanics should be covered as you notice them—particularly when creating finished designs to sell.
A polished back may not be the exciting part of floral design, but it matters.
Which Witch Halloween Decoration Is Your Favorite?
Which Witch Halloween Decoration Is Your Favorite?
That’s what makes a compilation like this so useful. You don’t have to choose one exact design and recreate every detail.
Maybe the unconventional paint-stick swag base catches your attention. You might love the witch whose bow becomes her body, or perhaps the bold pink-and-black color palette is more your style.
The witch-hair technique is another idea you can borrow for your own Halloween designs. And if wreaths and swags aren’t what you need, the pumpkin centerpiece may be the inspiration that belongs in your home.
Take the techniques you love and use them in your own Halloween decorating.
Frequently Asked Questions About DIY Witch Halloween Decorations
Can beginners make these witch Halloween projects?
Yes. Some designs have more components than others, but Kelea breaks the construction into layers. Start by establishing the foundation and larger focal elements before adding smaller decorative details.
Can I make a witch swag without a premade swag base?
Yes. Several projects demonstrate alternative ways to build a foundation, including using a paint stir stick with garland or clustering large wired decorative pieces together.
What can I use instead of greenery in Halloween designs?
Black garland works especially well as Halloween filler. It can provide body and contrast while supporting brighter pumpkins, ribbon, berries and whimsical picks.
Why should I leave space for my bow?
Establishing a bow zone prevents you from filling the entire design with florals before realizing you’ve lost the space intended for your bow.
How do I make witch legs look more natural?
Use the wires inside the legs to change their position. Bend, kick, cross or angle them so they create movement instead of hanging straight down.
What does “break the plane” mean in floral design?
It means allowing one design element to overlap another visual area. For example, a curl might cross in front of the witch hat or a bow may slightly overlap another focal piece. This helps connect the different parts of the design.
Can I use these ideas without making the exact projects?
Absolutely. Techniques like layering, establishing focal zones, manipulating wired materials, hiding mechanics and creating your own bases can be applied to many seasonal projects.
6 Witch Designs, Plenty of Halloween Inspiration
These six DIY witch Halloween decorations show just how many directions you can take one theme.
You can create something for the front door.
Build a long whimsical swag.
Make a wreath filled with dramatic curls and ribbon.
Or bring your witch decor indoors with a pumpkin centerpiece.
More importantly, each project gives you another technique to carry into your next design.
Compilation 1606:
[See the 6 Witch Wreaths, Swags & Centerpiece Ideas Supply Lists]
Keep Learning with Kelea’s Design School
If you want to go beyond copying a project and understand why the placement works, that’s where Kelea’s Design School comes in.
You’ll learn how to establish focal areas, work with transition points, create depth and dimension, manipulate materials, build strong mechanics and develop designs that feel like your own.
[Learn More About Kelea’s Design School]