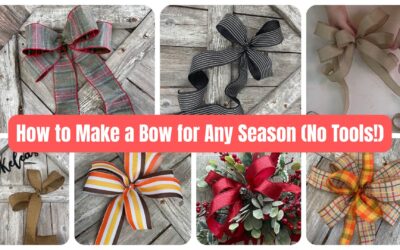
We have some beautiful Blast Off Bows today to share with you! You can use these for any festive wreath or swag this fall season. Follow along in this quick fall ribbon bow tutorial and see exactly how easy these are!
Quick Fall Ribbon Bow Tutorial
Bows can really take your wreath or swag to the next level. Bows are something I have been making for years, many years at that. I love all types of bows and ribbon tails. See all the different ribbons make me so happy! I see the ribbon and imagine what type of bow I can make with it! I always think too, the bigger the bow the better in my opinion. If you are looking for help in making bows then you are in the right place.
The first thing to know and remember when you start off making bows is what you do to one side you need to do to the other side. Also, I like to make some bow recipes to follow. In this tutorial, I will show exactly what I mean by that.
The key to a great Blast Off Bow is to pick the pattern you want to be dominant in your project and make sure you start with that as your base. Add any coordinating ribbon to accent your dominant pattern and build on that to create a beautiful bow for your next wreath or swag!

As you start making bows they get easier. Trust me, the more you make the better you will become. I don’t want you to be discouraged when making your first few bows. However, I want you to have confidence in making your bows. That is why I am sharing this tutorial with you. As you follow this simple quick fall ribbon tutorial you will have so much success in making bows from here on out.
Ingredients
2.5″ Dark Linen with Ivory Pumpkins Ribbon on a 10 Yard Roll
2.5″ Natural Open Weave Burlap Ribbon on a 50 Yard Roll
2.5″ Solid Orange Satin with White and Black Railroad Stripe Edge Ribbon on 10 Yards2.5″ Orange/Black Ultra Glittery Swirls Ribbon on a 10 yard roll
1.5″ Orange Brown Yellow Cream Square Plaid Ribbon on a 10 Yard Roll
2.5″ Ivory Faux Burlap with Dotted Pumpkins Ribbon on a 50 Yard Roll


Directions For 1st bow
- Start by deciding which ribbon you’d like to be the dominant pattern. We’ll start with the dark linen with Ivory pumpkins ribbon and add the spool on your EZ Bow Maker. Make a 20” tail, after snipping the end on an angle. Twist in the center and make a 7” loops on each side. Always twist your ribbon in the center to make sure the pattern is facing out. Repeat the same process adding two more 7” loops on each side for a total of three. Pinch the center down with your loops are complete and trim your 20” tail at an angle.
- The second layer of your blast off bow will be with your burlap natural weave ribbon. Add the spool to your Bow Maker and start off with tails slightly shorter than your base ribbon. Make 6” loops for a total of two on each side, remembering to twist and pinch in the center
- The last layer of your blast-off bow will be the Ivory pumpkin wired ribbon. Trim your tails at an angle slightly shorter than the previous layer. Make 5” loops on each side and trim the tail.
- Run your cable tie right beside the center of the bow maker and pinch the center of the bow as you lift the ribbon from the Bow Maker. Cinch the cable tie just enough to hold it together so you can take it off. Rotate the cable tie end to the back and start by fluffing and spacing out your back loops first. Continue through each layer of your bow, making sure each loop has its own plane.
- Add a second cable tie through the back before tightening the first tie. Snip off the excess with your wire cutters. Use a small 12” piece of your natural weave burlap and fold over and tie around the center of your bow to hide your zip ties. Trim the extra from the back.
Directions For GLAM FALL bow
- For the next bow you will need to grab your gold fall leaves ribbon and add the spool to the EZ Bow Maker. Start with a 20” tail trimmed at an angle. Make three 7” loops on each side of your bow. Twist and cinch each time in the center of your bow. Trim the 20” tail at an angle.
- Continue with the second layer of gold glitter ribbon and trim your tail at an angle slightly shorter than your base ribbon. Make two 6” loops on each side, twisting and cinching in the center. Trim the gold glitter tail at an angle
- Grab the gold fall leaves for our last layer on our blast off bow. Repeat the same process starting with slightly shorter tails trimmed at an angle. Make one 5” loop on each side and trim the last tail.
- Cinch the center of your bow and run a cable tie to the side as you pinch the center and lift your ribbon out of the Bow Maker. Secure with the cable tie just tight enough to keep it together and remove your bow. Turn the cable tie to the back and fluff each loop and position them into their own plane. Add a second cable tie through the back and cinch tight.
- Take a small length of ribbon and fold in half a couple of times. Tie around the center to cover the cable tie, trimming the ends on the back side. Make any adjustments or fluffing you need and your second blast off bow is done!
Directions For 3rd bow
- For this bow we are going to use a 2.5” black and white railroad with orange ribbon for the base and a 1.5” black and orange swirl for the middle layer. Start with a 20” tail trimmed at an angle. Make three 7” loops on each side of your bow. Twist and cinch each time in the center of your bow. Trim the 20” tail at an angle.
- Continue with the second layer of black and orange swirl ribbon and trim your tail at an angle slightly shorter than your base ribbon. Make two 6” loops on each side, twisting and cinching in the center. Trim the gold glitter tail at an angle.
- Grab the black and white railroad with orange for our last layer on our blast off bow. Repeat the same process starting with slightly shorter tails trimmed at an angle. Make one 5” loop on each side and trim the last tail.
- Cinch the center of your bow and run a cable tie to the side as you pinch the center and lift your ribbon out of the Bow Maker. Secure with the cable tie just tight enough to keep it together and remove your bow. Turn the cable tie to the back and fluff each loop and position them into their own plane. Add a second cable tie through the back and cinch tight.
- Take a small length of ribbon and fold in half a couple of times. Tie around the center to cover the cable tie, trimming the ends on the back side. Make any adjustments or fluffing you need and your third blast off bow is done!
When you are ready to expand your floral knowledge, come join us in Kelea’s Design School, we’d love to see you bloom