Add a touch of spooky elegance or whimsical fun to your Halloween wreath with a bewitching Halloween Bow with Pick! Elevate your seasonal decor with hauntingly beautiful designs crafted to complement your wreath perfectly. Embrace the season’s spirit and create a spellbinding entrance that will enchant all who visit.
Learn How To Make A Halloween Bow with Pick
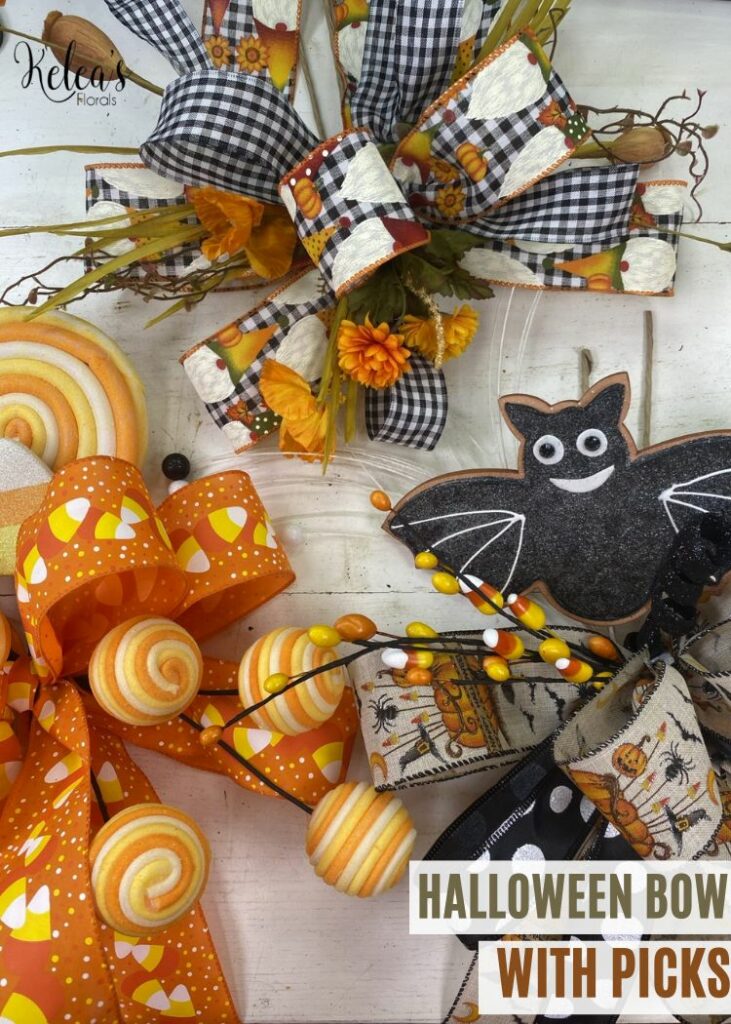
Halloween is one of my favorite holidays! I love the spooky vibes and all the Halloween colors. They always make adorable wreaths. Whether you go towards whimsical, fun Halloween colors or the more spooky Halloween colors, you can adjust your ribbon and picks to match. It’s a really fun way to customize your wreath and take it to the next level.
This bow is a beautiful addition to any wreath but is perfect for holiday wreaths. It could work for a fun Easter wreath or even a more traditional Christmas wreath, just by changing out the ribbons and picks. Sometimes, picking out the wreaths and picks is the most fun part! So let your creativity run wild and add a unique and festive bow to your next wreath.
Ingredients
2.5″ Natural Linen with Halloween Centerpiece Ribbon
1.5″ Black Satin with White Glittered Big Dots Ribbon on a 10 Yard Roll
Directions
- Start by creating your first tail by measuring from the end of your ribbon, the length of your tail. I decided on a long tail, so I measured 20”. Cut your tail and place one end in between the pegs on your bow maker.
- Follow the same steps to make an identical second tail.
- Place your ribbon between the pegs on your bow maker near the end of the ribbon. Create your first loop by looping the ribbon out and then back to the pegs on your bow maker. I decided to make my loops about 7”. Twist your ribbon in between the pegs.
- Create 4 loops by following the same steps. Cut off the end of your ribbon, leaving a very short tail.
- Add your narrower ribbon to your bow maker.
- Choose how long these tails will be. I went with a little shorter than my wider ribbon, about 18”.
- Create 2 loops with the narrower ribbon by following the same steps above. I made them a little smaller, 6” loops.
- Grab your picks and start playing around with where you’d like them to be in your bow. I chose to use 3 picks.
- Add a little bow on top of your bow and picks by creating 2 loops with your ribbon, then putting it between the pegs on your bow maker.
- Thread your cable tie behind your ribbon, then carefully remove the ribbon from the bow maker. Tighten your cable tie, rotate it to the back of the bow, then tighten all the way.
- Fluff and arrange your loops and tails.
- Cut a small piece of your narrower ribbon, about 8” long, to tie around the center of your bow.
- Your bow is ready to go on your wreath!
TIPS AND TRICKS
- You can absolutely use this same bow with any ribbon or picks to create a bow for any wreath you are working on. Use holiday ribbons and picks for a holiday wreath or ribbons and picks that match your wreath for an everyday look.
- There are a bunch of ways to attach a bow to a wreath, but I love a cable tie or 18 gauge wire.
What colors are most common for Halloween?
Halloween has quite a few colors. You could go with bright orange and purple or blacks and greys. Some ribbons also use a combination of purple, orange, and green. Mixing and matching any of these colors will also give you a fun or spooky vibe, depending on what you are looking for!
Where should I put a bow with picks on my wreath?
I like to place mine on the top or bottom of my wreaths because I feel that it is most balanced that way. But you can play with the placement! Set it on your wreath and see if you like it. Move it around before attaching it, and find where it looks best!