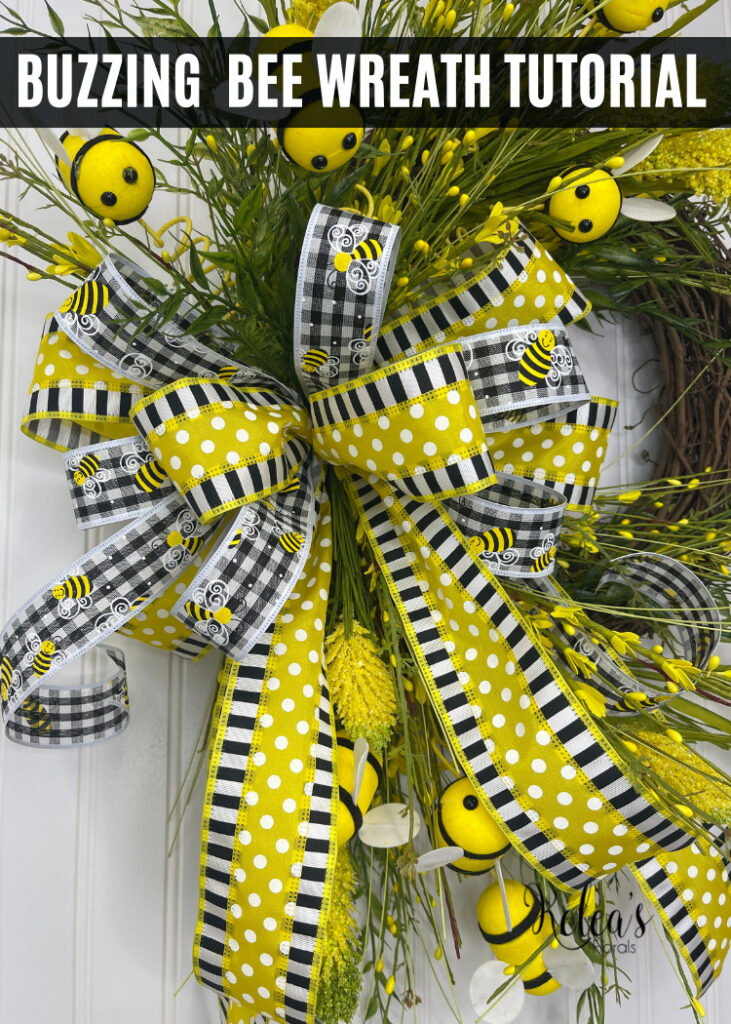
Making a bee wreath is a fun and easy DIY project that you can do with just a few supplies. Here’s a step-by-step tutorial on how to make a bee wreath that will be perfect for your front door.
How To Make A Bee Wreath
Making your bee wreath is super simple. With this design, you will notice that we start at the top. Then you will continue around the bottom adding the fern.
With this grapevine base being smaller you want to use a little less hot glue. Too much hot glue will show a bit more. If you do have some glue showing you just simply need to add in some Spanish moss. This helps hide those hot glue blobs.

Having the right supplies to make your wreaths is key to making beautiful wreaths. One of the nice things about the products in my shop is that they are easy to manipulate and high-quality products. I only select products that are easy to trim and separate, and of course, look great in a design.
To learn more about how to design a wreath be sure to check out Kelea’s Design School. There I will teach you how to create wreaths to use in your home or sell in your Etsy shops.
Ingredients
Directions
- Start by using your fishtail fern and dip the ends in hot glue and start at the top and work your way around the outside of your grapevine wreath.
- Break up your yellow filler flowers and place them in between the green fern you just placed. Add moss as you go to help hold your items in.
- Now add your main floral placing it top to bottom, placing equally.
- Add your bow with your zip tie
- Place your bee picks into your design. Dip in glue and place under the bow.
- Check your design and add any filler pieces you feel you need. Use your yellow filler flowers and place them around your bees.
- For the original supply with links to the video making it can be found here: https://www.keleas.com/product/buzzing-bee-wreath-supply-list/
How To Hang A Wreath?
Hanging a wreath can be a simple and easy process. Here are some steps that are worth sharing. Start by choosing the location where you want to hang the wreath. It could be on a door, a wall, or a window.
Decide on the type of hanger you want to use. You can use a wreath hanger that fits over the top of your door. Try a suction cup hook for a window, or a picture hanger for a wall. If you’re using a wreath hanger, simply slide the hook over the top of your door. Then adjust the height as needed. If you’re using a suction cup hook, moisten the cup and press it onto the window.
Are you searching for a unique DIY project this Halloween? Look no further than the Frankie Centerpiece Kit, perfect for adding a personalized and cute spooky touch to your Halloween decor. This DIY arrangement kit blends creativity with simplicity, making it an ideal craft for all skill levels.
DIY Frankie Centerpiece for Halloween Home Decor
Crafting your centerpiece is straightforward and enjoyable. You’ll need some basic tools like styrofoam, wire cutters, scissors, and hot glue. Begin by setting styrofoam inside the bucket, strategically place the twig sprays and, and use the eyeball picks for a finishing touch of flair.

Let me show you how to create your own DIY Frankenstein Halloween Centerpiece that is a cute not spooky decoration for Halloween. Mixing your spooky decorations with old and new gives you fun times spent crafting together now while reminiscing about the Halloweve of yester years. It’s a wonderful way to start a family tradition or simply enjoy some seasonal crafting magic.
Ingredients
Directions
- Start by finding cutting the styrofoam so it is nestled inside of the Green Frankenstein Bucket so that it sits nicely inside and glue down. I like to use both Gorilla Glue and Hot Glue to really secure it for both now and long term.
- Cut Black Garland Base into small sections and set your base, spreading for maximum coverage.
- Prep your picks by grabbing your Purple Green Orange Felt Ball Twig Sprays. Sseparating them into smaller picks. You can also twist the black chenille around your finger to create a fun effect.
- Trim your Glitter Eye Ball Picks and add to the stryofoam. Be sure to space them for the best visual display.
- Cut and prep the White Black Chenille Curly Stems add some dimension to them by curling with your fingers to really give them life.
- Stem back and look at your your centerpiece. Are thier bald or blank spaces? Fluff you black garland to fill and use the wires in your products from Keleas.com to really get the pieces where you want them.
- Grab one of your Glitter Curly Velvet Ball Picks and trim the stem down to a couple of inches. Fluff out your pick, and then place it to the left of your bow, tucking it behind the bow to have it peek out from behind it.


